• Skip to content
  • Skip to primary sidebar

Feast & Lore

Food stories featuring heritage recipes and new experiments.

  • Home
  • Recipes
  • About

Recipe

Roasted Brussels Sprouts with Squash and Apples

January 15, 2018 By Caroline 9 Comments

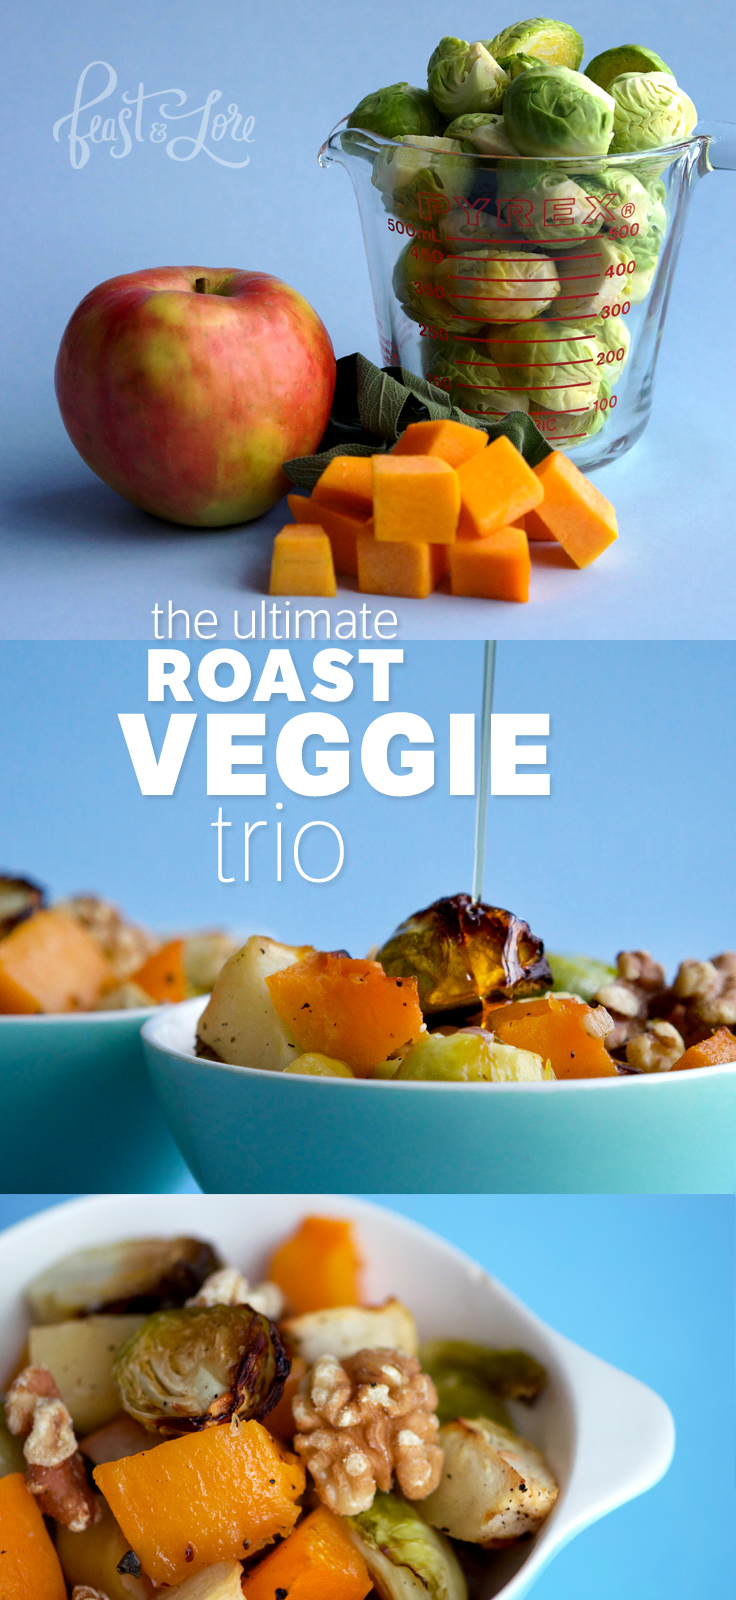
Bored with your vegetables these days? What you need is a good trio—the Luke, Leia and Hans of dinner! Brussels sprouts, butternut squash and apples are the unlikely characters to connect this veggie plot together. Roasting brings out the caramelized bitterness of the sprouts, the earthy sweetness of the squash and honey-tart apple flavours in the most perfect way. Add some fresh herbs, walnuts for crunch and drizzle with maple syrup for a vegetable dish that is totally delish, yet super healthy at the same time.


Caramelized butternut squash, brussels sprouts and apples come together with walnuts and maple syrup for a delightful veg side dish

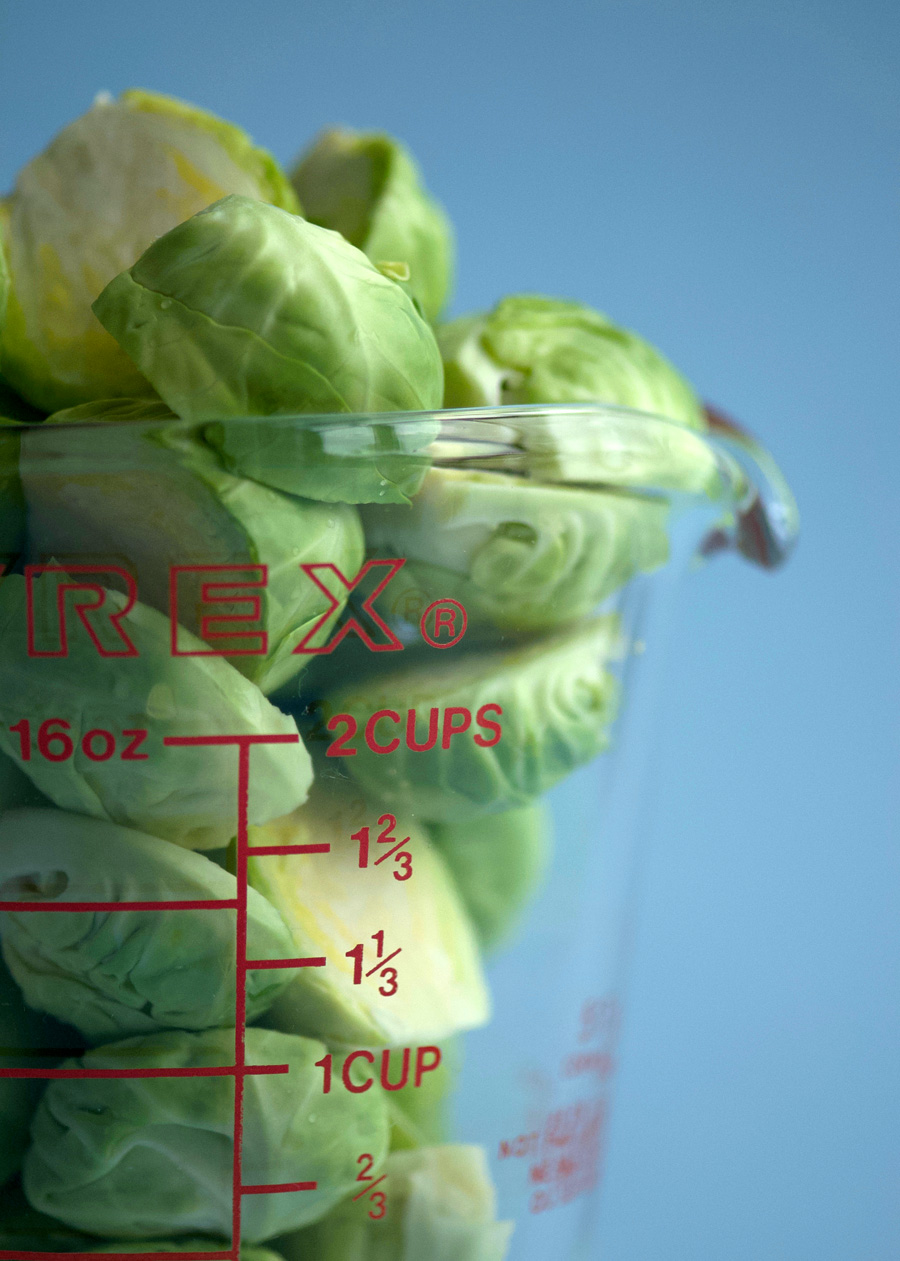
To begin, prep your brussels sprouts by removing the outer leaves, trimming the bottoms and slicing them in half (for really large sprouts, cut into thirds or quarters—the goal is for all the pieces to be roughly the same size for even roasting). I find a heaping two-cup measuring cup does the trick, you don’t need to be too precise.

A glass measuring cup brimming with fresh brussels sprouts

Next, chop up your butternut squash (about 2 cups as well). I like to buy a package of pre-cut squash from the store. It saves all that prep time peeling the skin, and a whole butternut would be too much for this recipe. No need to peel the apples, just cut them up into half-inch pieces and toss everything together in a large 9×13″ baking dish, with some shallots and some fresh rosemary, thyme or sage, whichever you have on hand. Season generously with salt and pepper, drizzle with some olive oil, and stir it all together.

The vegetables are oven-ready

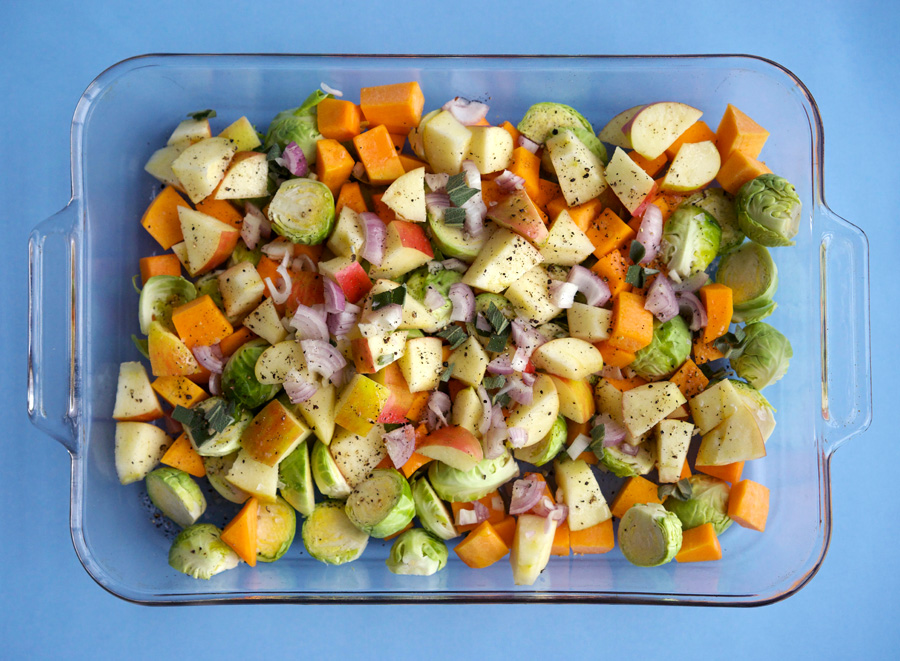
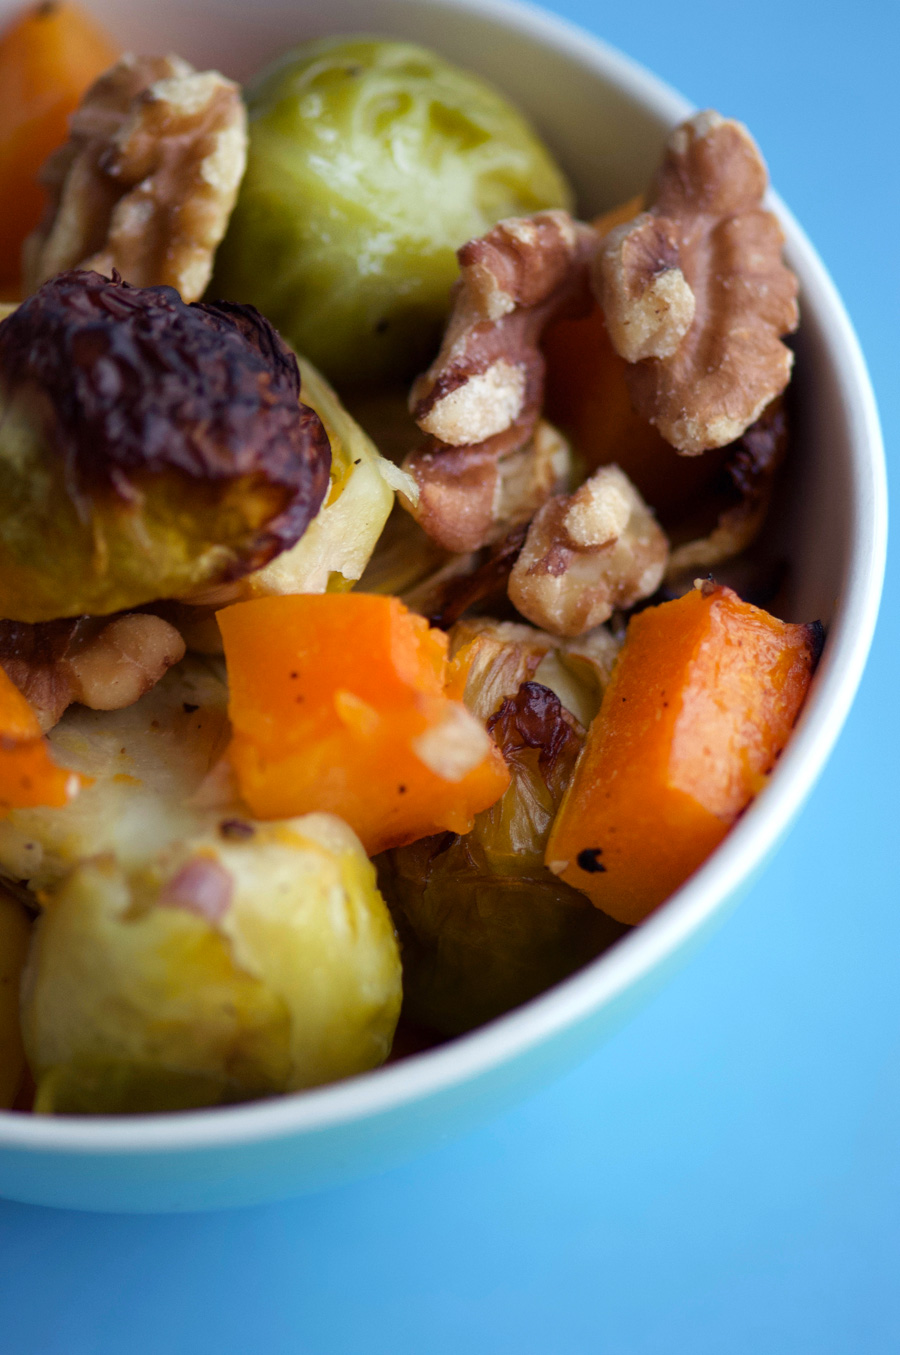
Roast, uncovered, for about 35–45 minutes until the edges of the squash and outer leaves of the sprouts are dark and golden. No need to stir, just let it roast in place to get all those nice dark golden bits.

Golden roasted brussels sprouts and vegetable mix

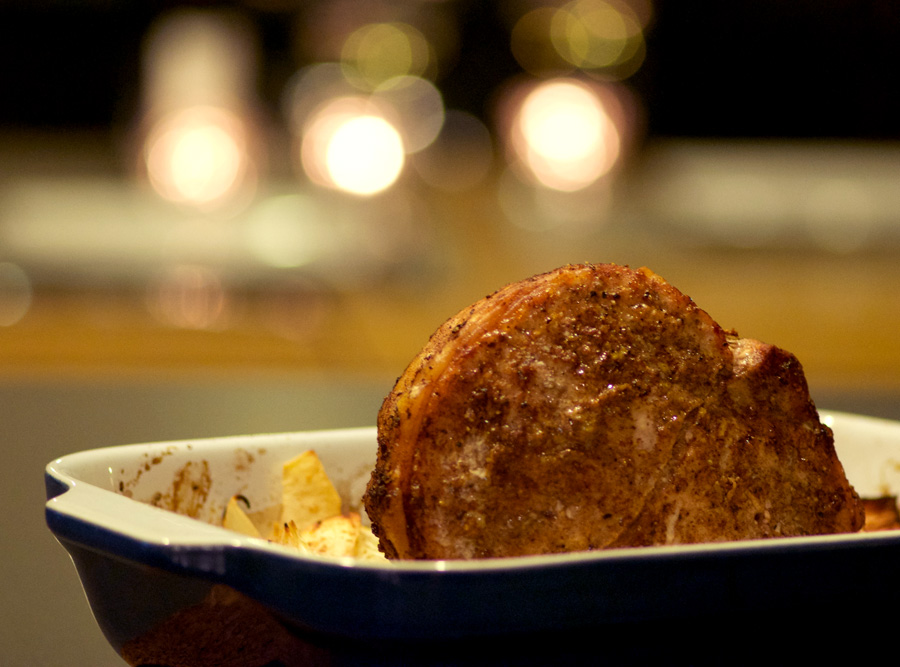
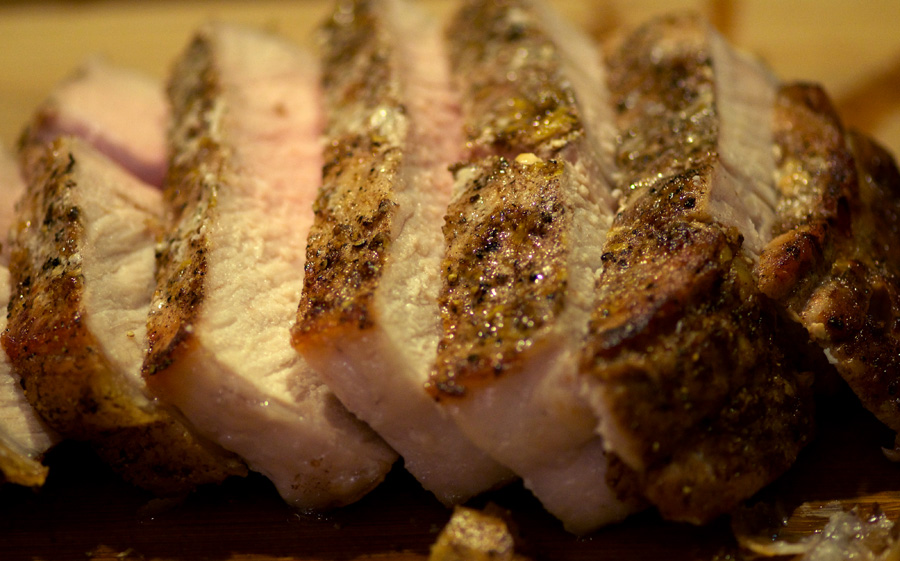
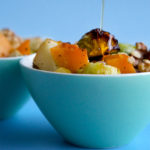
The photo above gives a good idea of how the vegetables should look when they are ready. Aren’t roasted brussels sprouts just gorgeous?! Finally when serving, I like to let people grab their own walnuts to place on top, and drizzle the maple syrup on top to their liking. Overall the combination is so simple and so good. It makes a great side dish with pork chops. With more walnuts and maybe a bit of goat cheese, this could also be a meal on it’s own. Who said vegetables can’t be the star of dinner? With the right trio, veggies triumph over all. May the syrup be with you!

Drizzling maple syrup on roasted brussels sprouts with squash and apples

Brussels Sprouts, Butternut Squash and Apples, the perfect trio of vegetables
Drizzling maple syrup on roasted brussels sprouts with squash and apples
4.75 from 4 votes
Print

Roasted brussels sprouts with butternut squash & apples

The perfect trio of vegetables to shake up your vegetable routine.

Course Side Dish
Servings 6

Ingredients

  • 2 cups Brussels sprouts
  • 2 cups butternut squash, peel removed, cut into 1" pieces
  • 2 cups apples (1–2 large apples) cut into 1" pieces
  • 2 shallots, roughly chopped
  • 2 tbsp olive oil
  • fresh rosemary or sage, chopped to taste
  • salt and freshly ground pepper to taste
  • maple syrup to taste
  • 1/2 cup walnut halves, toasted

Instructions

  1. Toss first seven ingredients in a 9x13" baking dish. Roast in a preheated 375° oven for 45–55 minutes. Veggies are done when there are dark golden areas on the outer brussels sprout leaves and squash. 

  2. Serve with maple syrup and walnuts on the side, for each person to top up their veggies as desired.

Recipe inspired by The Occasional Vegetarian’s Roasted Brussels Sprouts, Butternut Squash, and Apple with Candied Walnuts on Serious Eats.

Filed Under: Recipe, Side Tagged With: Apples, brussels sprouts, butternut squash, maple syrup, roasted, sage, squash, walnuts

Wine-Braised Beef Short Ribs with Parsnip Potato Mash

January 7, 2018 By Caroline 7 Comments

Melt-in-your-mouth, fall-off-the-bone, rich and delicious, these short ribs will warm the coldest winter night. Braised with Cabernet Franc and parsnips, the gravy develops a rich flavour with a subtle peppery depth. Even better the next day, this is a perfect make-ahead meal elegant enough to serve at a dinner party, yet equally suited to a casual family dinner.

Cabernet Franc braised shortrib with parsnip potato mash

To begin, the short-ribs need to be cut parallel to the bone, also known as “English style”, so that there is one bone per piece.  Avoid flanken “Korean style” cut ribs for this recipe, as the meat is cut much thinner and wouldn’t work as well with the long braising time. Below are the ribs straight from the butcher, I had them cut the ribs which were originally closer to 5″ long in half, into more manageable 2.5″ pieces as shown below. All together I had about 6 lbs of meaty ribs—this is pretty much the max amount my generous dutch oven would hold.

You can see from the photo below that the meat is well-marbled with fat. The braising process slowly and gently cooks this fat so that it renders down leaving silky soft meat that falls right off the bone. I highly recommend making this a day in advance so that you can easily remove all the fat from the gravy—when you chill the broth in the fridge all the fat floats to the top and hardens so that you can just lift it out in a large piece. The remaining broth will be wonderfully enhanced by natural collagens from the bones giving your gravy natural body and thickness.

Notice the generous marbling of fat in the bone-in short rib meat

To build the flavour profile of your braise, it is critical to get a good sear on the ribs. I had to do mine in two batches to avoid overcrowding. Go with high heat and make sure they sizzle when they hit the pot. You want a deep brown colour on the seared areas, and also look for some browned bits of meat to begin to stick to the bottom of the pot—you’ll scrape up all those bits later and they form the flavour base for your broth.

Browning shortrib meat in pot over high heat

Once all the ribs are well-browned, remove them to a bowl and set aside. Add the onions to the pot and cook until they start to turn golden, about 5–6 minutes. Add the parsnips for another 5–6 minutes, then add garlic and rosemary and cook some more.

Cook parsnips onions and rosemary

Once all the vegetables are golden, it’s time to add red wine and broth. A word on the type of wine: I find Cabernet Franc works really well for this dish. Generally this grape varietal is grown specifically to be blended with other grapes like Cabernet Sauvignon and Merlot. However, it has become popular in areas like Canada’s Niagara region as a varietal to enjoy on its own. It ripens a bit earlier than Cab Sauvignon so tends to fair better in the Canadian climate. I find Cab Francs tend to have a peppery quality with notes of tobacco and cassis that I really enjoy, while it goes lighter on the tannins. These qualities make it perfect to braise the short ribs and delivers a beautiful gravy when paired with the parsnip, rosemary, onion and garlic.

Braise short ribs in red wine

The pot of ribs with wine and broth is placed into a preheated 325° oven where it gently braises for 2.5 hours. Once ready, the meat will have have shrunk considerably (as much of the fat will have melted away into the broth), and if you take a fork to it, the meat will be very soft and fall away in shreds. Often some bones will come loose while it cooks; you’ll find them floating freely in the broth. Once the meat is cooked, I find it is best to remove the ribs, setting them aside in a sealable container, and then transfer the cooled broth into another container to be chilled in the fridge overnight. This way you can easily remove the fat which will harden into a single piece on top of the broth. If you can’t bring yourself to wait and want to eat these immediately (which would be totally understandable!) allow the broth to sit without stirring for 5–10 minutes; you’ll notice the fat will sit on top of the broth (but being clear it is a bit hard to discern from the actual broth). I once skimmed almost two full cups of fat, and I was doubting myself, wondering if I was being over zealous and skimming broth rather than fat. I decided to freeze it to check, and sure enough, it was all solid hardened fat!

Whether you patiently wait overnight or skim off the fat while warm from the oven, the next step is to bring the broth to a simmer and add flour mixed with butter to thicken it into a light gravy, just thick enough to coat the back of a spoon. Then the meat is added back into the sauce to be warmed up, ready for serving. Pureeing the parsnips further thickens the sauce.

Elegant wine-braised beef short rib

The short ribs are great served on your favourite mashed potato recipe, or to change things up you can make the parsnip-potato mash to compliment the sauce. Recipe for the parsnip mash is below.

Elegant wine-braised short ribs piled high on fluffy potato parsnip mash
5 from 1 vote
Print

Wine-braised beef short ribs

Melt-in-your-mouth short ribs are delicious and simple to make. Best made the day before to allow for the easiest removal of excess fat from the broth.

Course Main Course
Cuisine French
Prep Time 15 minutes
Cook Time 3 hours
Servings 8

Ingredients

Beef short ribs

  • 2 tbsp butter, divided
  • 6 lbs 2.5–3" meaty beef short ribs (about 8) "British cut"
  • salt
  • freshly ground pepper
  • 1 large red onion, chopped
  • 1 1/4 cups parsnips, cut into 1/2" pieces
  • 6 garlic cloves, chopped
  • 3 tbsp fresh rosemary, chopped
  • 750 ml Cabernet Franc (1 bottle)
  • 568 ml beef broth (2 regular size cans)
  • 1 tbsp flour

Parsnip Rosemary Potato Mash

  • 3 lbs russet potatoes, peeled and cut into 1" pieces
  • 1 lb parsnips, cut into 3/4" pieces
  • 3/4 cup milk
  • 3/4 stick butter (6 tbsp)
  • salt
  • pepper

Instructions

Short ribs

  1. Trim large fat from edges of ribs and season with salt and freshly ground pepper. Melt better in an oven-safe dutch oven pot over medium high heat. Add ribs to pot and brown well on all sides (add ribs in at least two batches to ensure proper browning). Remove browned ribs to a large bowl and set aside.

  2. Add onions to pot and cook until golden, about 5 minutes. Add parsnips and cook until golden, another 5 minutes or so. Add garlic and rosemary, cook until garlic has softened slightly.

  3. Add the bottle of red wine and the beef broth. Bring to a simmer, scraping up the browned bits from the bottom of the pot. Return ribs to the pot, cover, and place into a preheated 325° oven. Braise in the oven for 2 1/2 hours.

  4. Remove pot from oven, and transfer the ribs to a bowl. Check for any loose bones that may have come loose and are drifting in the broth, and remove. Using a slotted spoon, remove most of the parsnip pieces and reserve in a bowl. Ideally place the broth, parsnip pieces and meat in separate containers and refrigerate until the next day. 

  5. When ready to serve, remove the layer of fat from the broth and discard. Take about 1/4 cup of the broth and add to a small blender with the parsnip pieces, blend until smooth. Add parsnip puree into the broth, and bring the broth to a simmer. Mix 1 tablespoon of butter with the flour and blend into a paste. Add to the simmering pot to thicken the broth into a light gravy. Return meaty ribs to the pot and simmer over low heat until they are warmed through. Plate and serve with mashed potatoes.

Parsnip Rosemary Potato Mash

  1. Fill a large pot with water and add parsnips, potatoes and a generous pinch of salt. Bring to a boil and cook for 15–20 minutes, until the potatoes and parsnips are very soft. Drain.

  2. Meanwhile, in a small bowl or glass measuring cup, microwave milk and butter until the butter has melted and the milk is warm. Add to the cooked, drained potatoes and mash. Test for flavour and add salt if needed. Serve with short ribs and gravy.

Cabernet Franc braised beef short ribs

This recipe was based on Zinfandel-Braised Short Ribs over at Epicurious.

Filed Under: Main, Recipe Tagged With: beef, braise, cabernet franc, mash, parsnip, potato, red wine, rosemary, short rib, shortrib, slow food, stew, winter

Breakfast Chia Pudding with Mango and Blackberries

January 1, 2018 By Caroline 7 Comments

One small change in your weekly routine can boost your overall well-being. Taking only 15 minutes of active time to make, this chia pudding can be added to your weekly breakfast rotation with ease. Among the healthiest superfoods on the planet, chia seeds deliver a massive amount of nutrition with very few calories. The tiny seeds pack in protein, fibre, antioxidants, iron and calcium. Lucious mango sauce and juicy blackberries top the pudding for a breakfast you’ll actually look forward to waking up to. What I love about this quick fix is how it keeps me full and energized all morning.


Berries, chia seed pudding and mango are layered into a healthy breakfast

Begin the night before, as the chia seeds need time to soak and thicken. In a sealable container, add the chia seeds first. (Start with the chia seeds on the bottom as it’s easier to stir them in that way. They are very light and will float when added on top of liquid.) I prefer using white chia seeds as I find the black seeds tend to clump up and don’t combine with the milk quite as well (and the white seeds look a bit nicer) but black chia seeds will work if they are all you have on hand.

Plain whole white chia seeds

Next, add your milk. This can be any milk of your choice—I just use regular 2% dairy, but you can also use almond milk, soy, etc. Give it a good stir with a fork and let sit on the counter for a minute or two. Then stir it up again before covering and placing in the fridge to rest overnight. I find this extra stir helps ensure the seeds don’t settle on the bottom of the dish, where they can clump together a bit the next day.

Soak chia seeds in milk overnight

The next morning, you’ll notice the milk has thickened and the chia seeds have absorbed much of the liquid. Add in plain greek yogurt and stir to create a nice, rich pudding texture. Set aside—you now have a versatile chia pudding base that can become a healthy staple in your breakfast repertoire!

Greek yogurt is added to chia mixture to make chia pudding

Next, make the mango puree (you can also make this the night before to save yourself time in the morning). Combine mango chunks and the juice of half a lemon and puree. Give it a taste—if your mangos weren’t quite ripe and on the firm side, the puree might need a touch of sugar or honey. If your mangos are very ripe and sweet, add in the second half of the lemon juice. Ideally, make this with very ripe mangos so that no additional sugar is required. In fact, this puree is a great way to use up over-ripe mango that has become fibrous as the blender breaks down all the stringy bits, and lemon juice brings back the tart quality of fresh mango.

Fresh mango and lemon juice are blended into a delicious sauce

Finally, layer all of the ingredients into your breakfast serving. Confession: I don’t use fancy parfait glasses like the one in the photos for my daily breakfast, just a regular bowl does just fine! But the glass does show the layers off well, and if you were making this for brunch with friends, they are a nice touch.

Start with fresh blackberries at the bottom of the dish. Next layer on the chia pudding, followed by mango sauce and then a bit more chia pudding on top with a few berries for garnish. (Use 1/3 of the chia pudding per serving) If you have some large flake coconut it adds a nice crunch on top.

There is enough chia pudding for 3 servings—it keeps well in the fridge for up to 4 days, along with the mango puree. Even if you make a batch of this for yourself once per week, you’ll be having a superfood breakfast regularly to give you energy and boost your health. No time to make the mango puree? No problem—just use any fresh berries with a bit of honey and granola to top off the chia pudding.

Blackberries, chia pudding and blackberries are layered into a parfait

Try making it on a Sunday night and see how you feel by Wednesday after having it for three breakfasts in a row. Personally, I’m hooked—the mix of protein, nutrients and fresh fruit keep my energy high and my morning well-fuelled. It’s amazing how one small change to your weekly routine can make a big difference to how you feel. You just might get hooked on this healthy indulgence too, and make chia pudding part of your morning breakfast routine. I would love to hear if chia pudding is your new binge—leave a comment and let me know what you think!

Chia Pudding with Mango Sauce and Blackberries
Healthy chia pudding is layered with mango puree and blackberries
5 from 2 votes
Print

Chia pudding with mango and blackberries

Healthy, delicious and filling, I make this for chia pudding for breakfast every week, changing up the berries depending on what looks good at the market that week.

Course Breakfast
Cuisine American
Prep Time 15 minutes
Servings 3

Ingredients

Chia pudding

  • 1/4 cup whole white chia seeds
  • 1 cup milk of your choice (dairy, almond, anything goes)
  • 1 cup plain greek yogurt
  • blackberries or any berries of your choice
  • large flake coconut for garnish

Mango puree

  • 1 1/2 cups chopped mango (about 2 medium)
  • 1 lemon (juiced)

Instructions

  1. Place chia seeds in a medium bowl (large enough to hold 2 cups). Add milk over top of seeds, stirring well with a fork. Let sit on counter for 2–3 minutes, and stir again. Transfer to fridge for a minimum of six hours, or overnight.

  2. Add yogurt to the chia seed mixture and stir well to combine to create a nice pudding texture.

  3. Combine mango and half of the lemon juice in a small food processor. Blend until well combined. Taste the puree—depending on how ripe and sweet your mangos are, you may want to either add a bit of sugar or honey if it tastes sour, or add more lemon juice if the mangos were very ripe and it is tasting too sweet.

  4. In your serving bowl, layer berries, some chia pudding, mango puree and a bit more chia pudding. (Use a third of the pudding per serving) Top with additional berries and garnish with coconut flakes. Serve and enjoy!

Recipe Notes

The mango puree is a great natural sweetener, but if you don't have time to make it, just use your favourite berries and drizzle with a bit of honey. Also tastes great with a bit of granola on top.

Filed Under: Breakfast, Recipe Tagged With: berries, blackberries, blackberry, chia, Healthy, Mango, pudding, yogurt

Vanilla Kipferl: The Can’t-Live-Without Holiday Cookie

December 4, 2017 By Caroline 11 Comments

This is it. The one everyone agrees is THE cookie. More delicate than shortbread, scented with vanilla sugar, to be made only with finely ground walnuts (no imposter almonds!) Take a bite and the cookie cascades like a buttery waterfall of sugary crumbs that melt in your mouth, with an elegant finish of earthy walnut. These are Grandma’s Vanilla Kipferl (Vanillekipferl), and this is the recipe her family has made for generations.

Vanilla Kipferl on a cooling rack dusted with vanilla sugar

I remember when Grandma shared the recipe with me. She told me a special grinder was needed for the walnuts, to get them fine enough. And that she mixed everything right on the countertop. (No bowls: mind=blown!) She taught me how the residual amount of butter on the foil wrappers they come in is usually just enough to grease the cookie sheets if you rub the wrapper directly onto the sheet. Her recipe was completely in metric, and she had what I thought was the most unusual dry measuring tool. It was shaped like a funnel with ingredients like flour, sugar, etc outlined in German on the inside along the top, and the corresponding units in grams below each ingredient (as 100 g of flour would sit at a different height in the funnel than 100 g of sugar). No mixing tools were used at all, she just used her hands to form the dough.

I was determined to learn how to make these cookies, so I went home loaded with notes and worked on sorting it all out into something I could make with the tools I had. For starters, the walnuts. While she highly preferred using a specialized hand-grinder, I didn’t have this so I tried out my mini-food processor to grind the nuts instead. I have done this ever since and with a good quality, sharp blade you can get the nuts quite fine. No one has ever complained about the texture when eating my cookies, so I think it is just fine this way. Though if you have a German hand grinder, it would certainly make for a lovely, fine texture for your cookies. Below you can see a close-up photo of the grind texture obtained using a mini-processor. You also need to take care not to over-process, after which you will turn the nuts into nut butter instead of ground nuts!

Ground walnuts for Vanilla Kipferl cookies

Next, how to mix the dough. I have to admit I felt a bit uneasy diving in using my hands in the early stages of the dough with so much butter. I also preferred the comfort of using a mixing bowl. My instincts told me to treat this a bit like pastry—after all the cookie is almost somewhere between a cookie and a pastry itself with its delicate texture, and it does start with cold butter. So I modified the technique to combine the butter into the dry ingredients using a pastry cutter to get it roughly incorporated before moving on to using my hands to knead it together. This keeps the butter from getting too warm, and yields a great texture in the end product. (If you don’t have a pastry cutter, you could also use two knives for this step.) Below is a close-up shot showing the desired texture you want to achieve using the pastry cutter.

Cutting butter into the dough with a pastry cutter

Now, roll up your sleeves, remove any rings, and get in there with your hands! Squeeze, press and shape the dough until it comes together and forms a solid mass or ball. Grandma’s recipe says to add a little bit of milk if it’s not holding together, but generally I find I don’t need any, there is a lot of butter and the walnuts have some natural oils, too.

Vanilla Kipferl dough shaped into a ball

Grandma was able to roll out the kipferls with such deft efficiency, I felt utterly useless with my pathetic looking little crescents at first (that took me three times as long to make). But don’t give up, it just takes practice. After all, she had probably hand-rolled literally thousands of these cookies by the time she was teaching me the ropes. One tip I learned from practice: don’t roll out too much dough at once, it will just fall apart. Also, you need to get the pressure just right—press too light while rolling and the roll will crumble from the centre. Press too hard and you’ll crush it. I found an even rolling style, using my palms rather than my fingers (finger impressions leave the roll dented and uneven), and gently coaxing the roll to grow out to the sides while pressing down works best.

Starting with a small handful of dough (about the size of a large egg) roll it between your hands to get it started into a long roll. Then move it to the counter and roll it out until it is about 1/2″ inch in diameter. Next, cut the roll into 1″ pieces, and roll those out a bit more, turning the ends into the crescent shape and pinching the ends into points.

How to shape Vanilla Kipferl

It is important to remember that these cookies puff out and grow, so make them smaller than what you desire for the final cookie. I find it is really important for the aesthetic of the cookie to pinch the ends into points, otherwise they puff out and the ends lose their shape. For comparison, check out the raw cookie dough on the baking sheet shown immediately below, and the baked cookies, further down, to see the difference in size. A note about baking: during the final 3-5 minutes, you need to watch them like a hawk as they will go from perfect golden brown to dark with a bitter taste in a matter of 30 seconds—this is in large part due to the walnuts that burn easily. Even Grandma used to end up with a batch here and there that she would complain were overdone 🙂 When they display a nice even golden hue overall, they are ready to come out of the oven.Vanilla Kipferl on baking sheetVanilla Kipferl fresh from the oven

It is also important to note how fragile Vanilla Kipferl are. When you take them out of the oven, do not try to move them for at least five minutes, or you will be sure to break them. They need a bit of time to set as they cool.

For the sugar coating, Grandma always used packaged vanilla sugar mixed with icing sugar. If you can’t find packaged Vanilla Sugar, you can make it yourself by mixing a cut open, scraped out vanilla bean (along with the vanilla seeds) with icing sugar, ideally letting the bean sit in the sugar overnight to maximize the flavour transfer.

I find Vanilla Kipferl are far too delicate to be tossed in sugar. Instead it is much easier and more efficient to sift the powdered sugar over top. I also like to ensure the bottoms of the cookies get their sugary coating, so I developed the method shown below, where you set out two cookie sheets and the final storage tin lined with wax paper. Place your cooling rack with cookies onto the first tray, then dust both that and the empty tray with vanilla sugar. Then move the cookies onto the dusted empty tray to coat the bottoms, before moving them into the paper lined tin.

A quick note about storage: Grandma always said these cookies need to breathe, they do best in a tin lined with paper, and never seal the lid on tight—always leave a small air gap. The cookies last for weeks, in fact I think they get better with a bit of age.

Coating Kipferls in Vanilla Sugar

I feel honoured to be able to carry on the tradition of making Vanilla Kipferl, following in the footsteps of so many generations before me. I always remember Grandma when making them—mine will never be quite as good as hers, but I think she would be pleased to know we still carry on her tradition every year. I hope you will try them out too, and maybe add a new cookie tradition to your holidays!

A tin of Vanilla Kipferl Cookies, the only holiday cookie that matters

Vanilla Kipferl on a cooling rack dusted with vanilla sugar
5 from 3 votes
Print

Vanilla Kipferl: The Can't-Live-Without Holiday Cookie

More delicate than shortbread, Vanillekipferl melt in your mouth with a rich shattering of buttery, sugary crumbs lightly scented with vanilla.

Course Dessert
Cuisine Austrian, Viennese
Prep Time 45 minutes
Cook Time 15 minutes
Total Time 1 hour
Servings 50 cookies

Ingredients

  • 1 1/4 cups walnut pieces (165 g)
  • 2 1/4 cups flour (345 g)
  • 1/3 cup granulated sugar (70 g)
  • 2 sticks cold unsalted butter (240 g)
  • 1 cup icing sugar
  • 1 package Vanilla Sugar (9 g)

Instructions

  1. Prepare 2–3 baking sheets by lightly coating them with butter (Residual on the foil butter wrappers is usually the perfect amount and you can just rub the wrappers face-down onto the cookie sheets). Preheat the oven to 375°.

  2. Grind walnuts as fine as possible using a food processor, stopping when it starts to form solid clumps, to avoid over-processing it into nut butter. Add to a large bowl with flour and sugar and stir to combine.

  3. Cut cold butter into small pieces and add to the dry ingredients. Using a pastry cutter (or 2 knives) cut butter into the flour mixture until it forms an even small crumb. (Refer to photo in story for a visual reference.) Use your hands to completely combine the butter into the flour, kneading until the dough forms a smooth ball. Only if needed, add a small amount of milk to help the dough hold together.

  4. Take a small handful of dough and gently roll with light pressure into a log about 1/2" in diameter. Cut roll into 1" pieces. Take each piece and gently roll into the final cookie length, curving into a crescent shape and pinching the ends to taper them. Keep in mind they will puff and grow larger in the oven, so make them a little smaller than your desired final cookie size. Place on prepared baking sheet.

  5. Bake in preheated oven for 15–18 minutes. Rotate the cookies half-way through baking to ensure evenly browned cookies. Check carefully starting at 15 minutes to ensure they don't get too dark—the walnuts are delicate and will go from perfectly golden to burnt in a matter of 30 seconds if you step away! Remove from the oven when the cookies have an even light golden tone. Resist the urge to move the cookies off the sheet, as they are very fragile and will break while too warm. Allow to rest for 5 minutes before moving the cookies to a cooking rack. Allow to cool completely on the rack before coating with vanilla sugar in the next step. 

  6. Mix icing sugar and vanilla sugar in a small bowl, have a small sifter ready. Set out two cookies sheets that fit your cooking rack, and have a metal tin lined with wax or parchment paper ready. Place one cooling rack with cookies into the first cookie sheet. Dust with sugar using the sifter, and also dust the empty cookie sheet beside it. Next, transfer the sugar dusted cookies from the cooling rack to the empty cookie tray you just coated with icing sugar—this is to coat the bottoms of the cookies. Finally transfer the finished cookies into the prepared cookie tin.

Vanillekipferl heritage recipe passed down from Grandma

Filed Under: Dessert, Recipe Tagged With: austrian, cookie, Crescents, holiday cookie, vanilla kipferl, Vanillekipferl, Viennese

Spiced Pork Roast with Apple Onion Gravy

November 27, 2017 By Caroline Leave a Comment

Savoury, spiced and sweet—this roast brings it all together for an elevated take on the classic applesauce and pork pairing. Roasted apples and onions come together with fresh apple cider, maple syrup and pan drippings for an unbelievably flavour-packed gravy. Cinnamon, ginger, lemon zest and spices add subtle complexity to round out the dish. Perfect to enjoy with crisp Riesling on a cool late autumn evening with candles flickering to brighten the dark evening.

Spiced Pork Roast with Apple Onion Gravy is plated with potatoes and roasted apple slices

To start with, combine the spices and lemon zest together. Next you’ll split the mix between two bowls, as you’ll use half as a dry rub on the apples and onions, and the rest mixes up with olive oil to rub into to the pork roast.

Spices for the pork roast with lemon zest

Toss the apples with the spice mixture in the roasting pan, and add water to the dish.

Apples and onions are tossed with spices

Rub the pork with the olive oil spice mixture, and allow to rest at room temperature for 45 minutes to an hour to allow the meat to come to room temperature before roasting.

The rub is applied generously to the pork roast

Stand the pork on top of the apple onion mixture, and roast until the internal temperature reaches 145°. Wrap in foil and allow to rest for 5–10 minutes, allowing the temperature to rise to about 150°. (There was a time when the recommended temperature for pork was 160°, but this is actually way overcooked and leaves the meat dry and tough. Here’s a link where you can learn more about why the new USDA guidelines list 145° as a safe minimum temperature for pork. See a little trace of pink? No need to worry, it’s a good thing!)

Spiced Pork Roast emerges from the oven

As the roast emerges from the oven the fragrances of spice and onion is soooo good! Remove most of the apples and onions (reserving just a few as garnish), top with the pan drippings,  and blend into a puree. Add the puree to a small pot you’ll have simmering with apple cider and maple syrup, and you have pure apple onion gravy magic.

Roasted apples and onions in the blender

Slice up the perfectly cooked roast, juicy with just a faint trace of pink. Slather with apple onion gravy and enjoy with mashed potatoes, Brussels spouts or your favourite veg. Light some candles, uncork a bottle of Riesling, and turn one of those long, dark winter nights into cozy instead of cold.

Spiced pork roast, perfect medium, sliced

Spiced roast pork with apple and onion gravy
Print

Spiced Roast Pork with Apple Onion Gravy

The classic pairing of applesauce with pork is elevated with a zesty spice rub and apple-onion gravy that's so good, you'll want to just eat it straight up.

Course Main Course
Servings 4

Ingredients

  • zest of one lemon
  • 1 tsp ground cinnamon
  • 1/2 tsp ground ginger
  • 1/4 tsp ground allspice
  • 1/8 tsp ground nutmeg
  • 1 tbsp olive oil
  • 1.5 lb pork loin roast, centre cut (700 g)
  • salt
  • freshly ground pepper
  • 3 apples, peeled, cored and sliced into wedges
  • 2 onions
  • 1/4 cup fresh lemon juice
  • 1/2 cup fresh apple cider
  • 1/4 cup maple syrup

Instructions

  1. In a small bowl, combine lemon zest and spices. Take half of this spice mixture, move it into another bowl and add olive oil. Season pork with salt and pepper and rub with the oil spice mixture. Allow to rest for 45 minutes to one hour before roasting.

  2. Heat oven to 375°. In a roasting pan or deep baking dish, toss apple and onion wedges with lemon juice and the remaining spice mixture. Add 1/2 cup water, and place pork roast on top. Roast until internal temperature reaches 145°. Remove roast to cutting board and tent with foil, allowing to rest for 5–10 minutes. 

  3. While pork is roasting, combine apple cider and maple syrup into a small to medium saucepan and cook over medium high heat, bringing to a boil. Allow to simmer for a few minutes to reduce slightly. Remove from heat and set aside.

  4. Set aside a few apple and onion wedges for plating. In a mini-food processor or blender, blend the remaining roasted apples and onions along with the pan drippings until smooth. Add puree into the apple cider mixture and heat over medium-low heat to warm. Season with salt and pepper to taste.

  5. Slice pork roast and serve with apple onion gravy on the side, garnished with the reserved apple and onion wedges.

Spiced roast pork with apple onion gravy,

Filed Under: Main, Recipe Tagged With: apple, Gravy, lemon zest, Onion, Pork, Pork Roast

  • « Previous Page
  • Page 1
  • Page 2
  • Page 3
  • Page 4
  • Page 5
  • …
  • Page 8
  • Next Page »

Primary Sidebar

Welcome to my kitchen journal, a place where I will share my favourite heritage recipes honed over the years, as well as document new evolutions and experiments along the way. Great feasts become vehicles for fond memories—the best meals are the ones someone made with love, for you. Follow me to explore traditions, document stories and experience the joy of the feast. Read More…

  • Facebook
  • Instagram
  • Pinterest
  • Twitter
  • YouTube

Don’t miss a story!

Get email updates

Copyright © 2023