• Skip to main content
  • Skip to primary sidebar

Feast & Lore

Food stories featuring heritage recipes and new experiments.

  • Home
  • Recipes
  • About

Archives for January 2018

Ginger, Zing, Froth: The Amaretto Sour

January 27, 2018 By Caroline 6 Comments

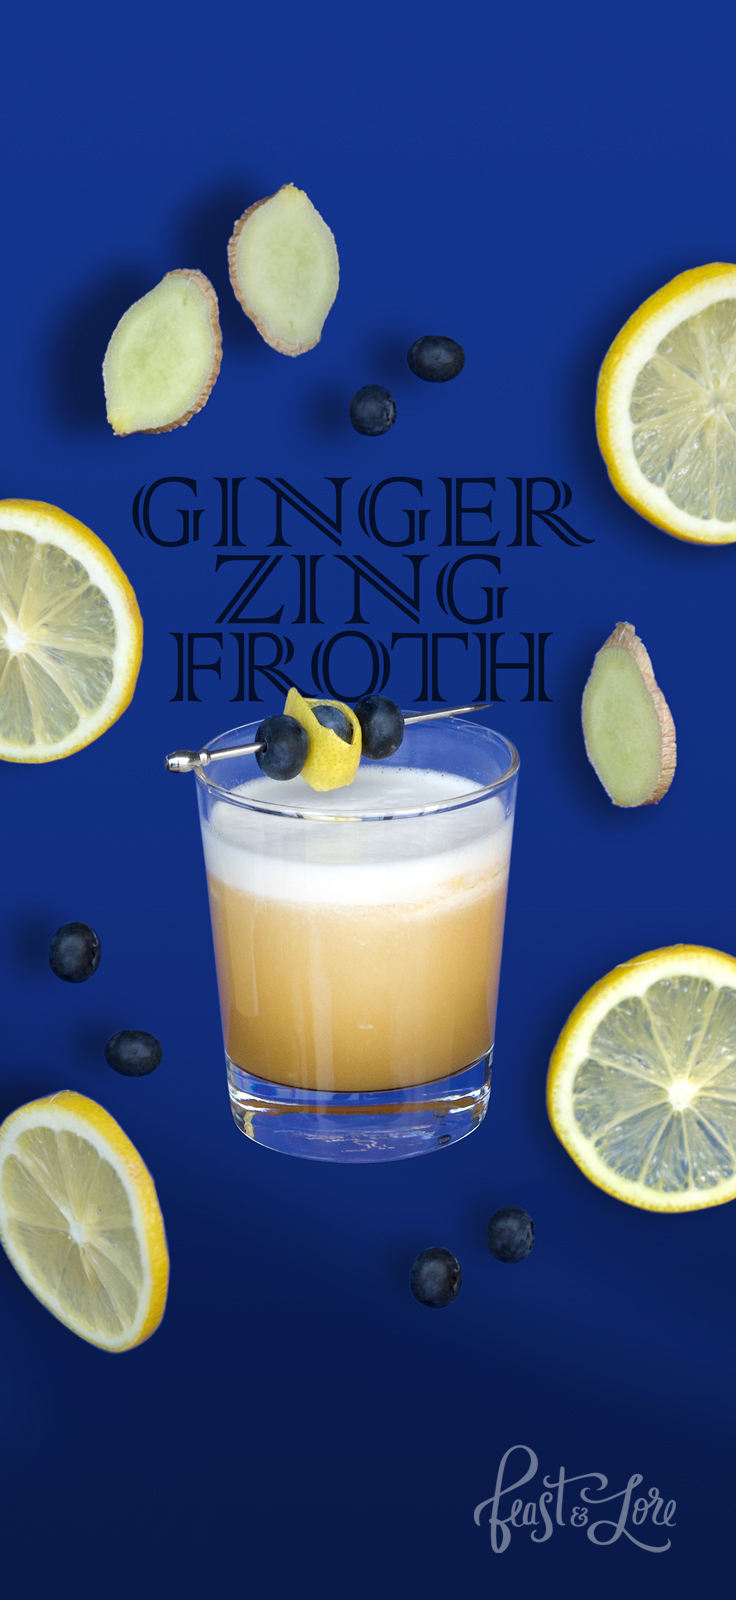
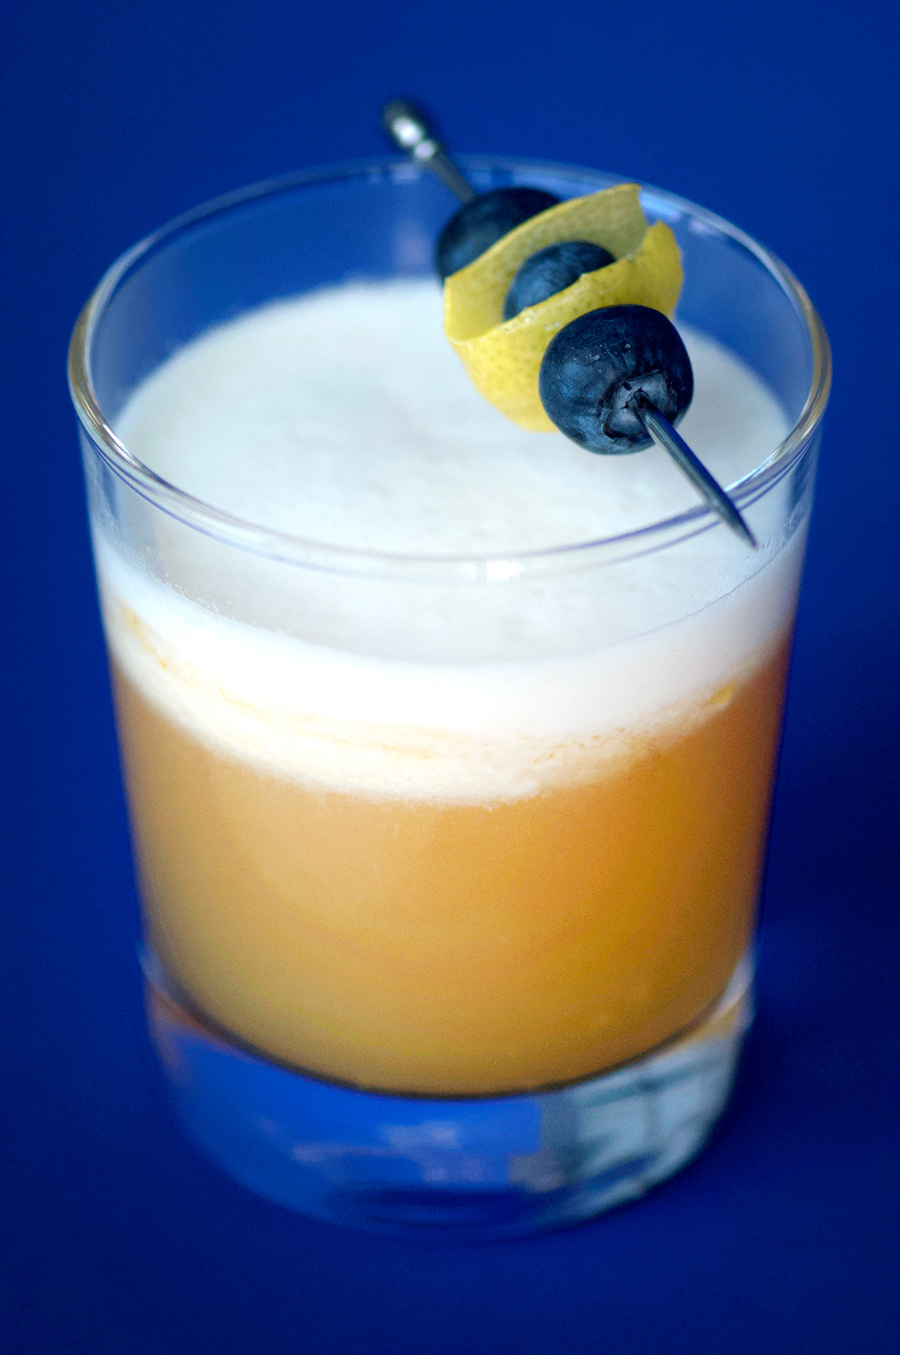
You’ll have to bring some muscle to shake up this cocktail, but it’s well worth it! I have yet to find someone who doesn’t love this drink. The ginger, lemon and Amaretto combine to offer just the right amount of lemony zing, warm gingery spice and nutty Amaretto. The froth on top balances out the sour flavours providing an elegant creamy finish. There is no added sugar or syrup—just a few simple ingredients are required.

Amaretto Sour: the fun drink with ginger, zing and froth!

Unless you are able to find a top-notch restaurant in a major urban centre, it can be hard to find a good quality cocktails when eating out. So many places load up on sugary syrups that seem designed to try to hide the alcohol flavours rather than accent them. All the more reason to expand your cocktail repertoire at home where you can control everything going into your drink.

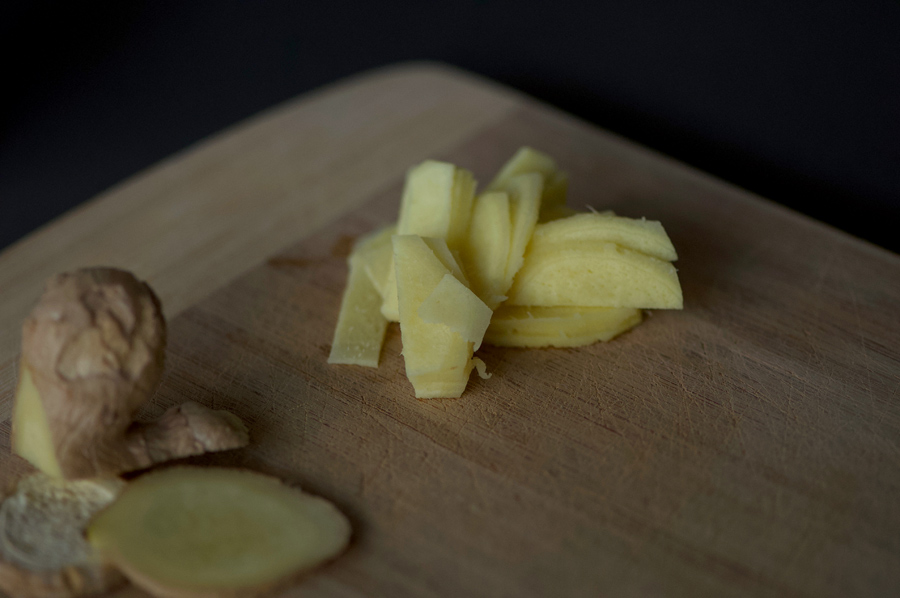
This combination works because the ingredients are very fresh and simple: fresh ginger, choppped;

Ginger is peeled and freshly chopped

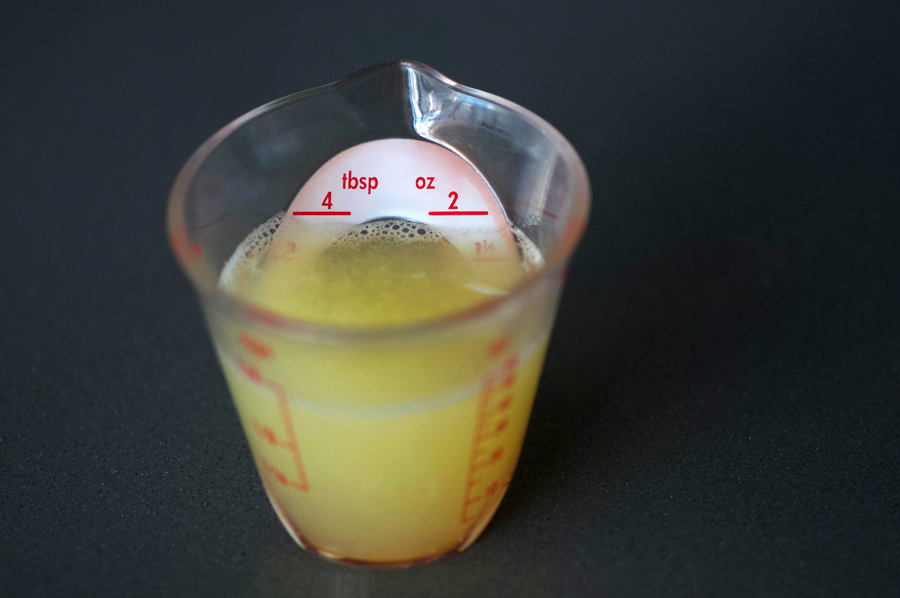
Freshly squeezed lemon juice,

lemon juice

Amaretto, of course…

Now before continuing with the rest of the ingredients, a word on Amaretto. Italian for “a little bitter”, Amaretto is an almond-flavoured liqueur that is frequently made from apricot pits, almonds, or both. The bitterness is rather mild and the drink is often made with sweet almonds to enhance the final flavour. If you are thinking you don’t want to get a bottle of this to try for one drink only for it to sit there, consider that Amaretto is very versatile and is called for in many recipes including Tiramisu, a flavour enhancer for whipped cream, as an additive for baked treats like biscotti, and savoury dishes, too. Not to mention, slipping a little into your evening coffee can be a nice treat as well 🙂 Now, back to our Amaretto Sours…


Amaretto liqueur

…don’t forget to add a splash or two of Angostura bitters. I did a side-by-side comparison with and without the bitters, and was really surprised how much better the drink tasted with the Angostura. It provides an extra depth and seems to bring out the best in the Amaretto. Even with all the lemon juice, this drink doesn’t need any additional sugars or syrups, keeping the taste clean and vibrant.

After adding an egg white and shaking it all up for 20 seconds or so, add some ice, and shake for another 20 seconds. Finally strain into two small glasses (or one larger one) to serve.

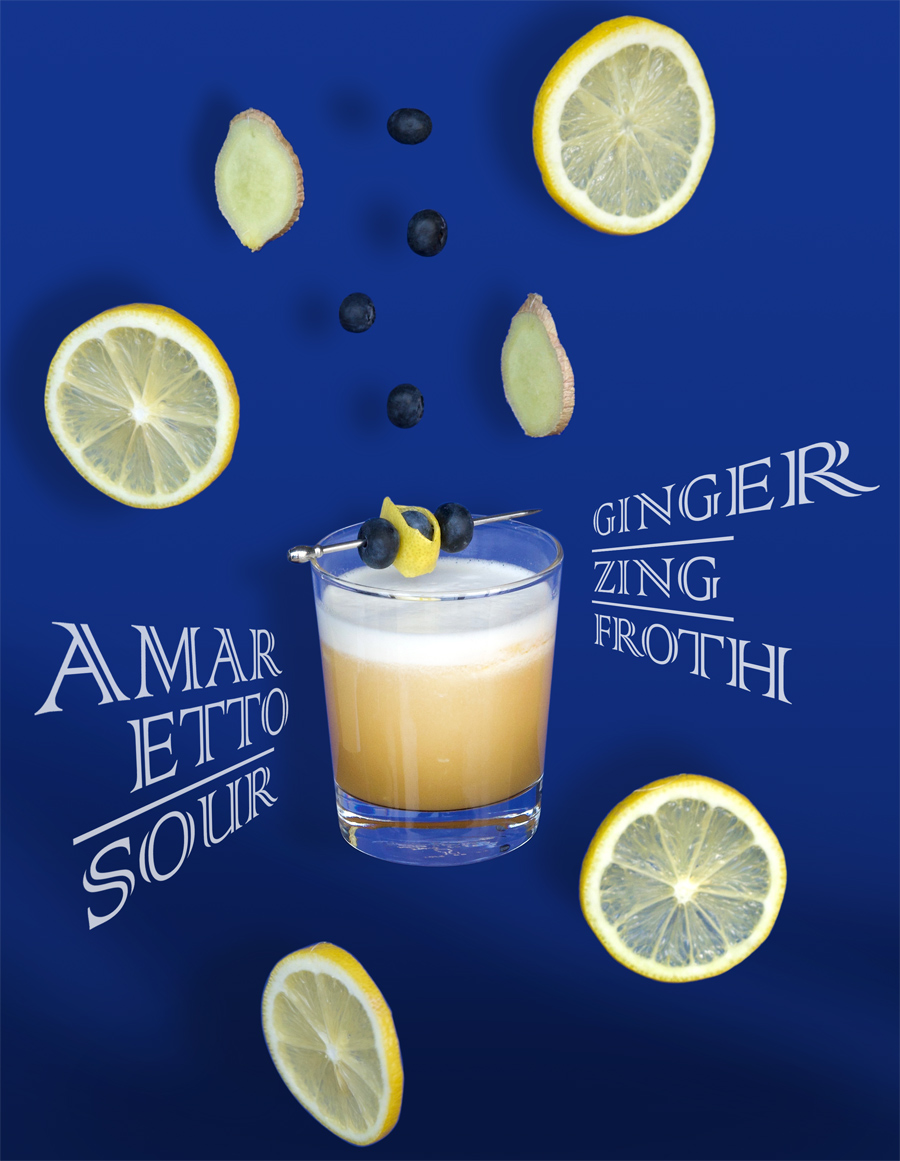
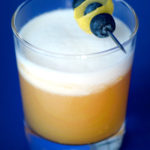
I like to thread a cocktail stick with blueberries and a strip of lemon zest, and pop a few extra lemon slices into the glass before serving. Nothing seems to grab people’s attention at a dinner party quite like pulling out the cocktail shaker, filling it with ice and giving it a good go—the sound and activity gets people interested and they’ll want to come near to see what you’re making. Even better, let your guests get into the action and have them do the shaking (especially if you need to make a few rounds, share the arm-workout love!) Try out this drink for your next gathering—you won’t regret it.

Recipe slightly modified from Serious Eats’ Ginger Amaretto Sour.

Amaretto Sour Drink


Amaretto Sour Drink
5 from 3 votes
Print

Amaretto Sour

Ginger, froth, zing—this drink brings all the flavour and fun, while being light on the alcohol taste. 

Course Drinks
Prep Time 5 minutes
Servings 2

Ingredients

  • 1 1.5" piece of peeled ginger, chopped into pieces
  • 1 3/4 oz fresh squeezed lemon juice
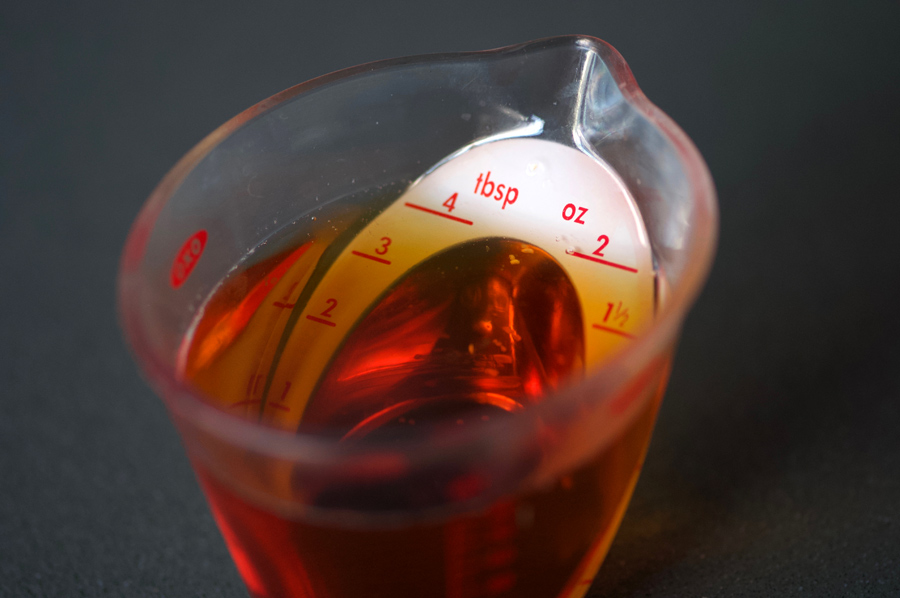
  • 2.5 oz Amaretto
  • 2 splashes of Angostura bitters
  • 1 egg white
  • lemon slices for garnish
  • blueberries for garnish
  • lemon zest slices, for garnish

Instructions

  1. Muddle the chopped ginger with lemon juice in cocktail shaker. Add Amaretto, bitters, and egg white. Shake well for 20 seconds. Add a handful of ice and shake for another 20 seconds. Strain into 2 glasses, popping a few lemon slices in each glass. Thread two cocktail sticks with blueberries and lemon zest, and top each glass with one of them. Serve and enjoy!

Amaretto Sour - Ginger Zing Froth

Filed Under: Drink, Recipe Tagged With: Amaretto, Blueberry, Cocktail, Drink, Froth, ginger, lemon, Sour, Zing

Roasted Brussels Sprouts with Squash and Apples

January 15, 2018 By Caroline 9 Comments

Bored with your vegetables these days? What you need is a good trio—the Luke, Leia and Hans of dinner! Brussels sprouts, butternut squash and apples are the unlikely characters to connect this veggie plot together. Roasting brings out the caramelized bitterness of the sprouts, the earthy sweetness of the squash and honey-tart apple flavours in the most perfect way. Add some fresh herbs, walnuts for crunch and drizzle with maple syrup for a vegetable dish that is totally delish, yet super healthy at the same time.


Caramelized butternut squash, brussels sprouts and apples come together with walnuts and maple syrup for a delightful veg side dish

To begin, prep your brussels sprouts by removing the outer leaves, trimming the bottoms and slicing them in half (for really large sprouts, cut into thirds or quarters—the goal is for all the pieces to be roughly the same size for even roasting). I find a heaping two-cup measuring cup does the trick, you don’t need to be too precise.

A glass measuring cup brimming with fresh brussels sprouts

Next, chop up your butternut squash (about 2 cups as well). I like to buy a package of pre-cut squash from the store. It saves all that prep time peeling the skin, and a whole butternut would be too much for this recipe. No need to peel the apples, just cut them up into half-inch pieces and toss everything together in a large 9×13″ baking dish, with some shallots and some fresh rosemary, thyme or sage, whichever you have on hand. Season generously with salt and pepper, drizzle with some olive oil, and stir it all together.

The vegetables are oven-ready

Roast, uncovered, for about 35–45 minutes until the edges of the squash and outer leaves of the sprouts are dark and golden. No need to stir, just let it roast in place to get all those nice dark golden bits.

Golden roasted brussels sprouts and vegetable mix

The photo above gives a good idea of how the vegetables should look when they are ready. Aren’t roasted brussels sprouts just gorgeous?! Finally when serving, I like to let people grab their own walnuts to place on top, and drizzle the maple syrup on top to their liking. Overall the combination is so simple and so good. It makes a great side dish with pork chops. With more walnuts and maybe a bit of goat cheese, this could also be a meal on it’s own. Who said vegetables can’t be the star of dinner? With the right trio, veggies triumph over all. May the syrup be with you!

Drizzling maple syrup on roasted brussels sprouts with squash and apples

Brussels Sprouts, Butternut Squash and Apples, the perfect trio of vegetables
Drizzling maple syrup on roasted brussels sprouts with squash and apples
4.75 from 4 votes
Print

Roasted brussels sprouts with butternut squash & apples

The perfect trio of vegetables to shake up your vegetable routine.

Course Side Dish
Servings 6

Ingredients

  • 2 cups Brussels sprouts
  • 2 cups butternut squash, peel removed, cut into 1" pieces
  • 2 cups apples (1–2 large apples) cut into 1" pieces
  • 2 shallots, roughly chopped
  • 2 tbsp olive oil
  • fresh rosemary or sage, chopped to taste
  • salt and freshly ground pepper to taste
  • maple syrup to taste
  • 1/2 cup walnut halves, toasted

Instructions

  1. Toss first seven ingredients in a 9x13" baking dish. Roast in a preheated 375° oven for 45–55 minutes. Veggies are done when there are dark golden areas on the outer brussels sprout leaves and squash. 

  2. Serve with maple syrup and walnuts on the side, for each person to top up their veggies as desired.

Recipe inspired by The Occasional Vegetarian’s Roasted Brussels Sprouts, Butternut Squash, and Apple with Candied Walnuts on Serious Eats.

Filed Under: Recipe, Side Tagged With: Apples, brussels sprouts, butternut squash, maple syrup, roasted, sage, squash, walnuts

Wine-Braised Beef Short Ribs with Parsnip Potato Mash

January 7, 2018 By Caroline 7 Comments

Melt-in-your-mouth, fall-off-the-bone, rich and delicious, these short ribs will warm the coldest winter night. Braised with Cabernet Franc and parsnips, the gravy develops a rich flavour with a subtle peppery depth. Even better the next day, this is a perfect make-ahead meal elegant enough to serve at a dinner party, yet equally suited to a casual family dinner.

Cabernet Franc braised shortrib with parsnip potato mash

To begin, the short-ribs need to be cut parallel to the bone, also known as “English style”, so that there is one bone per piece.  Avoid flanken “Korean style” cut ribs for this recipe, as the meat is cut much thinner and wouldn’t work as well with the long braising time. Below are the ribs straight from the butcher, I had them cut the ribs which were originally closer to 5″ long in half, into more manageable 2.5″ pieces as shown below. All together I had about 6 lbs of meaty ribs—this is pretty much the max amount my generous dutch oven would hold.

You can see from the photo below that the meat is well-marbled with fat. The braising process slowly and gently cooks this fat so that it renders down leaving silky soft meat that falls right off the bone. I highly recommend making this a day in advance so that you can easily remove all the fat from the gravy—when you chill the broth in the fridge all the fat floats to the top and hardens so that you can just lift it out in a large piece. The remaining broth will be wonderfully enhanced by natural collagens from the bones giving your gravy natural body and thickness.

Notice the generous marbling of fat in the bone-in short rib meat

To build the flavour profile of your braise, it is critical to get a good sear on the ribs. I had to do mine in two batches to avoid overcrowding. Go with high heat and make sure they sizzle when they hit the pot. You want a deep brown colour on the seared areas, and also look for some browned bits of meat to begin to stick to the bottom of the pot—you’ll scrape up all those bits later and they form the flavour base for your broth.

Browning shortrib meat in pot over high heat

Once all the ribs are well-browned, remove them to a bowl and set aside. Add the onions to the pot and cook until they start to turn golden, about 5–6 minutes. Add the parsnips for another 5–6 minutes, then add garlic and rosemary and cook some more.

Cook parsnips onions and rosemary

Once all the vegetables are golden, it’s time to add red wine and broth. A word on the type of wine: I find Cabernet Franc works really well for this dish. Generally this grape varietal is grown specifically to be blended with other grapes like Cabernet Sauvignon and Merlot. However, it has become popular in areas like Canada’s Niagara region as a varietal to enjoy on its own. It ripens a bit earlier than Cab Sauvignon so tends to fair better in the Canadian climate. I find Cab Francs tend to have a peppery quality with notes of tobacco and cassis that I really enjoy, while it goes lighter on the tannins. These qualities make it perfect to braise the short ribs and delivers a beautiful gravy when paired with the parsnip, rosemary, onion and garlic.

Braise short ribs in red wine

The pot of ribs with wine and broth is placed into a preheated 325° oven where it gently braises for 2.5 hours. Once ready, the meat will have have shrunk considerably (as much of the fat will have melted away into the broth), and if you take a fork to it, the meat will be very soft and fall away in shreds. Often some bones will come loose while it cooks; you’ll find them floating freely in the broth. Once the meat is cooked, I find it is best to remove the ribs, setting them aside in a sealable container, and then transfer the cooled broth into another container to be chilled in the fridge overnight. This way you can easily remove the fat which will harden into a single piece on top of the broth. If you can’t bring yourself to wait and want to eat these immediately (which would be totally understandable!) allow the broth to sit without stirring for 5–10 minutes; you’ll notice the fat will sit on top of the broth (but being clear it is a bit hard to discern from the actual broth). I once skimmed almost two full cups of fat, and I was doubting myself, wondering if I was being over zealous and skimming broth rather than fat. I decided to freeze it to check, and sure enough, it was all solid hardened fat!

Whether you patiently wait overnight or skim off the fat while warm from the oven, the next step is to bring the broth to a simmer and add flour mixed with butter to thicken it into a light gravy, just thick enough to coat the back of a spoon. Then the meat is added back into the sauce to be warmed up, ready for serving. Pureeing the parsnips further thickens the sauce.

Elegant wine-braised beef short rib

The short ribs are great served on your favourite mashed potato recipe, or to change things up you can make the parsnip-potato mash to compliment the sauce. Recipe for the parsnip mash is below.

Elegant wine-braised short ribs piled high on fluffy potato parsnip mash
5 from 1 vote
Print

Wine-braised beef short ribs

Melt-in-your-mouth short ribs are delicious and simple to make. Best made the day before to allow for the easiest removal of excess fat from the broth.

Course Main Course
Cuisine French
Prep Time 15 minutes
Cook Time 3 hours
Servings 8

Ingredients

Beef short ribs

  • 2 tbsp butter, divided
  • 6 lbs 2.5–3" meaty beef short ribs (about 8) "British cut"
  • salt
  • freshly ground pepper
  • 1 large red onion, chopped
  • 1 1/4 cups parsnips, cut into 1/2" pieces
  • 6 garlic cloves, chopped
  • 3 tbsp fresh rosemary, chopped
  • 750 ml Cabernet Franc (1 bottle)
  • 568 ml beef broth (2 regular size cans)
  • 1 tbsp flour

Parsnip Rosemary Potato Mash

  • 3 lbs russet potatoes, peeled and cut into 1" pieces
  • 1 lb parsnips, cut into 3/4" pieces
  • 3/4 cup milk
  • 3/4 stick butter (6 tbsp)
  • salt
  • pepper

Instructions

Short ribs

  1. Trim large fat from edges of ribs and season with salt and freshly ground pepper. Melt better in an oven-safe dutch oven pot over medium high heat. Add ribs to pot and brown well on all sides (add ribs in at least two batches to ensure proper browning). Remove browned ribs to a large bowl and set aside.

  2. Add onions to pot and cook until golden, about 5 minutes. Add parsnips and cook until golden, another 5 minutes or so. Add garlic and rosemary, cook until garlic has softened slightly.

  3. Add the bottle of red wine and the beef broth. Bring to a simmer, scraping up the browned bits from the bottom of the pot. Return ribs to the pot, cover, and place into a preheated 325° oven. Braise in the oven for 2 1/2 hours.

  4. Remove pot from oven, and transfer the ribs to a bowl. Check for any loose bones that may have come loose and are drifting in the broth, and remove. Using a slotted spoon, remove most of the parsnip pieces and reserve in a bowl. Ideally place the broth, parsnip pieces and meat in separate containers and refrigerate until the next day. 

  5. When ready to serve, remove the layer of fat from the broth and discard. Take about 1/4 cup of the broth and add to a small blender with the parsnip pieces, blend until smooth. Add parsnip puree into the broth, and bring the broth to a simmer. Mix 1 tablespoon of butter with the flour and blend into a paste. Add to the simmering pot to thicken the broth into a light gravy. Return meaty ribs to the pot and simmer over low heat until they are warmed through. Plate and serve with mashed potatoes.

Parsnip Rosemary Potato Mash

  1. Fill a large pot with water and add parsnips, potatoes and a generous pinch of salt. Bring to a boil and cook for 15–20 minutes, until the potatoes and parsnips are very soft. Drain.

  2. Meanwhile, in a small bowl or glass measuring cup, microwave milk and butter until the butter has melted and the milk is warm. Add to the cooked, drained potatoes and mash. Test for flavour and add salt if needed. Serve with short ribs and gravy.

Cabernet Franc braised beef short ribs

This recipe was based on Zinfandel-Braised Short Ribs over at Epicurious.

Filed Under: Main, Recipe Tagged With: beef, braise, cabernet franc, mash, parsnip, potato, red wine, rosemary, short rib, shortrib, slow food, stew, winter

Breakfast Chia Pudding with Mango and Blackberries

January 1, 2018 By Caroline 7 Comments

One small change in your weekly routine can boost your overall well-being. Taking only 15 minutes of active time to make, this chia pudding can be added to your weekly breakfast rotation with ease. Among the healthiest superfoods on the planet, chia seeds deliver a massive amount of nutrition with very few calories. The tiny seeds pack in protein, fibre, antioxidants, iron and calcium. Lucious mango sauce and juicy blackberries top the pudding for a breakfast you’ll actually look forward to waking up to. What I love about this quick fix is how it keeps me full and energized all morning.


Berries, chia seed pudding and mango are layered into a healthy breakfast

Begin the night before, as the chia seeds need time to soak and thicken. In a sealable container, add the chia seeds first. (Start with the chia seeds on the bottom as it’s easier to stir them in that way. They are very light and will float when added on top of liquid.) I prefer using white chia seeds as I find the black seeds tend to clump up and don’t combine with the milk quite as well (and the white seeds look a bit nicer) but black chia seeds will work if they are all you have on hand.

Plain whole white chia seeds

Next, add your milk. This can be any milk of your choice—I just use regular 2% dairy, but you can also use almond milk, soy, etc. Give it a good stir with a fork and let sit on the counter for a minute or two. Then stir it up again before covering and placing in the fridge to rest overnight. I find this extra stir helps ensure the seeds don’t settle on the bottom of the dish, where they can clump together a bit the next day.

Soak chia seeds in milk overnight

The next morning, you’ll notice the milk has thickened and the chia seeds have absorbed much of the liquid. Add in plain greek yogurt and stir to create a nice, rich pudding texture. Set aside—you now have a versatile chia pudding base that can become a healthy staple in your breakfast repertoire!

Greek yogurt is added to chia mixture to make chia pudding

Next, make the mango puree (you can also make this the night before to save yourself time in the morning). Combine mango chunks and the juice of half a lemon and puree. Give it a taste—if your mangos weren’t quite ripe and on the firm side, the puree might need a touch of sugar or honey. If your mangos are very ripe and sweet, add in the second half of the lemon juice. Ideally, make this with very ripe mangos so that no additional sugar is required. In fact, this puree is a great way to use up over-ripe mango that has become fibrous as the blender breaks down all the stringy bits, and lemon juice brings back the tart quality of fresh mango.

Fresh mango and lemon juice are blended into a delicious sauce

Finally, layer all of the ingredients into your breakfast serving. Confession: I don’t use fancy parfait glasses like the one in the photos for my daily breakfast, just a regular bowl does just fine! But the glass does show the layers off well, and if you were making this for brunch with friends, they are a nice touch.

Start with fresh blackberries at the bottom of the dish. Next layer on the chia pudding, followed by mango sauce and then a bit more chia pudding on top with a few berries for garnish. (Use 1/3 of the chia pudding per serving) If you have some large flake coconut it adds a nice crunch on top.

There is enough chia pudding for 3 servings—it keeps well in the fridge for up to 4 days, along with the mango puree. Even if you make a batch of this for yourself once per week, you’ll be having a superfood breakfast regularly to give you energy and boost your health. No time to make the mango puree? No problem—just use any fresh berries with a bit of honey and granola to top off the chia pudding.

Blackberries, chia pudding and blackberries are layered into a parfait

Try making it on a Sunday night and see how you feel by Wednesday after having it for three breakfasts in a row. Personally, I’m hooked—the mix of protein, nutrients and fresh fruit keep my energy high and my morning well-fuelled. It’s amazing how one small change to your weekly routine can make a big difference to how you feel. You just might get hooked on this healthy indulgence too, and make chia pudding part of your morning breakfast routine. I would love to hear if chia pudding is your new binge—leave a comment and let me know what you think!

Chia Pudding with Mango Sauce and Blackberries
Healthy chia pudding is layered with mango puree and blackberries
Print

Chia pudding with mango and blackberries

Healthy, delicious and filling, I make this for chia pudding for breakfast every week, changing up the berries depending on what looks good at the market that week.

Course Breakfast
Cuisine American
Prep Time 15 minutes
Servings 3

Ingredients

Chia pudding

  • 1/4 cup whole white chia seeds
  • 1 cup milk of your choice (dairy, almond, anything goes)
  • 1 cup plain greek yogurt
  • blackberries or any berries of your choice
  • large flake coconut for garnish

Mango puree

  • 1 1/2 cups chopped mango (about 2 medium)
  • 1 lemon (juiced)

Instructions

  1. Place chia seeds in a medium bowl (large enough to hold 2 cups). Add milk over top of seeds, stirring well with a fork. Let sit on counter for 2–3 minutes, and stir again. Transfer to fridge for a minimum of six hours, or overnight.

  2. Add yogurt to the chia seed mixture and stir well to combine to create a nice pudding texture.

  3. Combine mango and half of the lemon juice in a small food processor. Blend until well combined. Taste the puree—depending on how ripe and sweet your mangos are, you may want to either add a bit of sugar or honey if it tastes sour, or add more lemon juice if the mangos were very ripe and it is tasting too sweet.

  4. In your serving bowl, layer berries, some chia pudding, mango puree and a bit more chia pudding. (Use a third of the pudding per serving) Top with additional berries and garnish with coconut flakes. Serve and enjoy!

Recipe Notes

The mango puree is a great natural sweetener, but if you don't have time to make it, just use your favourite berries and drizzle with a bit of honey. Also tastes great with a bit of granola on top.

Filed Under: Breakfast, Recipe Tagged With: berries, blackberries, blackberry, chia, Healthy, Mango, pudding, yogurt

Primary Sidebar

Welcome to my kitchen journal, a place where I will share my favourite heritage recipes honed over the years, as well as document new evolutions and experiments along the way. Great feasts become vehicles for fond memories—the best meals are the ones someone made with love, for you. Follow me to explore traditions, document stories and experience the joy of the feast. Read More…

  • Facebook
  • Instagram
  • Pinterest
  • Twitter
  • YouTube

Don’t miss a story!

Get email updates

Copyright © 2026