• Skip to content
  • Skip to primary sidebar

Feast & Lore

Food stories featuring heritage recipes and new experiments.

  • Home
  • Recipes
  • About

cookie

The Heartbreak Cookie: Linzer Hearts

February 10, 2018 By Caroline 11 Comments

Slightly softened by their raspberry filling, fragrant with hazelnuts and a touch of cinnamon, Linzer cookies are a special treat. However, these pretty little cookies can be a real pain to make. The dough can be sticky and difficult to handle when you are after perfect scalloped edges and crisp center cutouts. I seem to be cursed every time I make these—from the motor on my food processor giving out in the middle of grinding nuts, to struggling to get the skins off the hazelnuts, to the dough sticking and ruining the shape of my cookies—I’ve experienced pretty much every way these can go wrong! It can be a real heartbreak to watch the shapes all smoosh and fall apart after all the work you’ve put into them. In this post I share the tips and tricks I’ve honed to get these cookies to turn out delicious and pretty with minimal fuss. Read on to learn how!

Linzer cookies with hearts


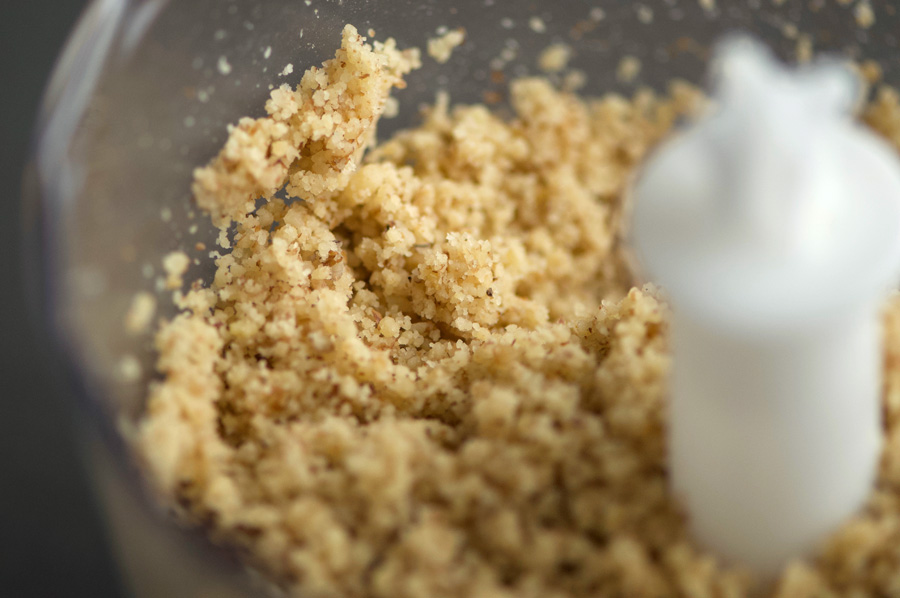
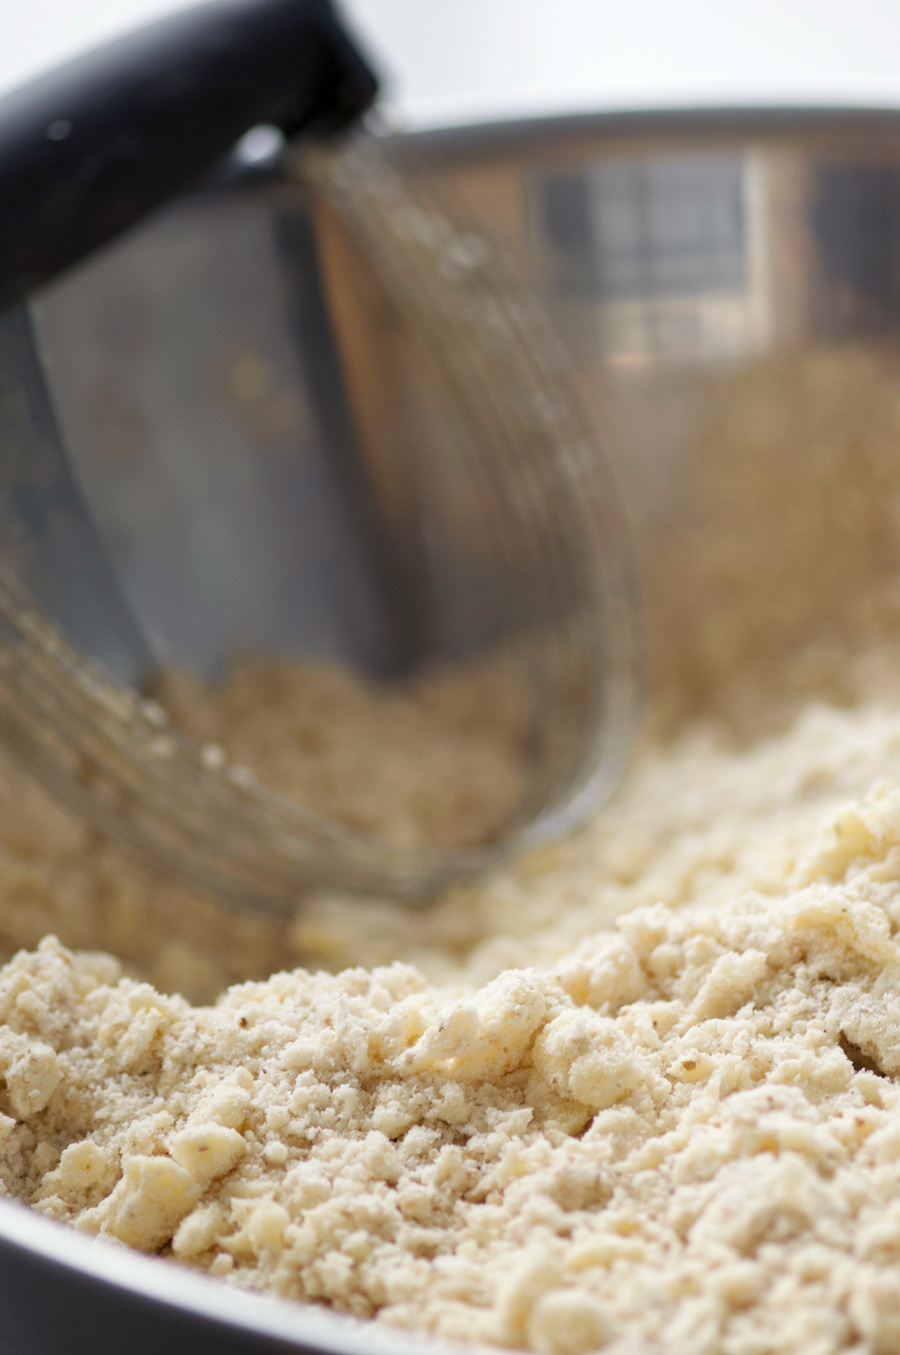
To start with, buy blanched hazelnuts with the skins already removed. This saves you a lot of tedious work trying to get them off yourself and makes no difference in the final flavour. Do be sure the toast the hazelnuts before grinding them, to bring out the full flavour. Prep the hazelnut and brown sugar, flour with dry ingredients, and whipped butter and brown sugar as shown below:

Ingredient prep to make Linzer cookies

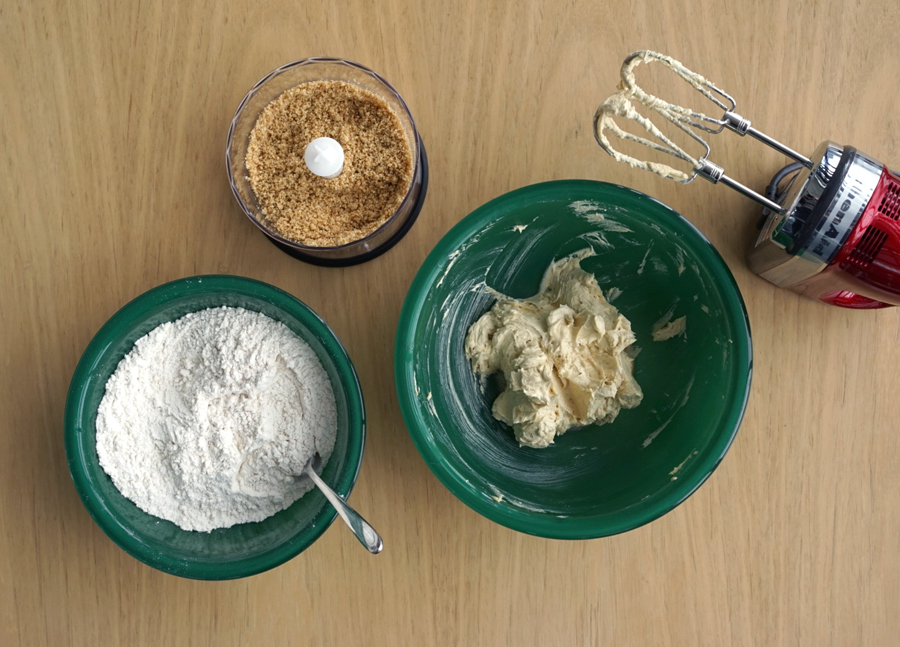
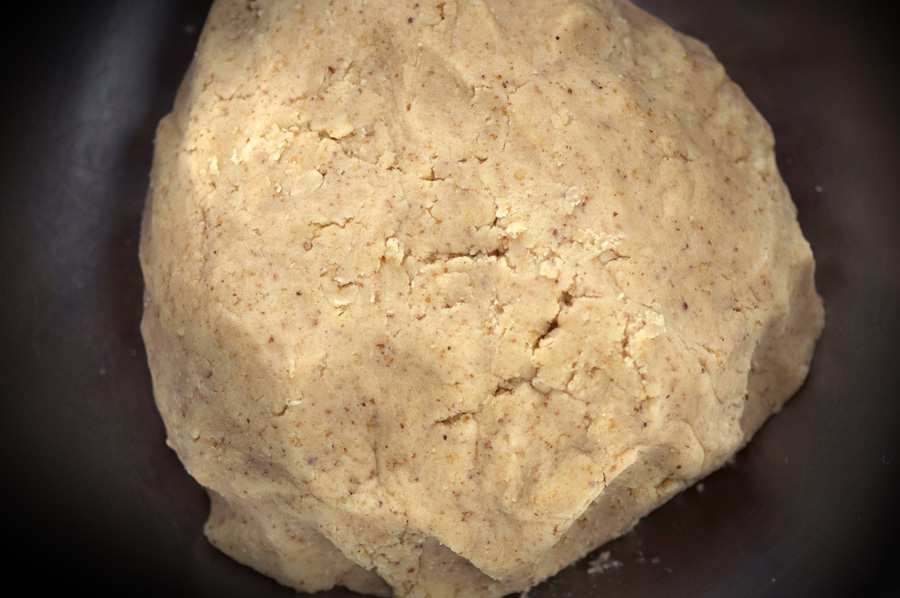
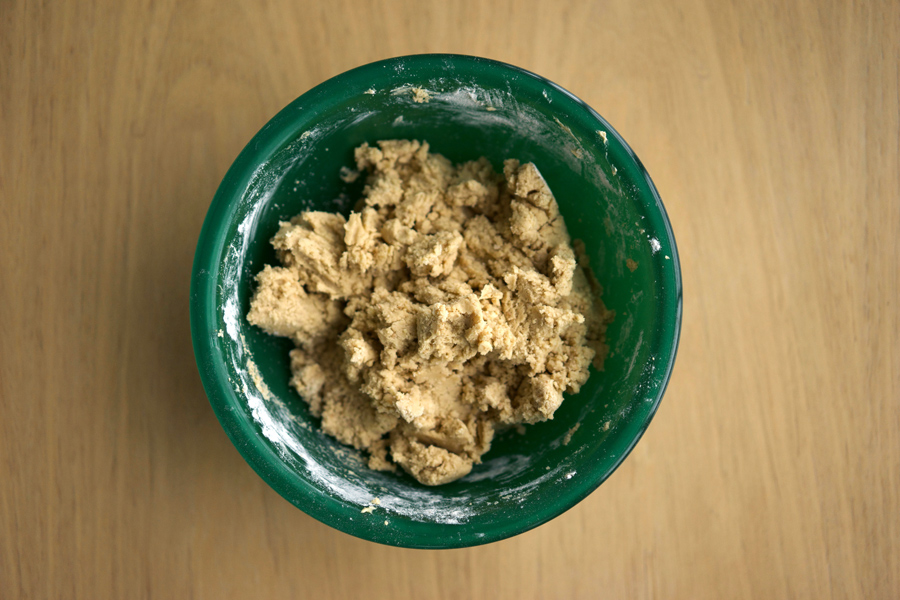
After fluffing up the butter and brown sugar, blend in the nut mixture, followed by the flour mixture. The dough should have the texture and consistency shown in the photo below:

Linzer cookie dough whipped in bowl

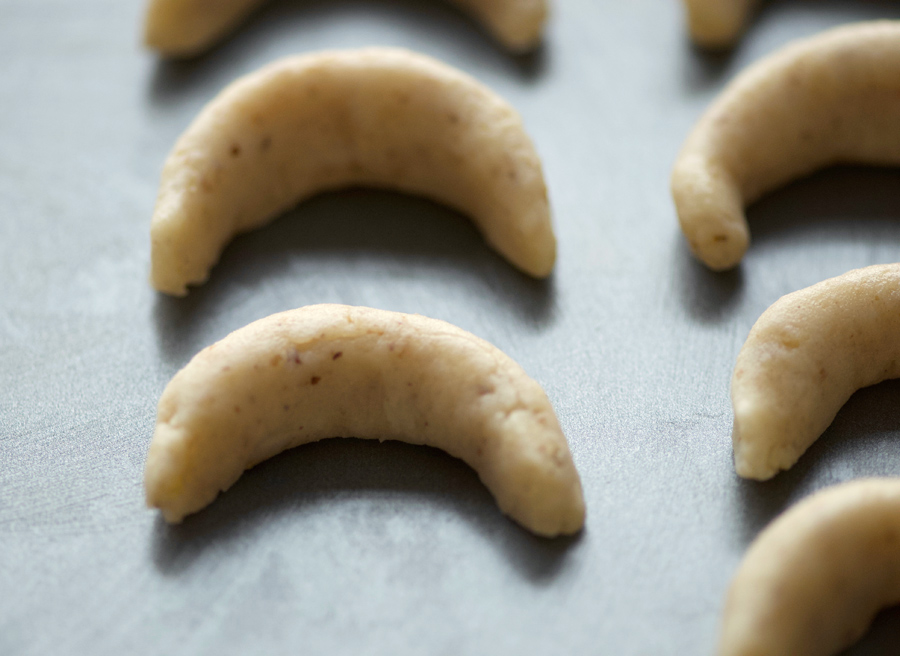
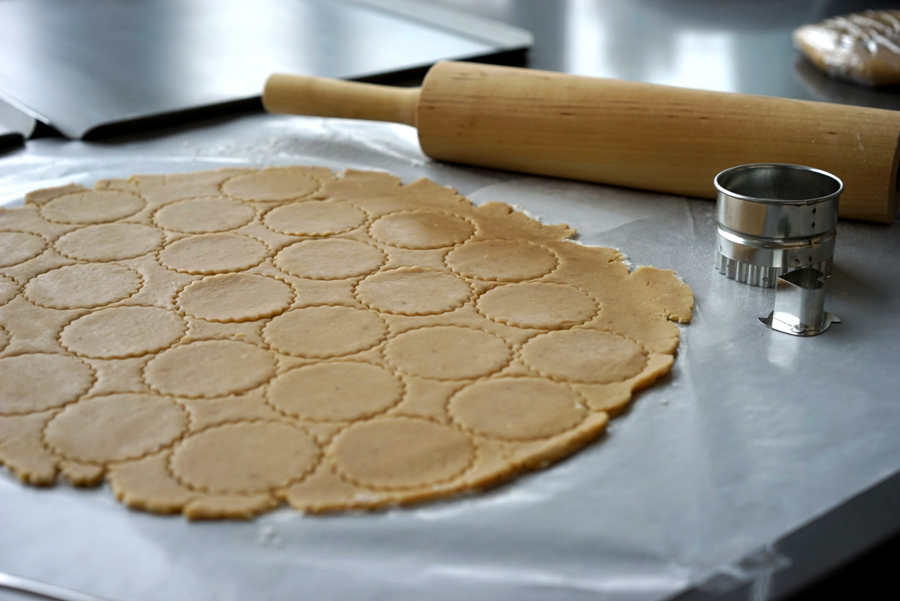
Divide the cookie dough into two and place each half onto a sheet of plastic wrap. Flatten each ball into a disk, wrap and toss into the fridge to chill for two hours. This will make the dough easier to work with when it’s time to roll it out. Once it’s done chilling, prepare your work surface (this step is very important!) Lay a sheet of wax paper on the countertop (I like to tape the sides down with just a small piece of tape on each edge). If your wax paper is not very large, overlap two pieces. Then, lightly flour this surface (without the flour, the cookies will still stick to the wax paper—little buggers!) Next, remove one cookie dough disc from the fridge, and place onto the prepared work surface. Lightly dust the top with a bit of flour, then add another piece of wax paper on top. Roll out the dough to a thickness of 1/8″, running your hand over the dough to check that it is as even as possible throughout. I used a specific Linzer cookie cutter but found it to be very disappointing. The dough does not stay in the cutter and remains stubbornly on my work surface instead, as shown below.

Linzer dough rolled out and cut

To get around this, I used a metal offset spatula. First I gently lifted away the excess dough; then very carefully slid the spatula between the cookie and the wax paper to lift it off and transfer it to the waiting cookie sheet, taking care not to stretch the cookie. This was the most delicate part; once the cookie was on the spatula it was easy to flip it off onto the baking sheet. Once you’ve got all the cookies cut out and on the baking sheets, chill the baking sheets in the fridge for about 15 minutes. This is critical to help the cookies keep their shape for the next step: cutting out the centres for the pretty filling reveal.

Count your cookies, ideally you’ll have the same number on each cookie sheet. You need to cut out the centre window shape on half of the cookies. Cut the windows all out on the same baking sheet as they bake a bit faster than the cookie bottoms, if they are together you take them out of the oven a minute or so before the bottoms. Another disappointment with my cookie cutter: it came with an insert to hold the centre in position, however when you press down it leaves a terrible ring around the edge of the cookie. No good! Instead I just free-handed it, placing the hearts in the centre as best I could—most were pretty close.

handle cookies carefully with an offset spatula

Rather than discard the centres of the cookies, I bake them into adorable mini-linzers! They look cute when plated together, and are perfect for snacking 🙂

Linzer cookies with heart cutouts

Bake the cookies, removing them from the oven when the edges are lightly golden. Allow to rest for a minute or so (but not much longer) and then transfer the cookies to a wire rack to fully cool. I left the cookies on the baking sheet until they were fully cooled once and guess what, they wanted to stick to the cookie sheet, too! Take all of the bottoms and spread with a generous dollop of raspberry jam, keeping the edges clear so the jam doesn’t smoosh out and make a mess when you put the tops on.

Raspberry Jam Filling on Linzer Cookies

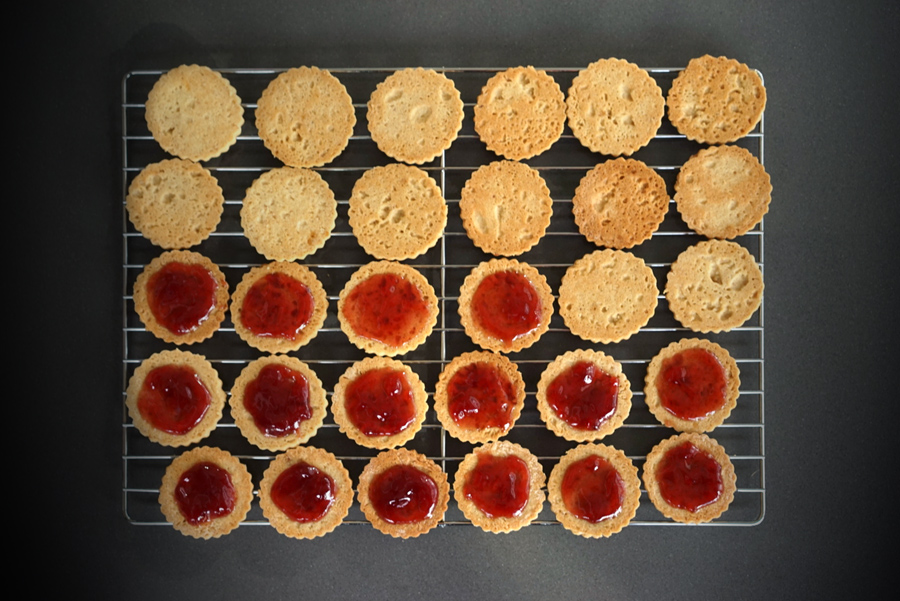
Take the rack of cookie tops, and sift them with icing sugar. I like to use a generous amount. So pretty!

Dusting Sugar on to Linzer Cookie Tops

Finally, assemble the tops to the bottoms, being careful not to get any powdered sugar on the jam areas. I found giving the tops a light tap underneath before adding to the cookie bottom helped a bit. Don’t forget to fill your baby-linzers, too. And you’re done! Well almost. You’ve just spent all this time making these beautiful cookies, but how to store them without getting powdered sugar all over the centres? I take a round metal tin, trace the lid onto some wax paper, and cut out perfectly fitted wax paper liners (about 5–6). Line the bottom, place cookies in a single layer, top with a wax paper sheet, and keep layering until your precious cookies are all carefully packaged up.

Linzer cookies stored in tin between layers of wax paper

A pain to make, but so delicious, I love Linzer cookies and wouldn’t have them any other way!

Adapted the Linzer Cookie Recipe at Epicurious.

Linzer cookies
The Heartbreak Cookie: Linzer Hearts
5 from 2 votes
Print

Linzer cookies

The cookie version of the famous Austrian cake, these lightly spiced cookies with raspberry filling are a delight!

Course Dessert
Cuisine Austrian
Prep Time 3 hours
Cook Time 12 minutes
Total Time 3 hours 12 minutes
Servings 24 cookies

Ingredients

  • 2/3 cup hazelnuts, blanched (skins removed) (3 oz)
  • 1/2 cup packed brown sugar, divided
  • 2 1/2 cups all-purpose flour
  • 1/2 tsp baking powder
  • 1/2 tsp salt
  • 1/4 tsp cinnamon
  • 1 cup unsalted butter (2 sticks), room temperature
  • 1 egg
  • 1 tsp vanilla
  • 250 ml seedless raspberry jam (approx 8 oz)
  • 1/2 cup icing sugar

Instructions

  1. Toast hazelnuts in a preheated 350° oven for 6–8 minutes. Allow to cool, then pulse in a food processor with 1/4 cup of brown sugar until finely ground.

  2. In a medium bowl, combine the flour, baking powder, salt and cinnamon.

  3. In a large bowl beat 1/4 cup brown sugar and butter with a hand-mixer until pale and fluffy, about 6 minutes. (About half that amount of time if using a stand-mixer) Add nut mixture and beat until well combined, about 1 minute. Beat in the egg and vanilla. Stir in the flour mixture until partly combined, then beat on low speed to fully combine. Divide dough into 2 and form each half into a flat disk on plastic wrap. Wrap and chill in the fridge for 2 hours.

  4. Prepare a clean counter surface with a large sheet of wax paper, using a small piece of tape on each side to help hold it in place. Sprinkle with flour. Remove one disk of dough from the fridge and place onto prepared surface. very lightly flour the top of the dough and add an additional piece of wax paper on top. Roll out the dough to 1/8" thick, and remove the top layer of wax paper.

  5. Have two cookie sheets ready beside your work area. Using cookie cutter, cut cookies as close together as possible to maximize the dough. If the cookies don't stay in your cutter to transfer onto the cookie sheet and remain on the wax paper instead, gently lift away the excess dough using an offset metal spatula until the edges of the first row of cookies are exposed. Gently slide the offset spatula between the cookie and the wax paper layer, lifting the cookie being careful not to allow it to warp or stretch to maintain the shape. Transfer to cookie sheet, leaving 1" between each cookie. Repeat with remaining dough until your two cookie sheets are full. Transfer the cookie sheets to the fridge to chill for 15 minutes. 

  6. Preheat oven to 350°. Once chilled, remove cookies from fridge and using the smaller heart cutter, cut out the centres from half of the cookies. Gently remove the centres, (I found a toothpick worked well to flick them out while preserving their shape). Drop the small cutouts onto the baking sheet in the spaces between the cookies, distributing on the two sheets if needed. Place in preheated oven and bake for 10 – 12 minutes, until edges are lightly golden. Allow cookies to cool for a few minutes on the cookie sheet, then transfer carefully to a wire rack, keeping the tops separate from the bottoms (and mini-hearts will be too small for the rack, they can cool on a plate).

  7. Asses your dough scraps, press together into a disk and transfer to the fridge to chill. Dough can be re-rolled once or twice max in this manner. Complete cookie cutting and baking process until all cookies are baked and ready.

  8. Once cool, take the wire racks with the top halves with the cutouts and place on a baking sheet. Sift icing sugar on top and set aside.

  9. Spread jam onto the bottom layers, using a generous amount and keeping it in the centre with a 1/8" clear area around the edges of the cookies. As the jam squishes out when you add the tops, this will keep them neat and prevent the jam from oozing out the sides. Carefully add the pretty dusted tops. I like filling the baby heart cookies with jam as well, without any sugar on top.

  10. These cookies are best stored in a tin so they can breathe. Cut 5 or so sheets of wax paper to the size of your tin (I trace the lid as a guide). Line the bottom, add the first row of cookies carefully in a single layer; top with a fitted wax paper sheet, layer on the next row of cookies, and so on, until the tin is full. Sprinkle in the baby hearts as you go (if you don't snack on them all first!)

Filed Under: Dessert, Recipe Tagged With: cookie, Heart, Linzer, raspberry

Vanilla Kipferl: The Can’t-Live-Without Holiday Cookie

December 4, 2017 By Caroline 11 Comments

This is it. The one everyone agrees is THE cookie. More delicate than shortbread, scented with vanilla sugar, to be made only with finely ground walnuts (no imposter almonds!) Take a bite and the cookie cascades like a buttery waterfall of sugary crumbs that melt in your mouth, with an elegant finish of earthy walnut. These are Grandma’s Vanilla Kipferl (Vanillekipferl), and this is the recipe her family has made for generations.

Vanilla Kipferl on a cooling rack dusted with vanilla sugar

I remember when Grandma shared the recipe with me. She told me a special grinder was needed for the walnuts, to get them fine enough. And that she mixed everything right on the countertop. (No bowls: mind=blown!) She taught me how the residual amount of butter on the foil wrappers they come in is usually just enough to grease the cookie sheets if you rub the wrapper directly onto the sheet. Her recipe was completely in metric, and she had what I thought was the most unusual dry measuring tool. It was shaped like a funnel with ingredients like flour, sugar, etc outlined in German on the inside along the top, and the corresponding units in grams below each ingredient (as 100 g of flour would sit at a different height in the funnel than 100 g of sugar). No mixing tools were used at all, she just used her hands to form the dough.

I was determined to learn how to make these cookies, so I went home loaded with notes and worked on sorting it all out into something I could make with the tools I had. For starters, the walnuts. While she highly preferred using a specialized hand-grinder, I didn’t have this so I tried out my mini-food processor to grind the nuts instead. I have done this ever since and with a good quality, sharp blade you can get the nuts quite fine. No one has ever complained about the texture when eating my cookies, so I think it is just fine this way. Though if you have a German hand grinder, it would certainly make for a lovely, fine texture for your cookies. Below you can see a close-up photo of the grind texture obtained using a mini-processor. You also need to take care not to over-process, after which you will turn the nuts into nut butter instead of ground nuts!

Ground walnuts for Vanilla Kipferl cookies

Next, how to mix the dough. I have to admit I felt a bit uneasy diving in using my hands in the early stages of the dough with so much butter. I also preferred the comfort of using a mixing bowl. My instincts told me to treat this a bit like pastry—after all the cookie is almost somewhere between a cookie and a pastry itself with its delicate texture, and it does start with cold butter. So I modified the technique to combine the butter into the dry ingredients using a pastry cutter to get it roughly incorporated before moving on to using my hands to knead it together. This keeps the butter from getting too warm, and yields a great texture in the end product. (If you don’t have a pastry cutter, you could also use two knives for this step.) Below is a close-up shot showing the desired texture you want to achieve using the pastry cutter.

Cutting butter into the dough with a pastry cutter

Now, roll up your sleeves, remove any rings, and get in there with your hands! Squeeze, press and shape the dough until it comes together and forms a solid mass or ball. Grandma’s recipe says to add a little bit of milk if it’s not holding together, but generally I find I don’t need any, there is a lot of butter and the walnuts have some natural oils, too.

Vanilla Kipferl dough shaped into a ball

Grandma was able to roll out the kipferls with such deft efficiency, I felt utterly useless with my pathetic looking little crescents at first (that took me three times as long to make). But don’t give up, it just takes practice. After all, she had probably hand-rolled literally thousands of these cookies by the time she was teaching me the ropes. One tip I learned from practice: don’t roll out too much dough at once, it will just fall apart. Also, you need to get the pressure just right—press too light while rolling and the roll will crumble from the centre. Press too hard and you’ll crush it. I found an even rolling style, using my palms rather than my fingers (finger impressions leave the roll dented and uneven), and gently coaxing the roll to grow out to the sides while pressing down works best.

Starting with a small handful of dough (about the size of a large egg) roll it between your hands to get it started into a long roll. Then move it to the counter and roll it out until it is about 1/2″ inch in diameter. Next, cut the roll into 1″ pieces, and roll those out a bit more, turning the ends into the crescent shape and pinching the ends into points.

How to shape Vanilla Kipferl

It is important to remember that these cookies puff out and grow, so make them smaller than what you desire for the final cookie. I find it is really important for the aesthetic of the cookie to pinch the ends into points, otherwise they puff out and the ends lose their shape. For comparison, check out the raw cookie dough on the baking sheet shown immediately below, and the baked cookies, further down, to see the difference in size. A note about baking: during the final 3-5 minutes, you need to watch them like a hawk as they will go from perfect golden brown to dark with a bitter taste in a matter of 30 seconds—this is in large part due to the walnuts that burn easily. Even Grandma used to end up with a batch here and there that she would complain were overdone 🙂 When they display a nice even golden hue overall, they are ready to come out of the oven.Vanilla Kipferl on baking sheetVanilla Kipferl fresh from the oven

It is also important to note how fragile Vanilla Kipferl are. When you take them out of the oven, do not try to move them for at least five minutes, or you will be sure to break them. They need a bit of time to set as they cool.

For the sugar coating, Grandma always used packaged vanilla sugar mixed with icing sugar. If you can’t find packaged Vanilla Sugar, you can make it yourself by mixing a cut open, scraped out vanilla bean (along with the vanilla seeds) with icing sugar, ideally letting the bean sit in the sugar overnight to maximize the flavour transfer.

I find Vanilla Kipferl are far too delicate to be tossed in sugar. Instead it is much easier and more efficient to sift the powdered sugar over top. I also like to ensure the bottoms of the cookies get their sugary coating, so I developed the method shown below, where you set out two cookie sheets and the final storage tin lined with wax paper. Place your cooling rack with cookies onto the first tray, then dust both that and the empty tray with vanilla sugar. Then move the cookies onto the dusted empty tray to coat the bottoms, before moving them into the paper lined tin.

A quick note about storage: Grandma always said these cookies need to breathe, they do best in a tin lined with paper, and never seal the lid on tight—always leave a small air gap. The cookies last for weeks, in fact I think they get better with a bit of age.

Coating Kipferls in Vanilla Sugar

I feel honoured to be able to carry on the tradition of making Vanilla Kipferl, following in the footsteps of so many generations before me. I always remember Grandma when making them—mine will never be quite as good as hers, but I think she would be pleased to know we still carry on her tradition every year. I hope you will try them out too, and maybe add a new cookie tradition to your holidays!

A tin of Vanilla Kipferl Cookies, the only holiday cookie that matters

Vanilla Kipferl on a cooling rack dusted with vanilla sugar
5 from 3 votes
Print

Vanilla Kipferl: The Can't-Live-Without Holiday Cookie

More delicate than shortbread, Vanillekipferl melt in your mouth with a rich shattering of buttery, sugary crumbs lightly scented with vanilla.

Course Dessert
Cuisine Austrian, Viennese
Prep Time 45 minutes
Cook Time 15 minutes
Total Time 1 hour
Servings 50 cookies

Ingredients

  • 1 1/4 cups walnut pieces (165 g)
  • 2 1/4 cups flour (345 g)
  • 1/3 cup granulated sugar (70 g)
  • 2 sticks cold unsalted butter (240 g)
  • 1 cup icing sugar
  • 1 package Vanilla Sugar (9 g)

Instructions

  1. Prepare 2–3 baking sheets by lightly coating them with butter (Residual on the foil butter wrappers is usually the perfect amount and you can just rub the wrappers face-down onto the cookie sheets). Preheat the oven to 375°.

  2. Grind walnuts as fine as possible using a food processor, stopping when it starts to form solid clumps, to avoid over-processing it into nut butter. Add to a large bowl with flour and sugar and stir to combine.

  3. Cut cold butter into small pieces and add to the dry ingredients. Using a pastry cutter (or 2 knives) cut butter into the flour mixture until it forms an even small crumb. (Refer to photo in story for a visual reference.) Use your hands to completely combine the butter into the flour, kneading until the dough forms a smooth ball. Only if needed, add a small amount of milk to help the dough hold together.

  4. Take a small handful of dough and gently roll with light pressure into a log about 1/2" in diameter. Cut roll into 1" pieces. Take each piece and gently roll into the final cookie length, curving into a crescent shape and pinching the ends to taper them. Keep in mind they will puff and grow larger in the oven, so make them a little smaller than your desired final cookie size. Place on prepared baking sheet.

  5. Bake in preheated oven for 15–18 minutes. Rotate the cookies half-way through baking to ensure evenly browned cookies. Check carefully starting at 15 minutes to ensure they don't get too dark—the walnuts are delicate and will go from perfectly golden to burnt in a matter of 30 seconds if you step away! Remove from the oven when the cookies have an even light golden tone. Resist the urge to move the cookies off the sheet, as they are very fragile and will break while too warm. Allow to rest for 5 minutes before moving the cookies to a cooking rack. Allow to cool completely on the rack before coating with vanilla sugar in the next step. 

  6. Mix icing sugar and vanilla sugar in a small bowl, have a small sifter ready. Set out two cookies sheets that fit your cooking rack, and have a metal tin lined with wax or parchment paper ready. Place one cooling rack with cookies into the first cookie sheet. Dust with sugar using the sifter, and also dust the empty cookie sheet beside it. Next, transfer the sugar dusted cookies from the cooling rack to the empty cookie tray you just coated with icing sugar—this is to coat the bottoms of the cookies. Finally transfer the finished cookies into the prepared cookie tin.

Vanillekipferl heritage recipe passed down from Grandma

Filed Under: Dessert, Recipe Tagged With: austrian, cookie, Crescents, holiday cookie, vanilla kipferl, Vanillekipferl, Viennese

Primary Sidebar

Welcome to my kitchen journal, a place where I will share my favourite heritage recipes honed over the years, as well as document new evolutions and experiments along the way. Great feasts become vehicles for fond memories—the best meals are the ones someone made with love, for you. Follow me to explore traditions, document stories and experience the joy of the feast. Read More…

  • Facebook
  • Instagram
  • Pinterest
  • Twitter
  • YouTube

Don’t miss a story!

Get email updates

Copyright © 2025