• Skip to content
  • Skip to primary sidebar

Feast & Lore

Food stories featuring heritage recipes and new experiments.

  • Home
  • Recipes
  • About

Recipe

Beef Goulash

April 26, 2020 By Caroline Leave a Comment

A hearty bowl of beef goulash is ready to eat.

There is no hiding behind tomato paste, vegetables or other flavours. This is a purists’ goulash where all of the rich colour and flavour come from beautifully seared beef, caramelized onions, plus Paprika, and that’s it. This classic recipe is incredibly simple and requires only a few ingredients. I’ll get into the secret to mastering the very dark, rich gravy below.

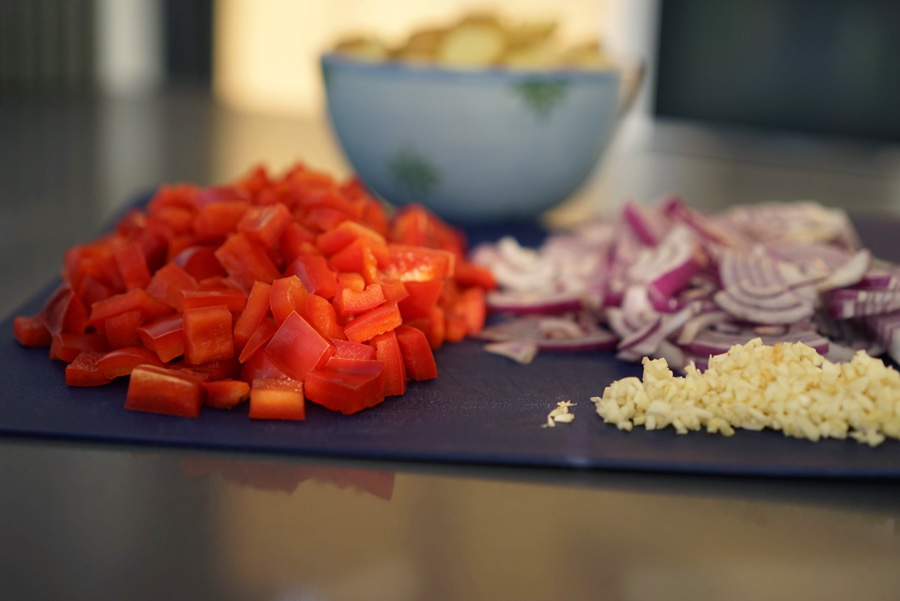
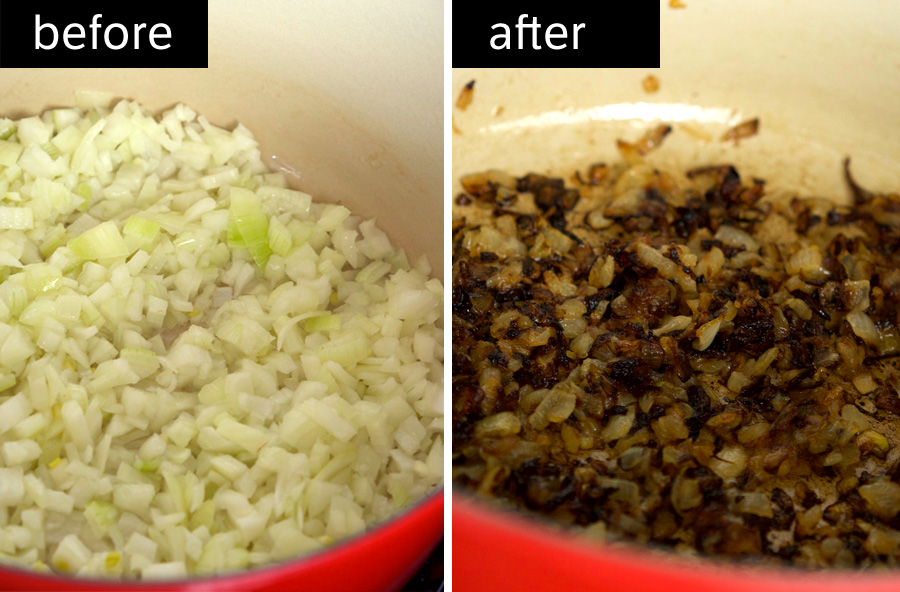
First, we begin with onions. LOTS of them! Don’t be shy, it looks like a lot but they really cook down and lend a deep, caramelized flavour to the stew. It is important to cook them in animal fat for the best caramelization (like lard) over medium – medium high heat for some time (usually about 25 minutes or so) to ensure they get dark enough and caramelize to the point of almost looking black. Golden simply won’t due if you want a rich, dark gravy. Be patient and wait for them to look like the image below:

Onions before and after

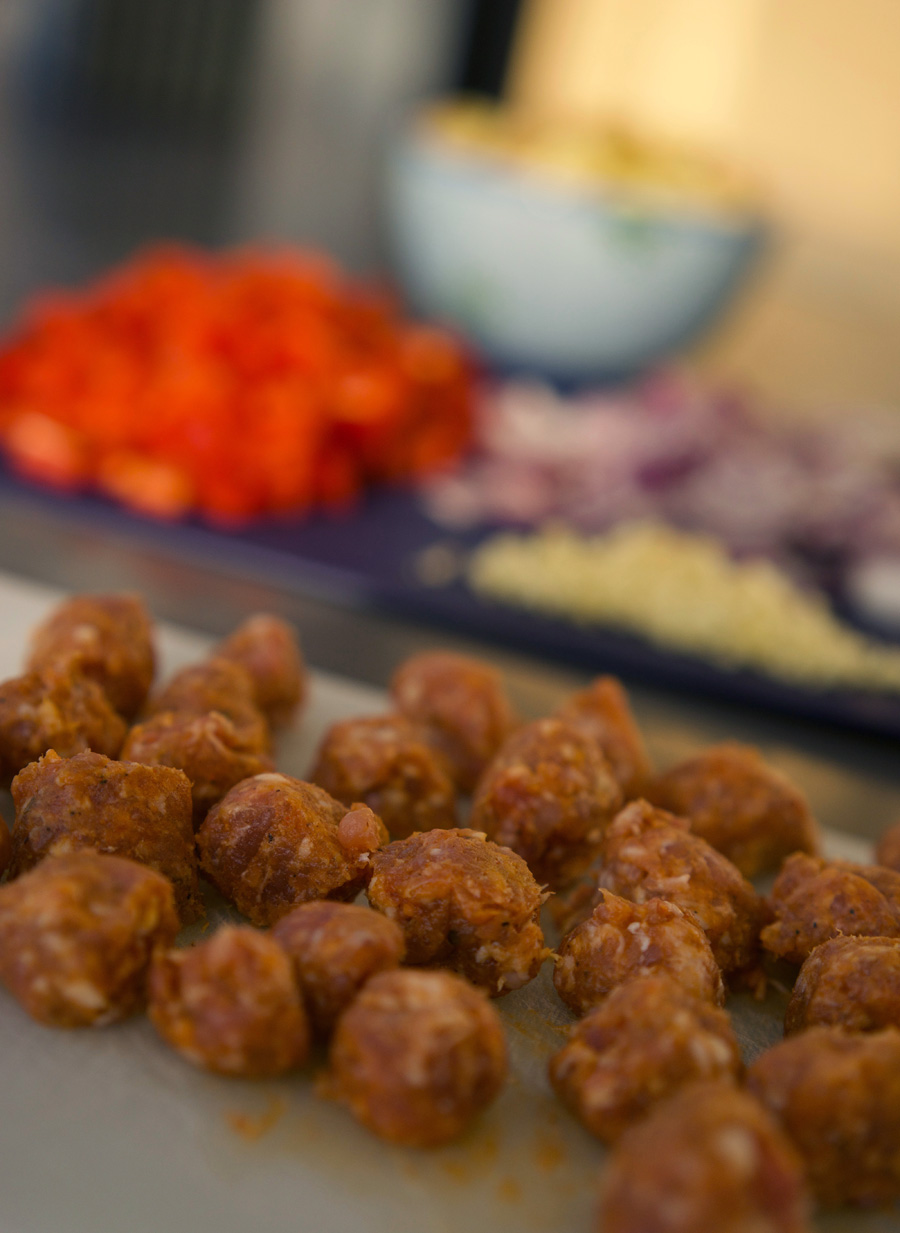
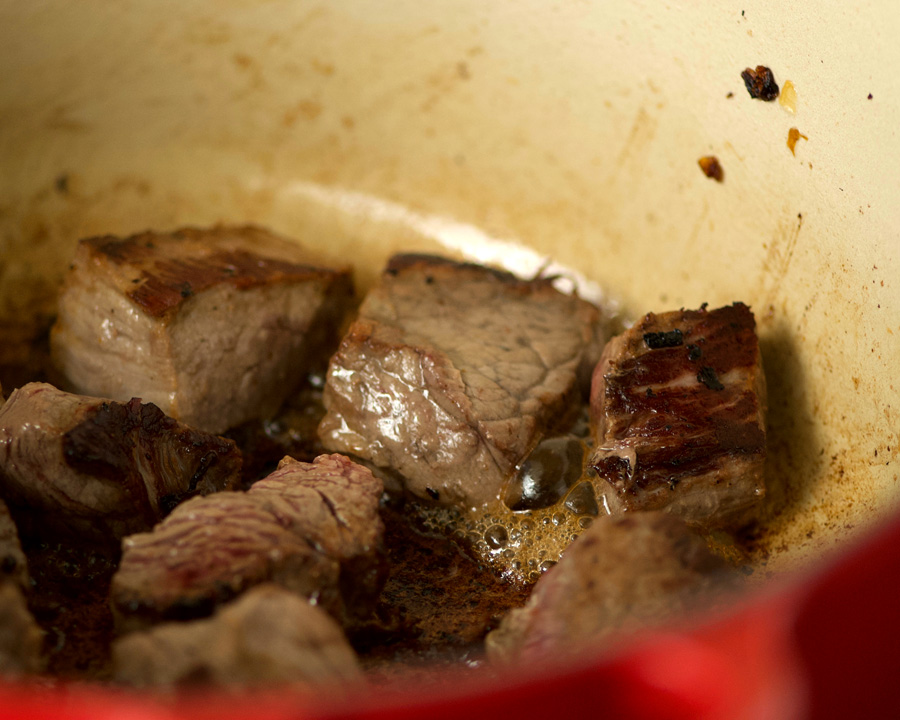
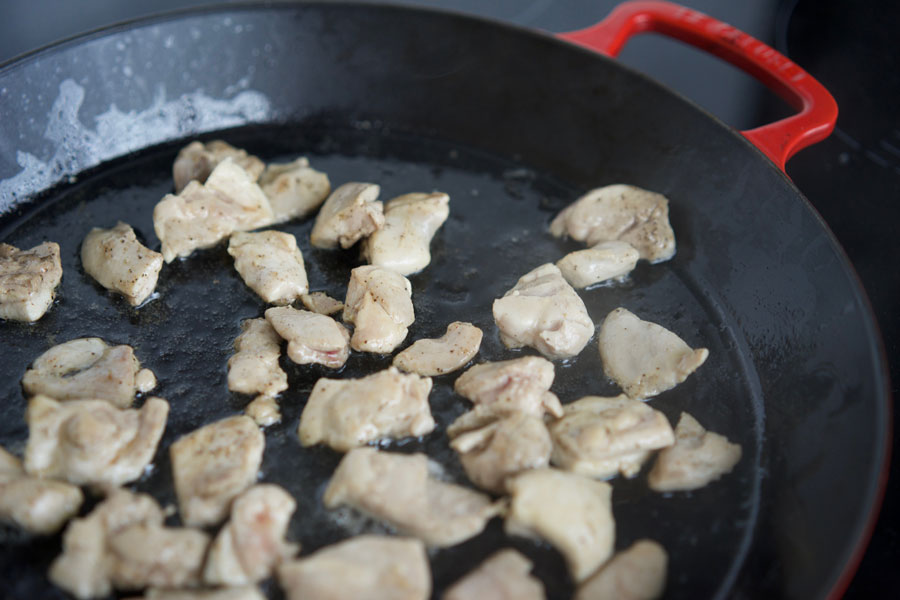
Once the onions are done, you’ll need to brown the meat. Remove the onions from the pan and set aside; add about a tablespoon of oil. Add the beef in batches, making sure not to overcrowd the pot. Drop the meat in and don’t touch it for about 3–4 minutes. This will help get you the very deep, dark areas of searing as shown in the image below. If you start to flip the meat and it’s not brown yet, continue to leave it until it is. If too much water evaporates from the meat and you find it’s steaming instead of browning, turn up the heat until the water cooks off. Then the meat will be able to brown. Pressing your meat with a paper towel before browning can help if you find it is holding too much moisture. If the pan starts to look dry, add a bit more oil.

Beef browns in the pot

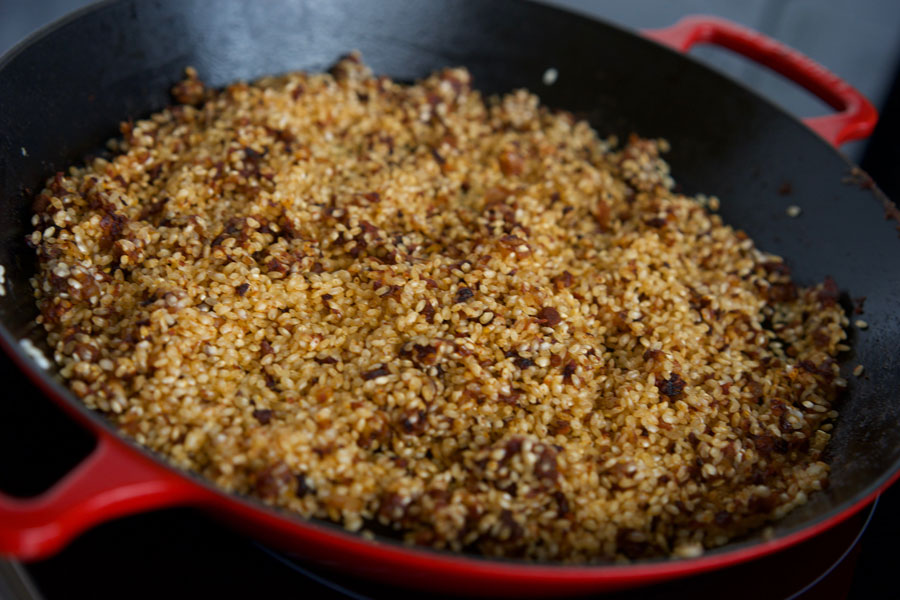
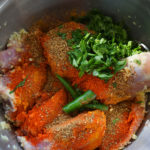
Once the meat is nicely browned, it’s time to add the spices. I use the Paprika shown below (LOTS!) About two tablespoons sweet (or more), and one tablespoon hot).

Hot and Sweet Paprika are the key to the flavours of this dish
Browned beef with added Paprika

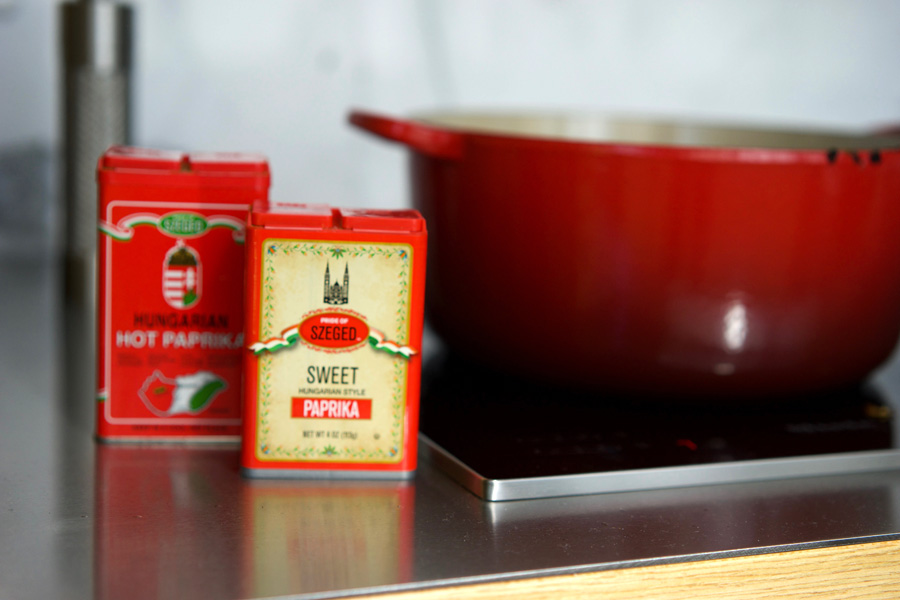
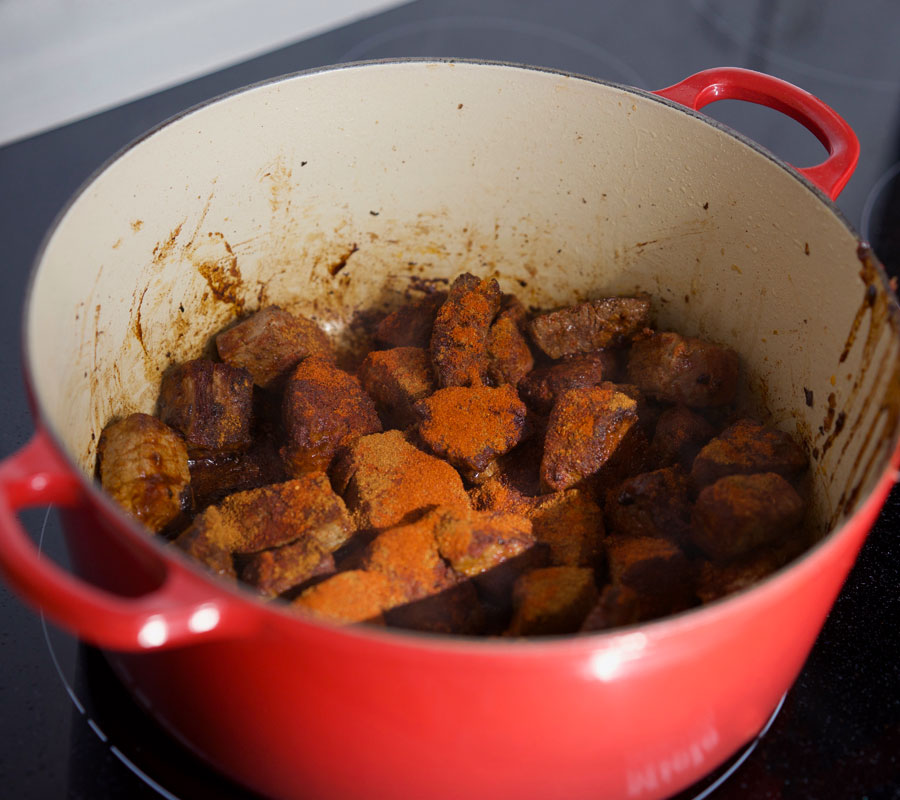
You want to add the Paprika to the pot and stir it around with the meat to heat it up in the oil to bring out all of the smokey spice’s flavour.

The meat braises in liquid and spices

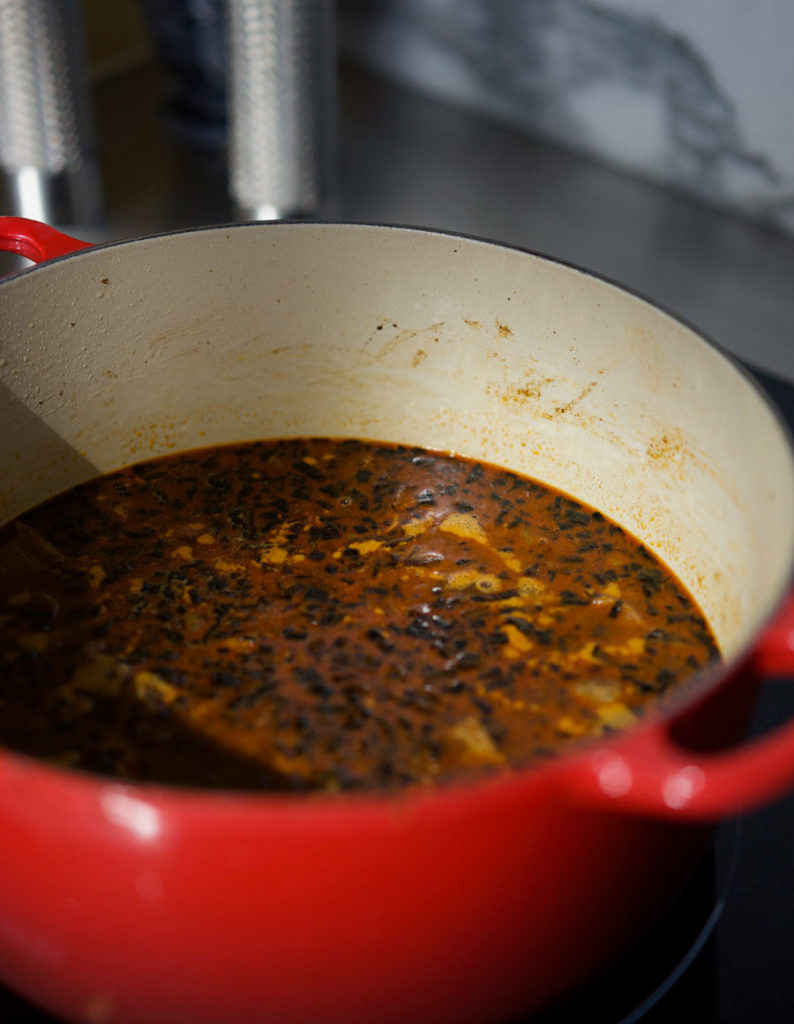
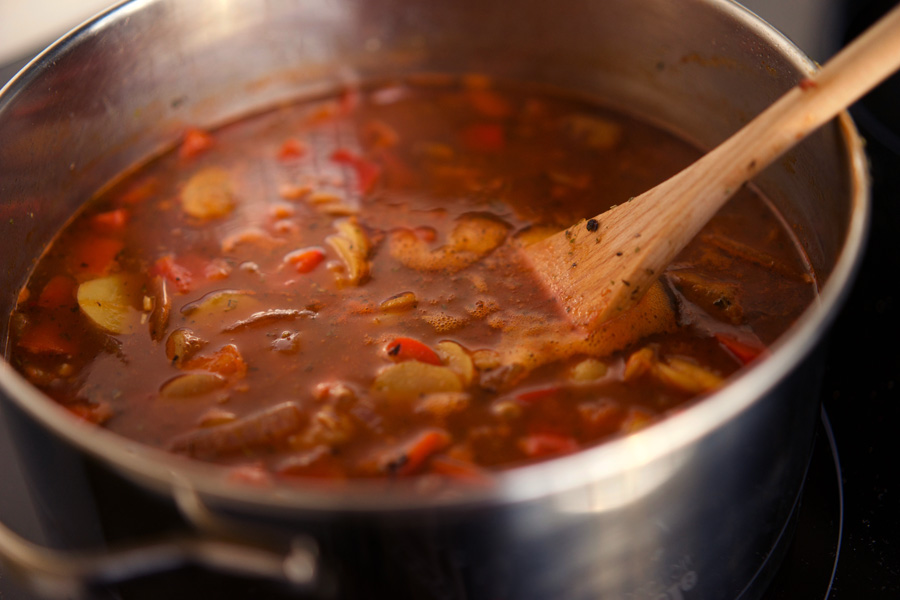
Then place the reserved onions back in the pot and add water and salt, scraping up the browned bits from the bottom of the pot. Simmer, covered, over medium-low heat for about two hours. You can pretty much ignore it, just checking occasionally to make sure it’s neither bubbling too profusely nor standing still with no bubbling at all. You want just a very slow, gentle bubble here and there to gently and slowly cook the meat to keep it tender.

Tender, meaty beef is lifted from the rich gravy

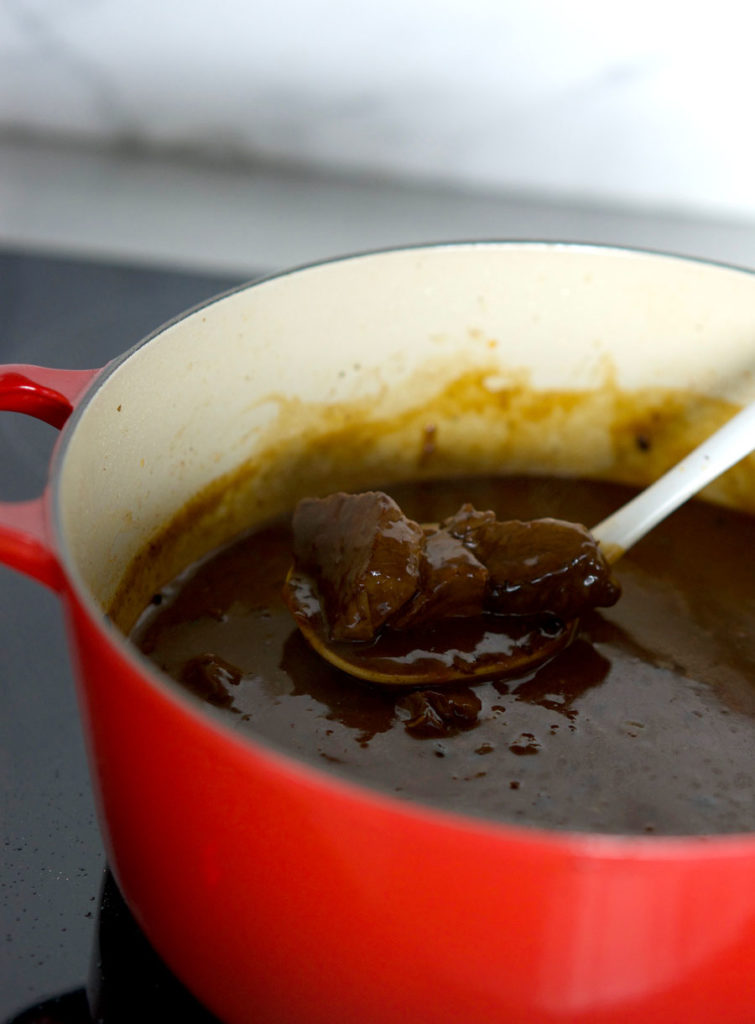
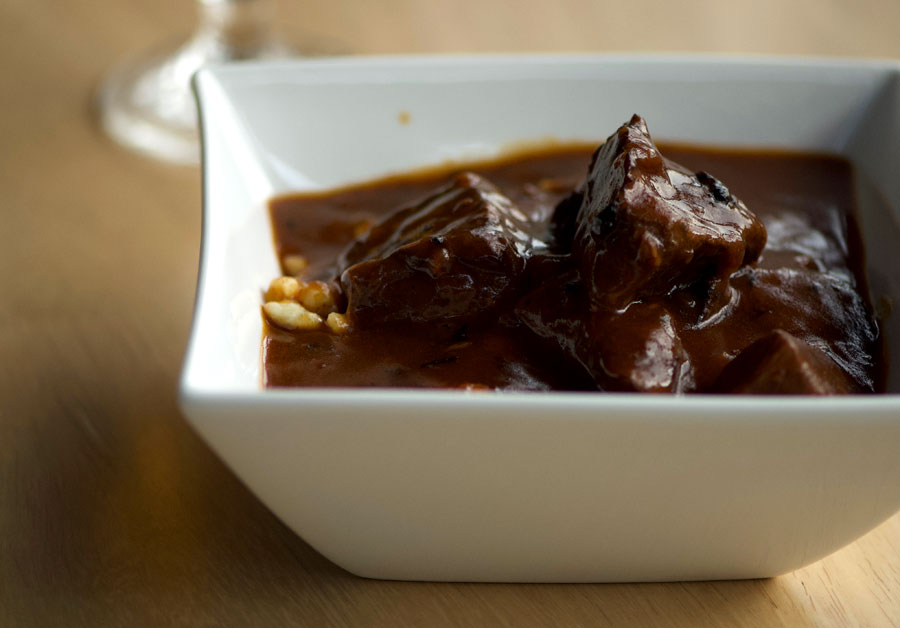
Once the meat is tender, add more water and bring to a simmer. Add a mixture of cornstarch and flour dissolved in cold water to thicken the sauce, simmer for a few more minutes, and it’s ready! Serve over spaetzle style noodles, potato dumplings, or potatoes.
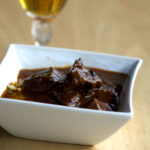
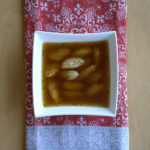
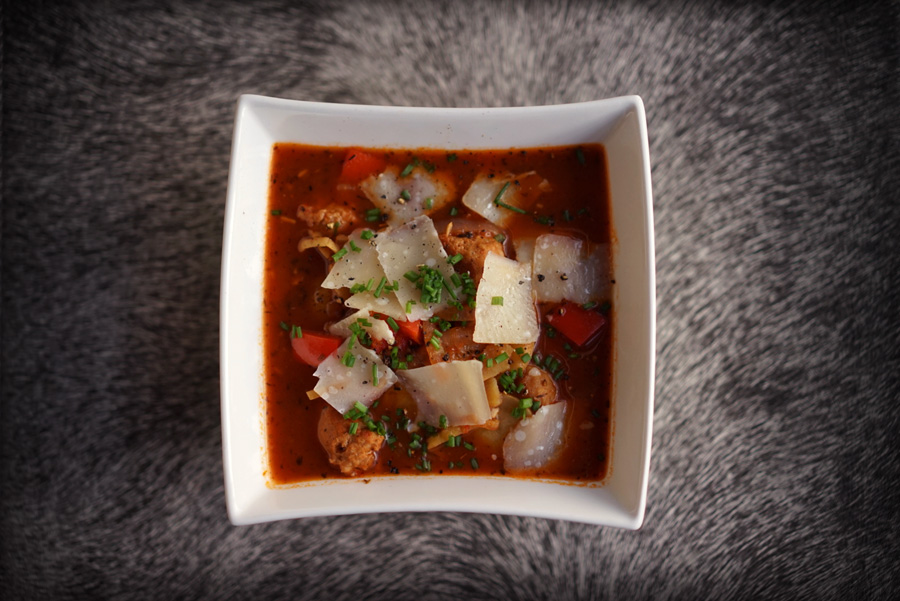
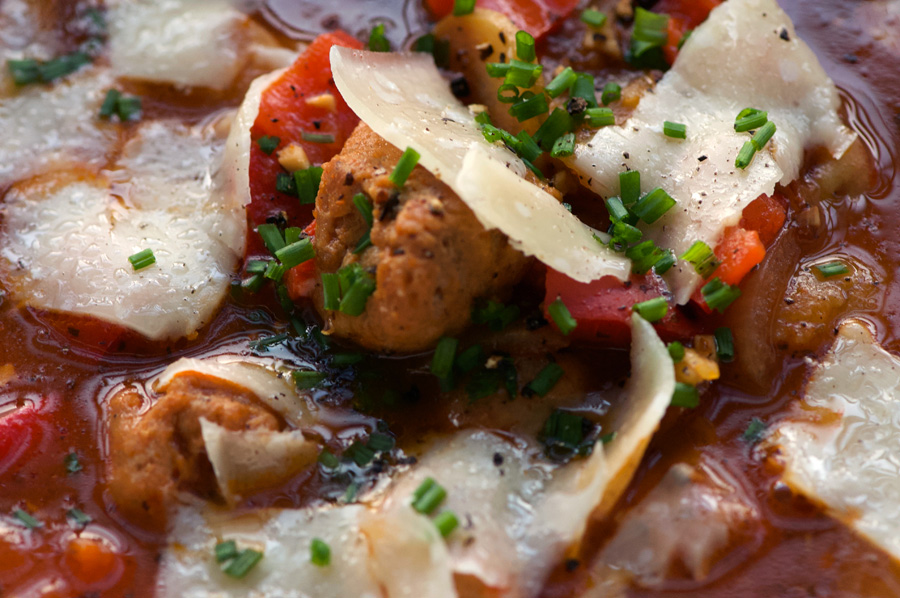
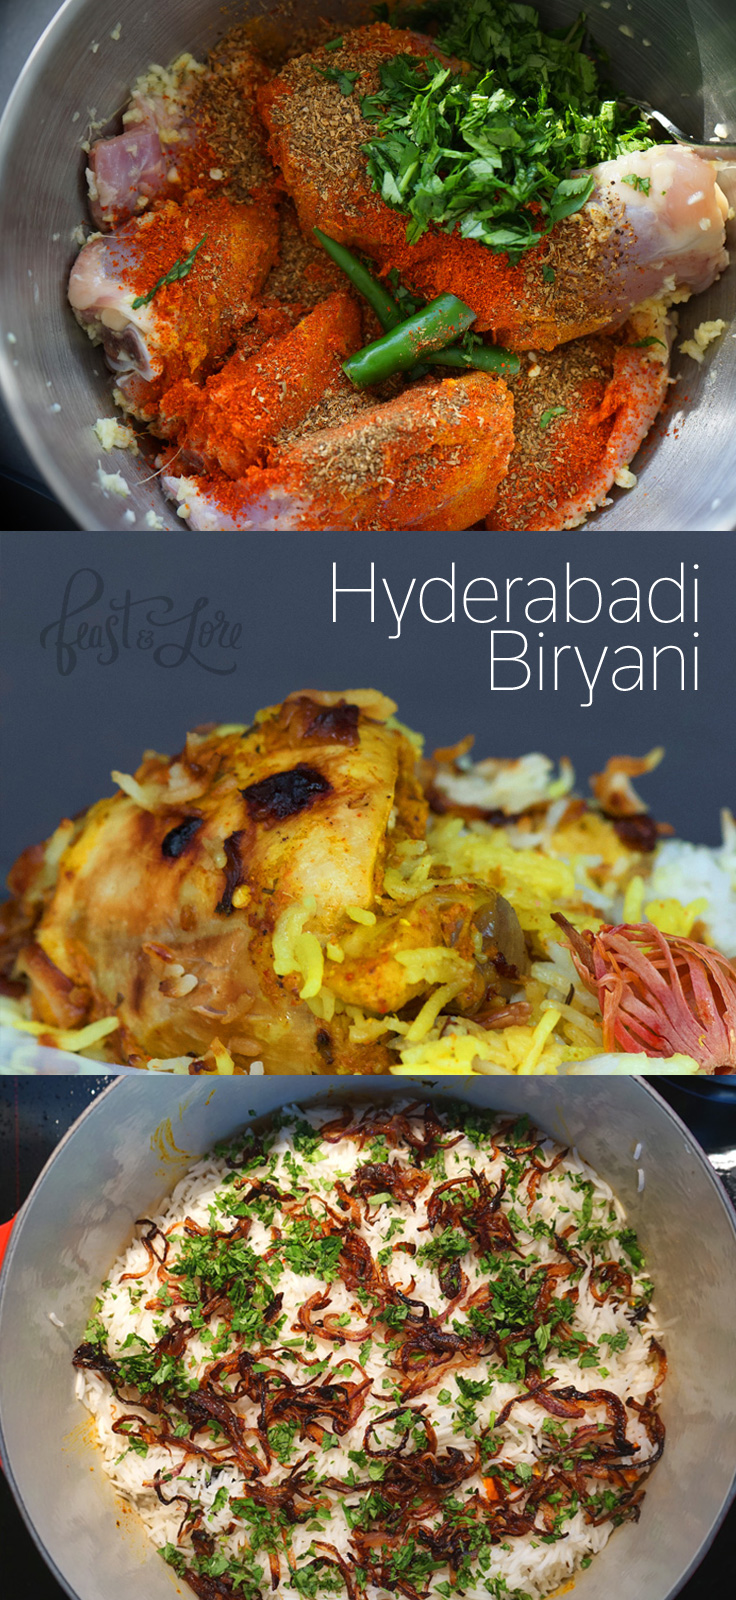
A bowl of beef goulash with rich gravy.
Print

Beef Goulash

A hearty, dark beef stew with onions and Paprika. No tomato paste, carrots or other stuff—this is a purists’ beef goulash that needs nothing extra added. Serve over noodles, dumplings or potatoes. Trying to resist a second helping is futile.

Course Main Course
Cuisine Hungarian
Keyword beef, comfort, goulash, gravy, hungarian, onions, paprika, sauce, stew, szeged
Prep Time 15 minutes
Cook Time 3 hours 20 minutes
Total Time 2 hours 35 minutes
Servings 8

Ingredients

  • 1/4 cup lard Tenderflake works well
  • 4-6 onions, roughly chopped
  • 1 tbsp vegetable oil
  • 2.5 lbs stewing beef
  • 2 tbsp Sweet Hungarian Paprika or more if desired
  • 1 tbsp Hot Hungarian Paprika substitute 1/2 tsp cayenne if you can’t find hot Paprika
  • 1 tsp salt
  • 4 1/2 cups water, divided 3 ways possibly more
  • 1/4 cup flour
  • 1/4 cup cornstarch
  • spaetzle noodles, dumplings or potatoes for serving

Instructions

  1. In a large pot, heat lard on medium-high heat. Add onions. Cook, stirring until they just start to brown, and turn down the heat slightly to avoid burning. Continue cooking until very dark and caramelized—they should be almost but not quite black. Once they reach the right colour, remove the onions to a side plate and reserve.

  2. Add 1 tbsp oil, turn up the heat to medium-high, and then add some of the beef, ensuring the pot isn’t overcrowded. Don’t touch the beef for about 3 minutes; check to see if dark brown areas have developed. If so, flip the meat until browned on all sides. If not, continue to heat until the right colour is there. Turn up heat if the meat isn’t browning enough. Brown the beef in batches, usually two batches does the trick in my pot. Once all of the meat is browned, add both Paprikas and stir over the sizzling heat for about one minute to bring out the flavour of the spices.

  3. Add the onions back into the pot along with the salt and two cups of water (or enough to just cover the meat). Scrape up any bits from the bottom of the pot. Simmer on low for about 1.5 – 2 hours, until meat is tender.

  4. Combine flour and cornstarch with 1/2 cup cold water; stir well to dissolve, pressing out any lumps. Add to the pot with an additional two cups water. Bring to a boil and simmer for about five minutes until sauce is bubbling and thickened. 

  5. Serve over spaetzle style noodles, dumplings or potatoes.

Filed Under: Main Tagged With: beef, goulash, Gravy, Hearty, hot Paprika, hungarian, Paprika, spaetzle noodles, stew, Sweet paprika, winter

Paella with chicken, lobster and shrimp

December 29, 2018 By Caroline 6 Comments

paella lobster closeup

Confession: I don’t really love Paella. Rather, I’m completely head over heels for Socarrat, the crispy, toasted, heavenly bits of rice that form at the bottom of the Paella pan when it’s cooked just right. Getting the Socarrat perfect is my primary goal when making this dish—though the accompanying spicy Chorizo, sweet lobster and juicy shrimp are nothing to complain about!

To begin, you’ll need a Paella pan. I use a heavy, cast iron version made by Le Crueset that I really enjoy, it’s quite versatile and find I use it for many other dishes beyond Paella. You can also buy a less expensive stainless steel or non-stick version, but it is important to use a wide, shallow Paella pan in order to achieve maximum rice to pan surface contact.

A few additional notes: it’s important to choose a good quality dry-cured Chorizo as it adds so much of the flavour. And when selecting Paprika, you must use a Spanish rather than Hungarian style Paprika for this dish to ensure the right flavours.

First, heat some olive oil and cook the chicken (I prefer chicken thighs for the most tender result) until just lightly browned on all sides.

chicken browning in the paella dish

Remove the chicken and set aside. It’s time to build the Sofrito—a common flavour base in this case made of onion, tomato and garlic. Add chopped onion to the pan and cook 2–3 minutes until translucent. Then add grated tomato and garlic, together with salt and pepper to taste. Cook this for approximately 45 minutes, scraping brown bits from the bottom of the pan every 5–10 minutes. Add a tiny bit of water to loosen the bits as you go if the pan is getting dry and the ingredients are sticking. Below shows the “before” starting point of the Sofrito, followed by the “after” end state where it is reduced to about 1/3 of the original volume and deep golden caramel in colour.

top photo shows sofrito in the early stages: light coloured and liquid. The bottom image shows the sofrito reduced down to less than half, quite dry and a deep brown colour.

Add Spanish Paprika and rice to the pan, stir to combine and lightly toast the rice.

Bomba rice is toasted in the paella pan before adding the liquid

Add reserved chicken, chorizo and chicken stock to the pan, stirring to combine well. Aim to spread the rice evenly over the bottom of the pan. Bring to a boil, then reduce heat to maintain a steady simmer. Cook approximately 15 minutes (do not stir) until the rice is starting to surface as it absorbs the liquid. Rotate the pan occasionally as it cooks to ensure even heat on the rice. Below the images show the initial liquid state and the transformation to the after state where the liquid has been absorbed.

top photo shows lots of liquid in the pan, the after photo shows the liquid has been absorbed revealing chorizo and rice.

Now add red pepper strips in a fanning circular pattern around the dish. Place lobster tails into the pan, pressing down into the rice. Cover with foil and cook for 3 minutes. Then quickly add the shrimp, recover with foil and cook an additional 5–6 minutes until the lobster is cooked and the shrimp are white/pink all the way through.

Now check the rice by tasting some from the top to see if it’s cooked through. It should be slightly al dente with a slight bite in the centre. If the rice needs more time, remove the lobster and shrimp and reserve on a plate; then add 1/4 cup – 1/2 cup water and recover to complete the cook. Also check the Socarrat crust, by digging your fork to the bottom of the dish and inspecting the bottom layer. Remove a small bit from the bottom to taste for the toasted character and firmness. If the bottom hasn’t developed a crust, turn the heat up for the final 3–4 minutes of cooking.

Once cooked through with the perfect Socarrat, remove from heat and allow to rest covered with foil for 5 minutes. Add shrimp back just before covering to gently warm it back up before covering with foil if needed.

paella seafood dish photographed from above

While resting, crack the lobster tail shells and remove the meat, and remove the tail vein if present. Add the lobster meat back in just prior to serving, along with lots of fresh lemon wedges and some fresh parsley. Be sure to scrape up the delicious Socarrat while serving—my favourite part!

A closeup of the colourful paella with red lobster, yellow lemons and golden rice
paella seafood dish photographed from above
5 from 6 votes
Print

Chicken Lobster Shrimp Paella

A classic Paella with tips to achieving a great toasted rice base.

Course Main Course
Cuisine Spanish
Prep Time 15 minutes
Cook Time 1 hour 15 minutes
Resting time 5 minutes
Servings 6

Ingredients

  • 2 tbsp olive oil
  • 4 boneless, skinless chicken thighs, cut into bite-sized pieces
  • 1 Spanish onion, finely chopped
  • 3 garlic cloves, minced
  • 2 medium tomatoes, grated on the large holes of a box grater (about 1 cup)
  • 1 tbsp Smoked Spanish Paprika
  • 10 oz Bomba rice (about 1.5 cups)
  • 3 dry-cured Chorizo, cut into rounds
  • 4 cups hot chicken broth, infused with Saffron strands for 1 hour
  • 1/2 red pepper, sliced into long thin strips
  • 6 jumbo shrimp
  • 2 lobster tails, or 4 scampi tails
  • 1 lemon, cut into wedges
  • 1/4 cup roughly chopped parsley

Instructions

  1. Heat oil in paella pan over medium heat. Add chicken, season with salt and pepper, and cook until evenly browned but not cooked through, about 4–5 minutes. Remove chicken from pan. 

  2. Make Sofrito: add onion and a bit more oil if pan is looking dry. Cook 2–3 minutes until translucent. Add grated tomato and garlic. Add more salt and pepper to taste. Cook approximately 45 minutes, scraping brown bits from bottom every 5–10 minutes. Loosen brown bits with a bit of water to release from bottom of pan if needed. After 45 minutes the colour should darken to a reddish caramel brown.

  3. Add paprika and rice; stir to combine and lightly toast rice. Add reserved chicken, chorizo and chicken stock to pan, stir to combine well. Aim to spread rice grains evenly along bottom of pan. Bring to a boil, then reduce heat to maintain a steady simmer. Cook approx. 15 minutes (do not stir), until rice is starting to surface as it absorbs the liquid. Check for even heat and move pan position over burner/rotate slightly as needed. 

  4. Add the red pepper strips in a fanning circular pattern towards the outer edge of the pan. Place shrimp and/or scampi tails in a circular pattern towards the centre of the pan, pressing into the rice a bit so they are almost flush. Cover the seafood with foil and cook 8–10 minutes until cooked through—the colour should be a bright pink. Taste the rice, it should have a slight bite in the centre. If it’s not quite done, add 1/4 cup – 1/2 cup water, recover with foil and cook 4 more minutes. Also test for the socarrat crust by pressing a spoon tip into the rice. If there is a firm layer at the bottom it’s good. If not, turn up the heat for the final 4 minutes. If the lobster and shrimp are cooked before the rice, remove and set aside until the rice is cooked.

  5. Remove from heat and allow to rest, covered with foil or a towel, for 5 minutes before serving. While resting, crack and remove the lobster tail shells and veins, discarding. Add lobster meat back to the pan. Garnish with parsley and lemon wedges, and serve straight from the paella pan at the table. 

Pintrest Paella image

Filed Under: Main, Recipe Tagged With: bomba rice, chorizo, lobster, Paella, seafood, shrimp, Socarrat, Sofrito, Spanish

Hyderabadi Biryani

November 4, 2018 By Caroline 11 Comments

Hyderabadi Biryani showing chicken, colourful rice, mace and spices

This post has been over three years in the making! It all started when I travelled to Hyderabad, India for a business trip in 2015. I was a few months into a new role as Creative Director, and it was my first visit to India. I was super excited to meet my design team as well as the extended Canadian marketing team in the area. It was an amazing trip where I experienced streets full of energy and life, colours, spices and the warmth of the local people.

Hyderabad is known for Biryani and I enjoyed it several times during my visit. Most Biryanis were made with goat, and they were often served in the pot, brought right to the table. When you plunged the serving spoon into the Biryani pot, there were colourful layers—and at the bottom, tender, spicy meat.

On my last day, one of the designers gave me a parting gift—all of the spices one would need to make a Biryani! I asked if he had a recipe, but he didn’t and no one else I asked had one either. I wasn’t sure how I would replicate this dish at home, but was intrigued with the idea of trying to make this and share it with my friends and family.

Upon returning home, I was eager to try some local Biryanis in the Toronto area. However each time I was disappointed that they were more like a stir-fry and didn’t have the layering with tender meat like the ones I had in Hyderabad. I did some research, and learned that Biryani was believed to have originated in the kitchens of the Nizam of Hyderabad. I remembered I had visited the Nizam’s palace with one of the designers, it is so beautiful. A few photos are below:

Beautifully intricate details of white relief on yellow inside Chowmahalla palace


Outside admiring the beautiful architecture of Chowmahalla Palace

After experimenting with several recipes, I developed the method shown here. Chicken is easier to come by here rather than goat meat, so I went with bone-in chicken thighs as this cut would remain tender.

A key ingredient to locate was authentic red, spicy Indian Chili powder (not to be confused with Mexican/American Chili powder which is much darker in colour, contains ingredients other than pure chilies, and is much less hot). This recipe has been adjusted to use the spicy Indian Chili powder which is made from pure ground chilies. The heat is just a bit less than Cayenne pepper. Kashmiri Chili powder would also work well—if you find that type, you can probably use more as it is less hot than Chili powder. If you can only find the Mexican style Chili powder, you can mix about one part Cayenne Pepper to three parts Paprika to simulate Kashmiri Chili powder. Below you can see the brilliant colours coming together for the spicy chicken marinade.

Chicken and bright red and green spices layered in a bowl

Hyderabadi Biryani chicken marinade with yogurt and spices

Another key ingredient is Ghee—a type of clarified butter with a delicious nutty flavour. I’ve seen this around quite a few supermarkets, however it’s pretty easy to make yourself from regular butter (and less expensive). Google it, whip up a batch, and story any extra in a jar in the fridge. It pretty much lasts forever that way. Or just buy it—whatever works for you!

Once you’ve got the meat marinating, you’ll need to fry up the red onions and almonds in the Ghee. And when it comes time to start cooking the chicken, this is also cooked in Ghee at the bottom of the pot, as shown above.

Colourful layers make up a proper Hyderabadi Biryani

The trickiest part of making this dish is getting the perfect cook for the rice. You par-cook Basmati rice and then add it to the pot with the meat to finish it. The first few times I made it, I had a tendency to over-cook the rice and it wasn’t quite as firm a texture as I would have liked. After making some notes and adjusting the par-boil cooking time down a bit, it came out pretty perfect.

Above and below, you’ll see the layering happening: meat on the bottom, followed by fried onions and more ghee, then rice, followed by more fried onions and cilantro, followed by more rice, ending with fried almonds and a bit of mace.

Hyderabadi Biryani with top layer of almonds and ghee

Finish the cooking with a tight-fitting lid and you are ready to serve up one awesome Biryani! I always accompany it with some home-made cucumber yogurt raita, which allows me to tolerate the spice factor of this dish.

Hyderabadi Biryani with chicken showing colours of saffron, golden shallots and bright mace

This Biryani has vibrant colours and flavours, I will always remember my visit to Hyderabad and the wonderful people I met every time I make this dish. Give it a try, and let me know how you find it!

Chicken Hyderabadi Biryani with raita on striking black place setting

Below are a few of my favourite photos from the trip. In particular, the top centre photo always makes me smile. While touring Golconda Fort, people kept gesturing to me with their camera. I thought they were asking me to take their photo for them. My more experienced travel companion pointed out that actually, they wanted a photo of us! I guess they don’t see very many North Americans out this way. At one point, four people were taking my photo at once. It was so bizarre, I held up my camera and captured them all taking their photos of us. It was like having our own paparazzi crew following us around, LOL!

Memories of Hyderabad, India showing spices, people, architecture and colours

Chicken and bright red and green spices layered in a bowl
4.5 from 2 votes
Print

Hyderabadi Biryani with Raita

Fragrant, layered rice with tender spicy chicken at the bottom, this recipe promises an authentic Biryani experience.

Course Main Course
Cuisine Indian
Prep Time 1 hour
Cook Time 45 minutes
Total Time 1 hour 45 minutes
Servings 6

Ingredients

For the chicken

  • 8 - 10 bone-in chicken thighs
  • 4 cloves garlic
  • 1.5 inch fresh ginger, peeled and sliced
  • 3/4 cup plain yogurt
  • 1/2 tbsp Indian Chili powder
  • 1/2 tbsp garam masala
  • 1/3 cup chopped fresh cilantro
  • 2 green chilies, sliced in half lengthwise and crosswise

For the onions and almonds

  • 2 red onions, thinly sliced
  • 3 tbsp ghee
  • 2 tbsp vegetable oil
  • 1/3 cup whole, peeled almonds

For the rice

  • 2 cups Basmati rice
  • 2 Bay leaves
  • 6–8 whole cloves
  • 2 medium pieces Cinnamon bark (cassia)
  • 1/2 tsp whole Jeera (Cumin seeds) or Caraway Seeds
  • 6 Cardamom pods
  • salt
  • 1/4 cup warm milk infused with Saffron
  • 1 tbsp Mace pieces

Instructions

  1. Place chicken thighs into a medium size bow, or into a large ziplock bag; set aside. In a small food processor, blend garlic and ginger into a paste. Add to bowl with chicken thighs along with the juice of 1/2 lemon. Stir well to combine and coat the chicken. Add spices, yogurt, half of the chopped cilantro and chilies. Stir to combine and marinate for a minimum of 30 minutes, or overnight in the fridge.

  2. Peel and thinly slice the onions. Melt Ghee in a large frying pan and bring to high heat; add about 2 tbsp vegetable oil and the onions. Fry until golden and crisp. Remove from pan with a slotted spoon to a small plate and reserve. Next, add the almonds to the pan and stir until golden on both sides. Remove and set aside on another small plate. Reserve the Ghee/oil mixture from the pot into a small heat-safe container.

  3. Rinse the rice, then place into a large bowl. Add water and soak rice for 30 minutes. 

  4. Add 3 tbsp reserved ghee to a large dutch oven, and heat to medium-high. Transfer marinated chicken to the pot, and cook for about 10 minutes. 

  5. Fill a medium pot of water set over high heat. Add Bay leaves, cloves, cinnamon, caraway, cardamon, salt, and the juice from 1/2 lemon. Bring to a boil. Drain the rice, and add it to the boiling water. (Cook it like pasta, draining excess water when it's ready). Start testing the rice at about 8 minutes—it's ready when it's possible to crush the rice, but it remains firm in the centre. You are aiming for it to be about 2/3 cooked. It shouldn't need to cook more than 10 minutes. 

  6. Drain the rice, and use a slotted spoon to transfer about half of the rice on top of the chicken mixture. Spread remaining fried onions and cilantro on top in an even layer. Transfer the remaining rice to the pot in an even layer. Sprinkle with a bit of rosewater, garam masala, fried almonds and mace pieces. Finish by spooning the saffron milk over everything. Cover the pot tightly, or place a damp towel between the pot and the lid to seal. Cook for five minutes on high. Lower heat to medium and cook for another 15 minutes, then reduce heat to low for 10 minutes. Finally, turn off heat and allow to rest for 10 minutes. Serve and enjoy with cooling raita!


4.5 from 2 votes
Print

Cucumber-yogurt Raita

A wonderful cooling sauce, perfect with a spicy Hyderabadi Biryani.

Course Side Dish
Cuisine Indian

Ingredients

  • 1 large unpeeled seedless cucumber, coarsely grated
  • 1 cup plain greek yogurt
  • 1/4 cup packed chopped fresh mint
  • 1 tsp ground cumin
  • pinch cayenne pepper

Instructions

  1. Wrap cucumber in a kitchen towel and squeeze dry. Add yogurt, mint, cumin and a pinch of cayenne pepper into a small food processor. Add cucumber and blend until smooth. Season to taste with salt and pepper. Cover and refrigerate at least two hours for the flavours to meld—or overnight. Serve chilled.

/>

Filed Under: Main, Recipe Tagged With: almonds, Basmati, Biryani, chicken, ghee, Hyderabadi Biryani, India, red onions, rice, spice, spicy

Beef Bone-broth with Cream of Wheat Dumplings

March 18, 2018 By Caroline 7 Comments

Rich and savoury beef broth with fluffy cream of wheat dumplings add up to pure comfort in a bowl. This recipe packs a two-for-one punch: make the broth recipe, use part of it for the dumpling soup, and then freeze the rest to use later as your very own personal stash of beef stock. It will do wonders for pan sauce, add body to gravy and is so much better than using canned broth.

Beef Bone Broth Soup with Cream-of-Wheat Dumpings

There is something very satisfying about taking a cheap bag of bones from the butcher shop and turning them into a delicious, healthy broth. Making bone-broth changed me. Now I look at bones from roasts, steaks, etc as possible additions to my next bone broth—I simply carve off most of the meat (leaving a bit on helps flavour the broth) and freeze the bones, saving them up until my next batch.

While bone broth has been trending these days as a source of collagen and minerals, Grandmothers everywhere have been making it for decades, and for good reason. The nice thing is you really don’t have to worry too much about exact measurements when it comes to making homemade broth. Work with as many bones as you can fit into your stock pot, top with water, add a few veggies and flavourings and let it all simmer for hours.

To extract maximum flavour from the bones, roast them in the oven first. This will provide crisp, darkened bits of flavouring to enhance your broth. I add the carrots and onions to bring out their sweetness as well. The roasting pan will emerge an hour later, crackling, sizzling and full of lots of browned bits.


Beef bones in a roasting pan with a few veggies

Beef bones roasted for bone-broth

While the bones are roasting, grab a few herbs (don’t overdo it, you don’t want to overly flavour the stock but just add a few subtle notes). Wrap them in a cheesecloth bundle and tie with kitchen twine, so they won’t fall apart during the hours of simmering to follow. This little package is also known as a “bouquet garni.”

Prep a bundle of herbs in cheesecloth to flavour broth

Once you’ve roasted the bones, remove them from the roasting pan and place them in a large stockpot. Add water to the roasting pan and scrape up the browned bits at the bottom of the pan (this process is similar to the early steps of making gravy). The water will take on a lovely deep golden hue as you pull up all the flavour from the roasted bones and veggies. Once you’ve scraped it all up, transfer the water and any browned bits to the stockpot. Add the bouquet garni, celery, and top with water to fully cover the bones.

Deglazing Extracts Flavour from Bone-Broth

At this point, you can pretty much walk away, simmering the pot for hours, checking on it every hour or so to stir things up a bit. I simmer my broth uncovered to condense the flavours. It saves space in the freezer and I just add water back in as needed when I’m ready to cook with it.

Everything in the stockpot

Once done (five hours should be plenty of time but you can simmer a bit longer if you like) remove the bones and meat from the pot. (if you have a dog, they will go crazy for the soup meat (which you should remove from the bone before giving to them so they don’t choke on any bone pieces). Otherwise, it tends to be pretty flavourless after all that cooking and can be discarded.) Strain the stock into a separate container to remove any small bones or pieces so you are left with simply the pure, clear broth. Ideally, allow this to cool and place in the fridge overnight. This step will cause the fat to solidify at the top of the broth so you can easily lift it out in one piece and discard it. Otherwise, if you don’t want to wait, skim the fat from the top by hand before adding to any recipes.

With the fat skimmed off of the broth, one trick to freeze it is to use an ice-cube tray to freeze into 1-2 tablespoon cubes. You can freeze these in a ziplock baggie to drop into sauces, gravies etc. You can also use larger ziplock containers depending on how you plan to use it later. Remember to add a label with what it is and the date you made it!

Now, on to the Cream of Wheat Dumplings! These are based on a classic style of dumpling originating in Austria, known as Griessnockerl. Traditionally, I believe these were made with Semolina flour, however I use Cream of Wheat which is more readily available and makes for a nice, fluffy dumpling.

These are super easy. Start with room temperature butter, an egg, and some salt. Mix with a fork until the mixture is lumpy and looks like the photo below.

Make Dumplings Mix Egg Butter Salt

Next, add the cream of wheat and combine well with a fork, stirring and pressing for about one to two minutes. The mixture will be smooth and fairly firm. It should sit for ten minutes before you cook it. I once left it out for an hour causing it to get too soft. Then when I went to add it to the soup, it all fell apart. So don’t leave it for too long. Ten minutes is perfect. While it’s resting, heat up your beef bone broth and water. Add a bouillon cube and bring to a boil. Do a taste test for salt and flavour levels—usually I find more salt is needed. When the broth tastes right, and the dumpling batter is ready to go, it’s time to shape those dumplings!

Make Dumplings add Cream-of-wheat

This step takes a bit of practice. Use two spoons (very small spoons, ideally, as these dumplings will easily double in size while they cook). Pick up about 1/2 teaspoon of the dumpling batter in one spoon. Use the second spoon to shape into an oval shape, pressing the dumpling together. Drop into the soup, and keep going until all of the dumplings are done.

A few notes to avoid any issues with the dumplings falling apart (which so far has only happened to me once!)

  • Use room temperature, not melted, butter for your batter
  • Allow the batter to rest for ten minutes before you start to shape the dumplings—but not much more than fifteen minutes, to avoid the batter becoming too soft.
  • Don’t have the broth at a rolling boil when dropping the dumplings in, keep it at a gentle simmer.
  • Shape the dumplings fairly tightly so they hold together well. If they are too loose they might fall apart in the broth.

Depending on how large you made them, the dumplings usually take about ten to fifteen minutes to cook. They will float to the top when they are close to being done. Test one first, by cutting through it. The inside should be a uniform consistency. If the centre is still hard, you need to cook them a bit longer.

Use two small spoons to shape dumplings

Serve sprinkled with freshly chopped chives. Some Maggi (seasoning sauce) at the table is always a good idea too in case anyone wants a bit more flavouring in their soup. A nice appetizer before a meal, or as a light lunch, this soup is both comforting and delicious!

Beef Bone-Broth Soup with Cream of Wheat Dumplings

Beef Bone Broth Soup with-Cream-of-Wheat Dumpings
4.5 from 2 votes
Print

Beef Bone-broth with Cream of Wheat Dumplings

A beautiful savoury beef broth full of natural collagens with fluffy cream of wheat dumplings. A traditional Austrian soup often served as a first course.

Course Appetizer
Cuisine Austrian
Servings 4

Ingredients

Beef Bone Broth

  • 2-3 fresh parsley sprigs
  • 2 fresh thyme sprigs
  • 1 Bay leaf
  • 5 black peppercorns
  • 4-5 lb meaty beef shanks/bones
  • 1 meaty veal shank
  • 2 onions: peels on, quartered
  • 1 large carrot, quartered
  • 2 ribs celery, quartered
  • water to cover bones
  • 1 1/2 tsp salt

Cream of Wheat Dumplings with Beef Bone Broth

  • 4 cups beef broth
  • 2 cups water
  • salt to taste
  • 1/2 beef boullion cube
  • 2 tbsp softened unsalted butter
  • 1 egg
  • 1/2 tsp salt
  • 1/2 cup cream of wheat
  • chopped chives to taste

Instructions

Beef Bone Broth

  1. Preheat oven to 450°. Spread bones, veal shank, onion and carrot in a roasting pan. Transfer to the oven and roast until dark brown in places, about one hour.

  2. Make bouquet garni: wrap herbs, Bay leaf and peppercorns in a cheesecloth and tie with kitchen twine.

  3. Transfer the roasted bones and veggies into a large stockpot. Add approximately two cups of water to the roasting pan, scraping up browned bits from the bottom. If you roasting pan is stovetop-safe, heating it on the stove may help loosen more bits. Add to stockpot with celery pieces. Top pot with water until bones are covered, and bring to a boil. Add salt. 

  4. Froth will develop at the top of the stock, especially during the first hour. Skim and discard the foam. Simmer gently uncovered for five to seven hours. Remove large bones and pieces from the pot and discard. Strain the broth through a fine sieve. Cool and refrigerate overnight to allow the fat to solidify at the top, remove. Transfer to storage containers and freeze/use as needed.

Cream of Wheat Dumplings with Beef Bone Broth

  1. Heat beef broth and water, add bouillon and taste and adjust seasoning as required. Bring to a gentle simmer.

  2. In a small to medium bowl beat egg. Add butter and salt, and combine well with a fork. Add cream of wheat and mix well with a fork, pressing to combine ingredients. Allow to rest for ten minutes.

  3. Using a very small teaspoon, take 1/2 tsp of batter and use a second spoon to shape it into an oval dumpling, pressing together. Drop into the broth. Continue with the rest of the batter. If your spoons get sticky, drop into the broth between shaping.

  4. Keeping the broth at a light simmer, cook the dumplings until they float to the top, about ten minutes. Check to see if they are done: cut one if half and see if the centre is consistent. Taste—if the middle is hard, cook for an additional five minutes or so. Serve topped with finely chopped fresh chives.

Rich and savoury beef broth with fluffy cream of wheat dumplings add up to pure comfort in a bowl.

Filed Under: Pleb Feasts, Recipe, Soup Tagged With: austrian, beef, Bone-Broth, Bones, Cream of Wheat, dumplings, German, Griessnockerl, soup

Italian Potato-Sausage Soup

March 11, 2018 By Caroline 5 Comments

A hearty meal with a healthy dose of veggies, this Italian Potato-Sausage Soup is one of the first recipes I ever made. I remember the first time I tried it, I confused a clove of garlic with a head of garlic, so I used 2 whole heads of garlic by mistake! The result, while rather pungent, actually wasn’t half bad 🙂 I learned my lesson for next time and it’s been a favourite dish for over twenty years now! The sausages give the broth a wonderful spicy flavour complimented by the fresh red peppers. Topped with shaved Parmesan cheese and some chives, it comes together quickly for a delicious lunch or dinner.

Italian Potato Sausage Soup with Red Peppers

The original recipe came from a book I had picked up, 30-minute Meals from the Academy. An oldie but a goodie, this book has lots of simple recipes that are easy to pull together and taste great. The book put an emphasis on the mise-en-place method of prepping and cutting all of your ingredients before beginning to cook anything. This was an important lesson to learn when I first starting out—I still remember frantically trying to keep up with prepping ingredients while cooking because I hadn’t thought through how long the prep work would take (and being a newbie in the kitchen, I wasn’t exactly sous chef material!) True to the book, I still prep and chop everything for this recipe before getting started on the stove.

Mise en place - prep all your veggies in advance

It’s worth noting that the quality of sausages you buy will greatly affect the final dish. Rather than the basic grocery store sausages that can be very fatty and overly salted, I go to a good quality butcher offering house made, smaller-batch sausages instead. I find they tend to be much leaner and the spices and overall flavour is so much better. They freeze well, so you can always buy enough for several recipes to avoid too many special trips to the meat shop. I adapted the recipe to include the extra step of removing the sausage casings. It only takes a couple of extra minutes and makes the sausage pieces more meatball like. I also found that while the larger piece sizes recommended for the veggies look quite gourmet, they are hard to manage and not very user-friendly while eating. Instead I go with bite-size pieces that fit easily into a spoon—no extra cutting/wrangling required while eating!

Remove italian sausage casings and cut into meatballs

The sausages start off steaming in a small amount of water, then the water is drained and they are browned on all sides. Once brown, the sausages are removed from the pot and set aside. Olive oil is added, and the veggies are sautéed. I start with the onion, followed by garlic, seasoning and potatoes. I add the red peppers near the end as I like them to remain just a tiny bit crisp. Once the veggies are just slightly golden in places, it’s time to add the broth and tomato paste. The reserved sausages go back in, too.

Saute Garlic, Onions and Vegetables

At this point you just need to cook everything for about 15 minutes or so, until the potatoes are soft and cooked through. Do a taste check for salt and pepper, adding more if needed. A nice crusty baguette with butter on the side round this out for a tasty dinner or hearty lunch.

Add broth and tomato paste and cook soup

To serve, ladle into bowls and top with shaved parmesan pieces and some chives or green onions. Twenty years later, I still make this regularly and it’s a real crowd pleaser. This recipe is a keeper and I hope to make it for another twenty years.

Italian Potato Sausage Soup Topped with Parmesan Cheese

Hearty and delicious, a tomato broth with lot of fresh vegetables and sausage
5 from 1 vote
Print

Italian Potato Sausage Soup

A hearty soup loaded with bright red peppers, garlic, potatoes and sausage that is quick and easy to make.

Course Main Course
Cuisine Italian
Prep Time 20 minutes
Cook Time 20 minutes
Total Time 40 minutes
Servings 5 people

Ingredients

  • 3 Italian Sausages
  • 1/2 cup water
  • 2 tbsp olive oil
  • 1 small red onion, quartered and sliced
  • 550 g baby potatoes, thinly sliced
  • 3 cloves garlic, minced
  • 1 tbsp Italian Seasoning
  • 2 red peppers, cut into bite-sized pieces
  • 156 ml tomato paste (5.5 oz)
  • 900 ml chicken broth (30 oz or 4 cups)
  • salt to taste
  • freshly ground pepper to taste
  • handful of chives, diced
  • Parmesan cheese, shaved

Instructions

  1. Trim, chop and prep all ingredients. Remove casings from sausages and cut into 1" pieces, forming little sausage meatballs.

  2. In a large covered pot over medium-high heat, simmer sausages in 1/4 cup water for four minutes. Drain water, increase heat, and brown sausages on all sides (for about five minutes). Remove sausages and set aside.

  3. Heat olive oil in pot. Add onions and sauté for four minutes. Add garlic, potatoes, Italian seasoning and salt and pepper to taste. Cook for another five minutes. Add red peppers and cook for two minutes.

  4. Add tomato paste, broth and reserved sausages. Bring to a boil and simmer for fifteen minutes, until potatoes are softened and cooked through. Test for seasoning and add more salt if needed.

  5. To serve, ladle into bowls and top with shaved Parmesan, freshly ground pepper and diced chives.

Zesty tomato broth with red peppers, potatoes and sausages

Filed Under: Main, Recipe Tagged With: Garlic, Italian, Parmesan Cheese, potato, Red peppers, Sausage, soup, Tomato

  • Page 1
  • Page 2
  • Page 3
  • …
  • Page 8
  • Next Page »

Primary Sidebar

Welcome to my kitchen journal, a place where I will share my favourite heritage recipes honed over the years, as well as document new evolutions and experiments along the way. Great feasts become vehicles for fond memories—the best meals are the ones someone made with love, for you. Follow me to explore traditions, document stories and experience the joy of the feast. Read More…

  • Facebook
  • Instagram
  • Pinterest
  • Twitter
  • YouTube

Don’t miss a story!

Get email updates

Copyright © 2023