• Skip to content
  • Skip to primary sidebar

Feast & Lore

Food stories featuring heritage recipes and new experiments.

  • Home
  • Recipes
  • About

German

Beef Bone-broth with Cream of Wheat Dumplings

March 18, 2018 By Caroline 7 Comments

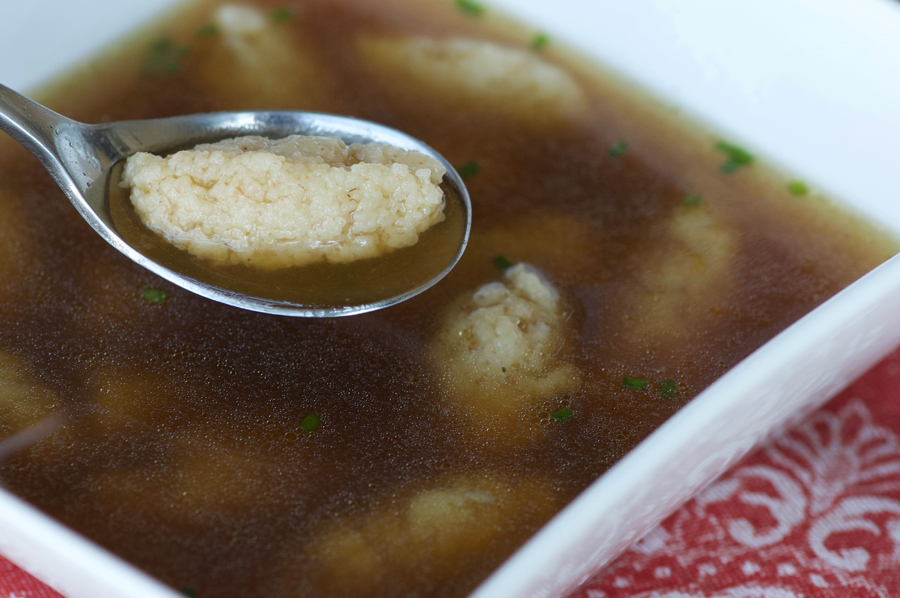
Rich and savoury beef broth with fluffy cream of wheat dumplings add up to pure comfort in a bowl. This recipe packs a two-for-one punch: make the broth recipe, use part of it for the dumpling soup, and then freeze the rest to use later as your very own personal stash of beef stock. It will do wonders for pan sauce, add body to gravy and is so much better than using canned broth.

Beef Bone Broth Soup with Cream-of-Wheat Dumpings

There is something very satisfying about taking a cheap bag of bones from the butcher shop and turning them into a delicious, healthy broth. Making bone-broth changed me. Now I look at bones from roasts, steaks, etc as possible additions to my next bone broth—I simply carve off most of the meat (leaving a bit on helps flavour the broth) and freeze the bones, saving them up until my next batch.

While bone broth has been trending these days as a source of collagen and minerals, Grandmothers everywhere have been making it for decades, and for good reason. The nice thing is you really don’t have to worry too much about exact measurements when it comes to making homemade broth. Work with as many bones as you can fit into your stock pot, top with water, add a few veggies and flavourings and let it all simmer for hours.

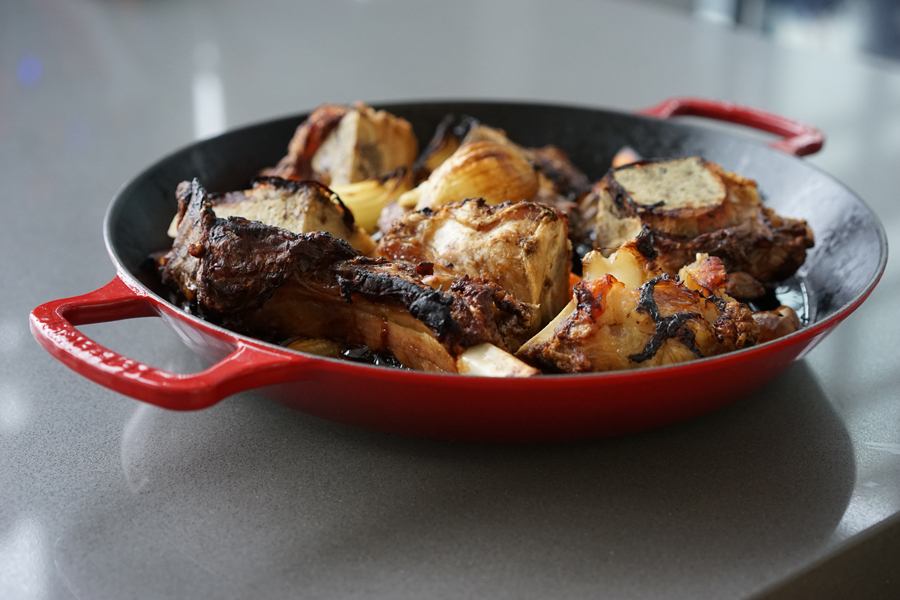
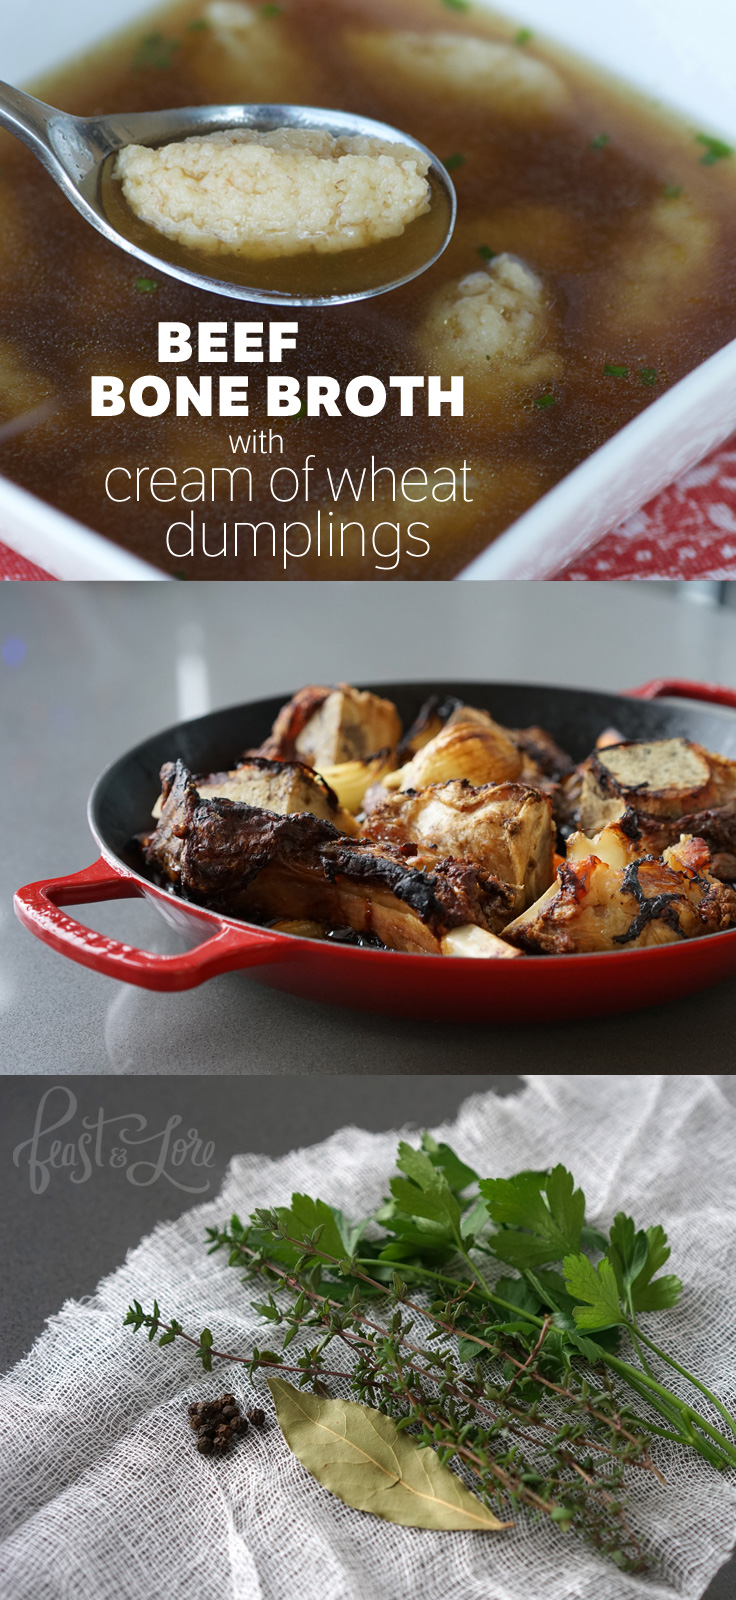
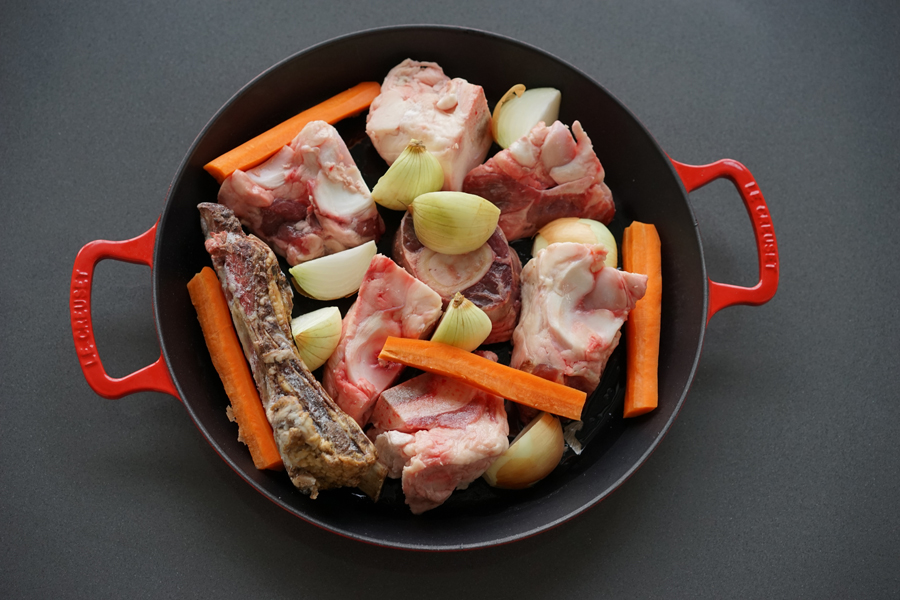
To extract maximum flavour from the bones, roast them in the oven first. This will provide crisp, darkened bits of flavouring to enhance your broth. I add the carrots and onions to bring out their sweetness as well. The roasting pan will emerge an hour later, crackling, sizzling and full of lots of browned bits.


Beef bones in a roasting pan with a few veggies

Beef bones roasted for bone-broth

While the bones are roasting, grab a few herbs (don’t overdo it, you don’t want to overly flavour the stock but just add a few subtle notes). Wrap them in a cheesecloth bundle and tie with kitchen twine, so they won’t fall apart during the hours of simmering to follow. This little package is also known as a “bouquet garni.”

Prep a bundle of herbs in cheesecloth to flavour broth

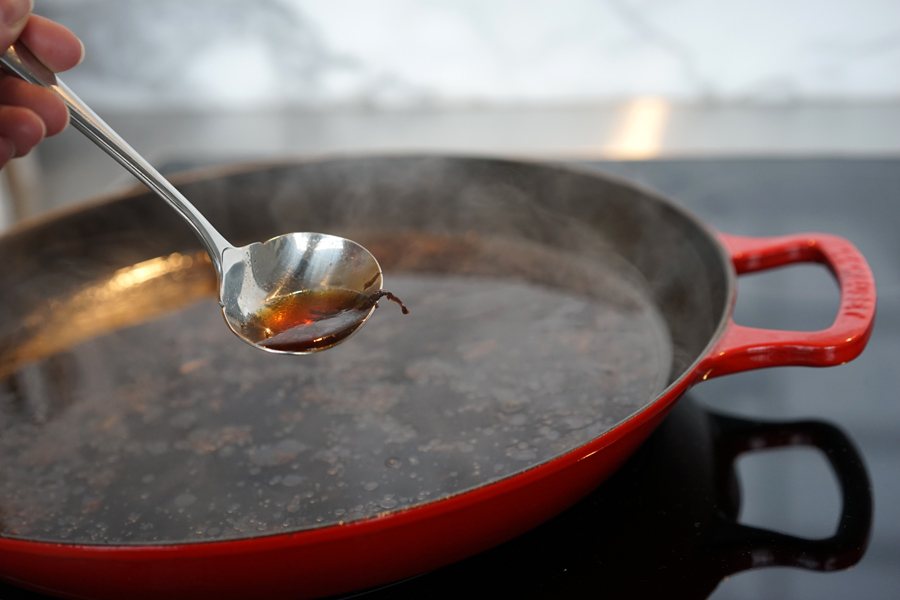
Once you’ve roasted the bones, remove them from the roasting pan and place them in a large stockpot. Add water to the roasting pan and scrape up the browned bits at the bottom of the pan (this process is similar to the early steps of making gravy). The water will take on a lovely deep golden hue as you pull up all the flavour from the roasted bones and veggies. Once you’ve scraped it all up, transfer the water and any browned bits to the stockpot. Add the bouquet garni, celery, and top with water to fully cover the bones.

Deglazing Extracts Flavour from Bone-Broth

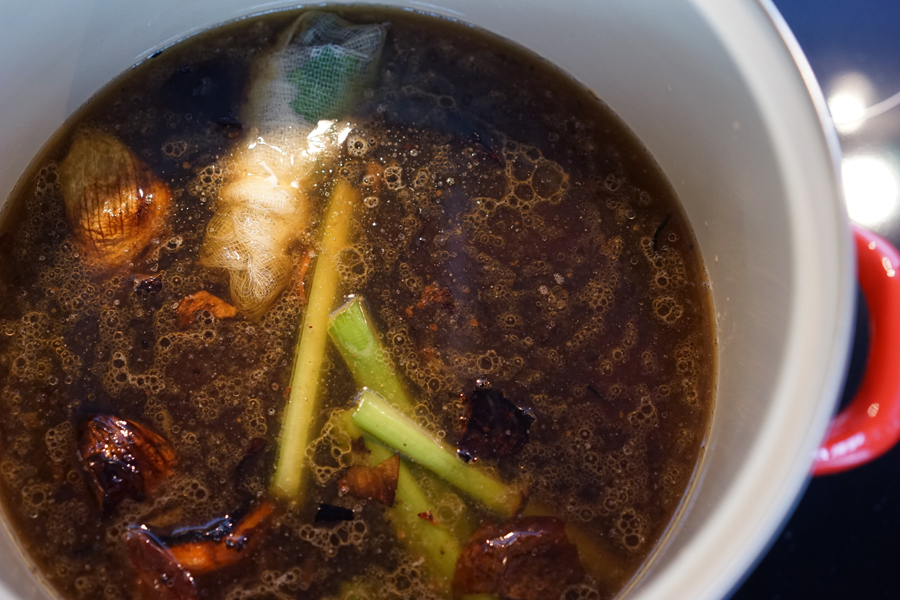
At this point, you can pretty much walk away, simmering the pot for hours, checking on it every hour or so to stir things up a bit. I simmer my broth uncovered to condense the flavours. It saves space in the freezer and I just add water back in as needed when I’m ready to cook with it.

Everything in the stockpot

Once done (five hours should be plenty of time but you can simmer a bit longer if you like) remove the bones and meat from the pot. (if you have a dog, they will go crazy for the soup meat (which you should remove from the bone before giving to them so they don’t choke on any bone pieces). Otherwise, it tends to be pretty flavourless after all that cooking and can be discarded.) Strain the stock into a separate container to remove any small bones or pieces so you are left with simply the pure, clear broth. Ideally, allow this to cool and place in the fridge overnight. This step will cause the fat to solidify at the top of the broth so you can easily lift it out in one piece and discard it. Otherwise, if you don’t want to wait, skim the fat from the top by hand before adding to any recipes.

With the fat skimmed off of the broth, one trick to freeze it is to use an ice-cube tray to freeze into 1-2 tablespoon cubes. You can freeze these in a ziplock baggie to drop into sauces, gravies etc. You can also use larger ziplock containers depending on how you plan to use it later. Remember to add a label with what it is and the date you made it!

Now, on to the Cream of Wheat Dumplings! These are based on a classic style of dumpling originating in Austria, known as Griessnockerl. Traditionally, I believe these were made with Semolina flour, however I use Cream of Wheat which is more readily available and makes for a nice, fluffy dumpling.

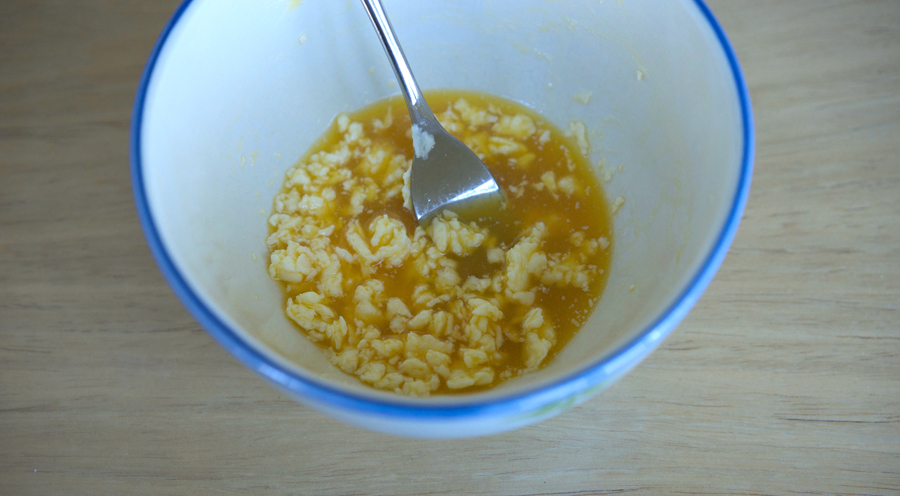
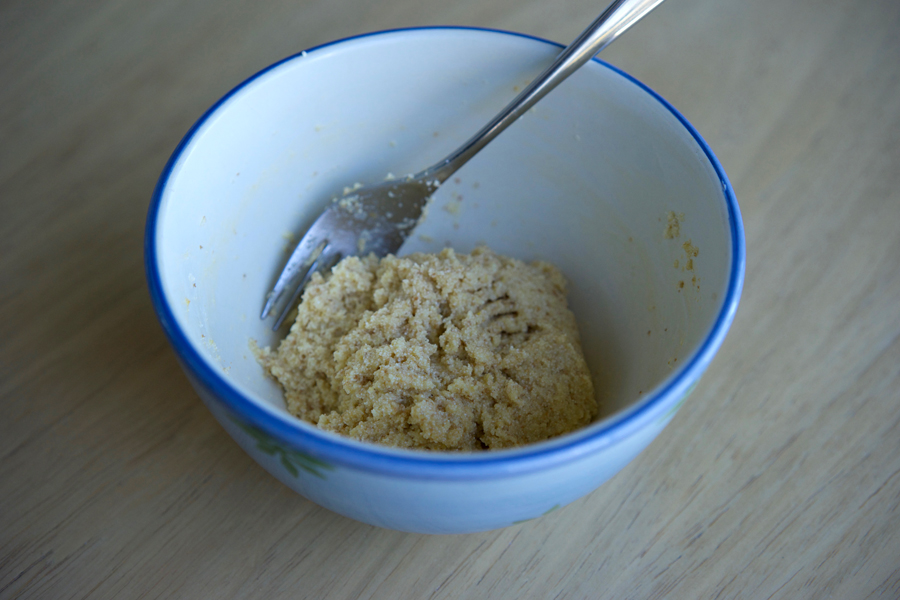
These are super easy. Start with room temperature butter, an egg, and some salt. Mix with a fork until the mixture is lumpy and looks like the photo below.

Make Dumplings Mix Egg Butter Salt

Next, add the cream of wheat and combine well with a fork, stirring and pressing for about one to two minutes. The mixture will be smooth and fairly firm. It should sit for ten minutes before you cook it. I once left it out for an hour causing it to get too soft. Then when I went to add it to the soup, it all fell apart. So don’t leave it for too long. Ten minutes is perfect. While it’s resting, heat up your beef bone broth and water. Add a bouillon cube and bring to a boil. Do a taste test for salt and flavour levels—usually I find more salt is needed. When the broth tastes right, and the dumpling batter is ready to go, it’s time to shape those dumplings!

Make Dumplings add Cream-of-wheat

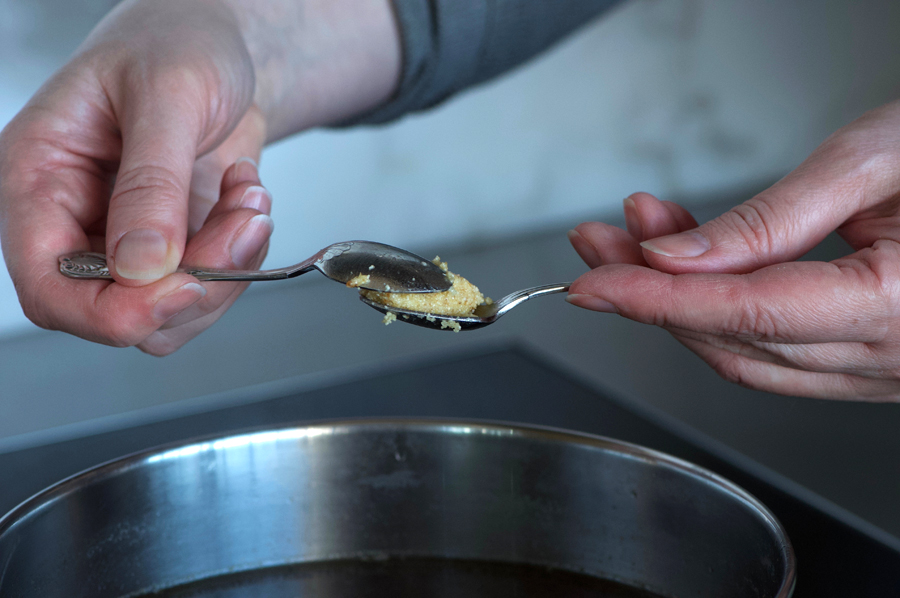
This step takes a bit of practice. Use two spoons (very small spoons, ideally, as these dumplings will easily double in size while they cook). Pick up about 1/2 teaspoon of the dumpling batter in one spoon. Use the second spoon to shape into an oval shape, pressing the dumpling together. Drop into the soup, and keep going until all of the dumplings are done.

A few notes to avoid any issues with the dumplings falling apart (which so far has only happened to me once!)

  • Use room temperature, not melted, butter for your batter
  • Allow the batter to rest for ten minutes before you start to shape the dumplings—but not much more than fifteen minutes, to avoid the batter becoming too soft.
  • Don’t have the broth at a rolling boil when dropping the dumplings in, keep it at a gentle simmer.
  • Shape the dumplings fairly tightly so they hold together well. If they are too loose they might fall apart in the broth.

Depending on how large you made them, the dumplings usually take about ten to fifteen minutes to cook. They will float to the top when they are close to being done. Test one first, by cutting through it. The inside should be a uniform consistency. If the centre is still hard, you need to cook them a bit longer.

Use two small spoons to shape dumplings

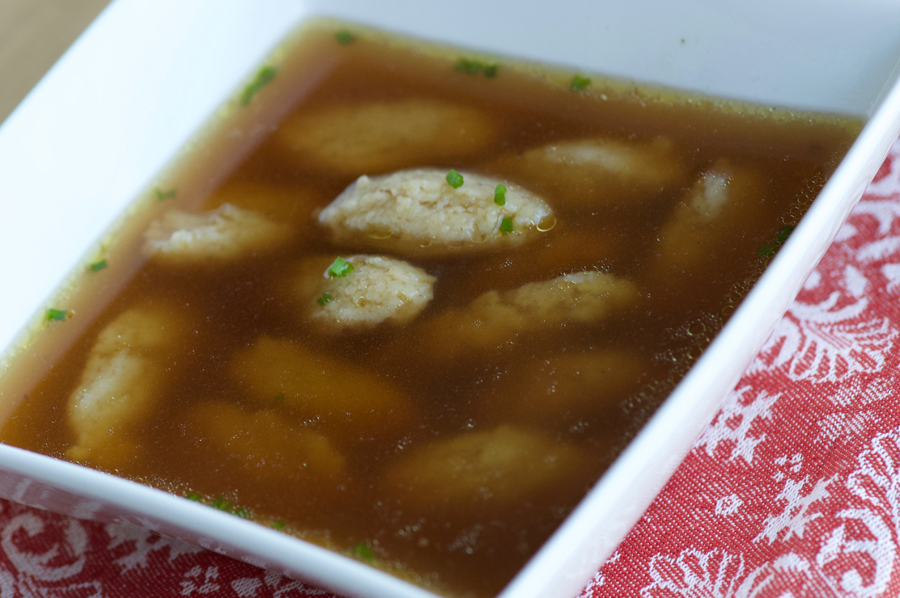
Serve sprinkled with freshly chopped chives. Some Maggi (seasoning sauce) at the table is always a good idea too in case anyone wants a bit more flavouring in their soup. A nice appetizer before a meal, or as a light lunch, this soup is both comforting and delicious!
Beef Bone-Broth Soup with Cream of Wheat Dumplings

Beef Bone Broth Soup with-Cream-of-Wheat Dumpings
4.5 from 2 votes
Print

Beef Bone-broth with Cream of Wheat Dumplings

A beautiful savoury beef broth full of natural collagens with fluffy cream of wheat dumplings. A traditional Austrian soup often served as a first course.

Course Appetizer
Cuisine Austrian
Servings 4

Ingredients

Beef Bone Broth

  • 2-3 fresh parsley sprigs
  • 2 fresh thyme sprigs
  • 1 Bay leaf
  • 5 black peppercorns
  • 4-5 lb meaty beef shanks/bones
  • 1 meaty veal shank
  • 2 onions: peels on, quartered
  • 1 large carrot, quartered
  • 2 ribs celery, quartered
  • water to cover bones
  • 1 1/2 tsp salt

Cream of Wheat Dumplings with Beef Bone Broth

  • 4 cups beef broth
  • 2 cups water
  • salt to taste
  • 1/2 beef boullion cube
  • 2 tbsp softened unsalted butter
  • 1 egg
  • 1/2 tsp salt
  • 1/2 cup cream of wheat
  • chopped chives to taste

Instructions

Beef Bone Broth

  1. Preheat oven to 450°. Spread bones, veal shank, onion and carrot in a roasting pan. Transfer to the oven and roast until dark brown in places, about one hour.

  2. Make bouquet garni: wrap herbs, Bay leaf and peppercorns in a cheesecloth and tie with kitchen twine.

  3. Transfer the roasted bones and veggies into a large stockpot. Add approximately two cups of water to the roasting pan, scraping up browned bits from the bottom. If you roasting pan is stovetop-safe, heating it on the stove may help loosen more bits. Add to stockpot with celery pieces. Top pot with water until bones are covered, and bring to a boil. Add salt. 

  4. Froth will develop at the top of the stock, especially during the first hour. Skim and discard the foam. Simmer gently uncovered for five to seven hours. Remove large bones and pieces from the pot and discard. Strain the broth through a fine sieve. Cool and refrigerate overnight to allow the fat to solidify at the top, remove. Transfer to storage containers and freeze/use as needed.

Cream of Wheat Dumplings with Beef Bone Broth

  1. Heat beef broth and water, add bouillon and taste and adjust seasoning as required. Bring to a gentle simmer.

  2. In a small to medium bowl beat egg. Add butter and salt, and combine well with a fork. Add cream of wheat and mix well with a fork, pressing to combine ingredients. Allow to rest for ten minutes.

  3. Using a very small teaspoon, take 1/2 tsp of batter and use a second spoon to shape it into an oval dumpling, pressing together. Drop into the broth. Continue with the rest of the batter. If your spoons get sticky, drop into the broth between shaping.

  4. Keeping the broth at a light simmer, cook the dumplings until they float to the top, about ten minutes. Check to see if they are done: cut one if half and see if the centre is consistent. Taste—if the middle is hard, cook for an additional five minutes or so. Serve topped with finely chopped fresh chives.
Rich and savoury beef broth with fluffy cream of wheat dumplings add up to pure comfort in a bowl.

Filed Under: Pleb Feasts, Recipe, Soup Tagged With: austrian, beef, Bone-Broth, Bones, Cream of Wheat, dumplings, German, Griessnockerl, soup

Schvetskins (Apricot Dumplings)

August 25, 2017 By Caroline 8 Comments

Imagine your knife cutting through a soft, pillowy dumpling to reveal a juicy, fragrant, perfectly cooked apricot. You sprinkle with sugar to sweeten the fruit, and take your first bite. The crisp sugary breadcrumbs hug the dough and the sweet apricot flavour fills your mouth. This is the Schvetskin experience we enjoy as a special ritual every August when the apricots are at their peak. From humble ingredients—potatoes, breadcrumbs and apricots—you can make a delicious dessert that is hearty enough to be a light meal on its own.

While they may be officially known as Marillenknodel, we’ve always called them “Schvetskins”. You see, you can also make these with other fruits like plums or even cherries. The plum version is called Zwetschgenknoedel, which growing up sounded a lot like “Schvetskin-knoodle”—and the name stuck. So now, any fruit dumplings of this sort, we just go with “Schvetskins” which is easier for us Anglophones to remember!

dark earthy potatoes alongside brilliant apricots in a blue bowl

For many years, Schvetskins were my nemesis. I could not get them to turn out for the life of me. They would always fall apart while cooking and turn into a terrible, goopy mess. I finally figure it out, I wasn’t using enough flour. Too much potato, and your dough will be sticky and fall apart when boiling. Even with a recipe, it can vary depending on your potatoes, humidity and other factors, so this is one you need to develop a bit of a feel for. I’ve included lots of photos to show the texture you are looking for. When in doubt, just add more flour. Better a little on the firm side, than falling apart!

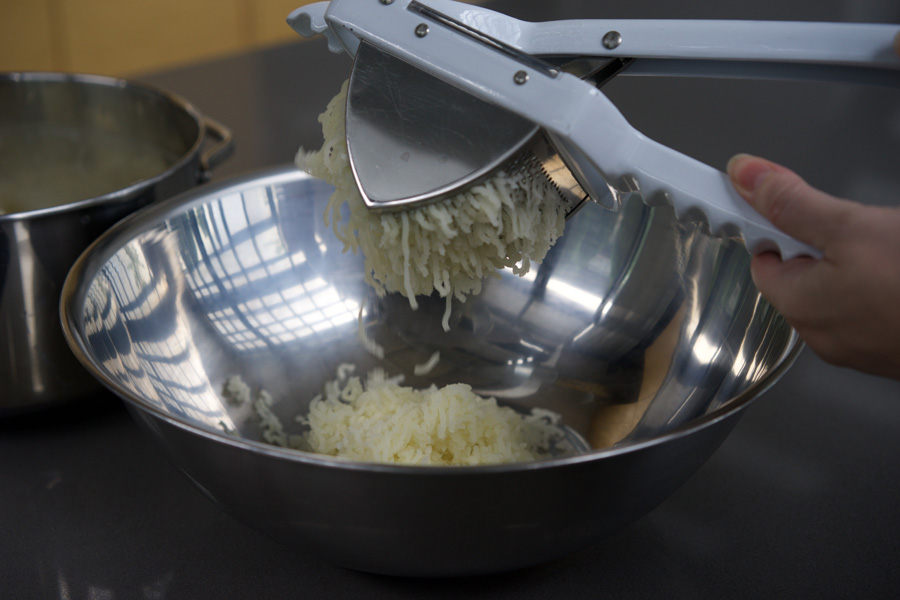
A sturdy potato ricer, like the one shown below, is a great tool for this recipe as it helps ensure there are no potato lumps in your dough. I used to have a cheaper one, but with the russet potatoes I prefer to use for their dryness, it didn’t hold up well and the handles would end up all bent. The one below is from Williams Sonoma and it has very sturdy handles that easily process the potatoes. Reminds me of Play Dough’s “hairdresser” salon kit (I always wanted one of those growing up!)

Potatoes are fed through a heavy-duty ricer

So once you have “riced” your cooked potatoes, you add flour, egg, salt and cream of wheat. I mix it with a fork at first, then you have to get in there with your hands and knead it.

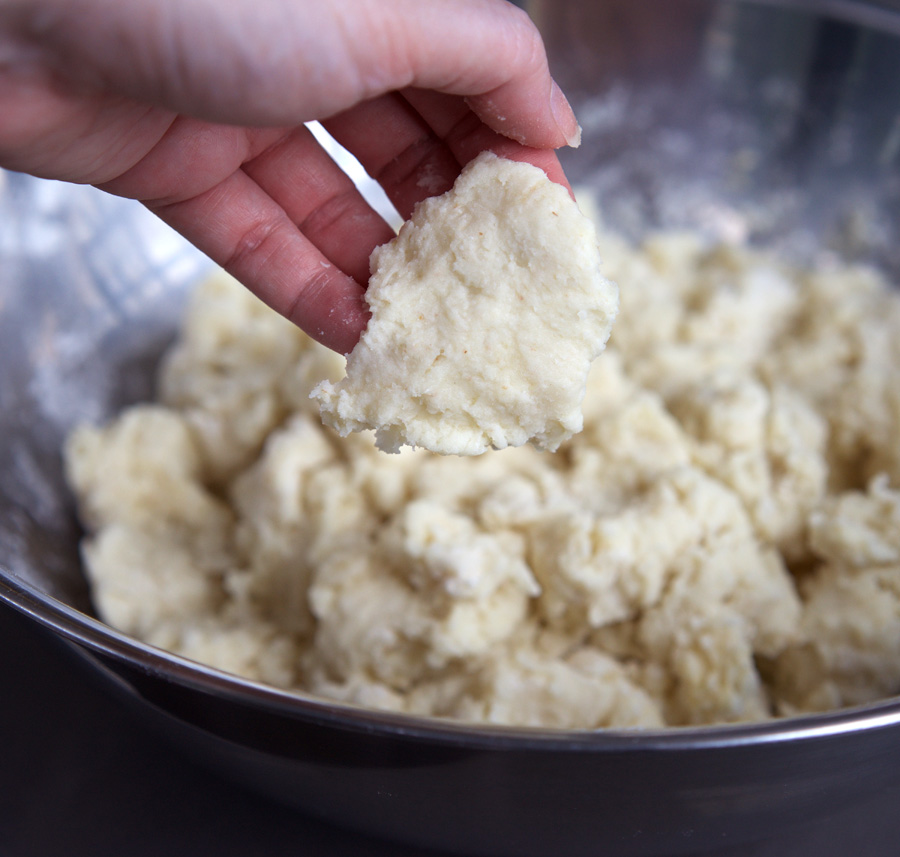
Texture of finished dough is relatively firm and somewhat sticky

Below is a closeup of the dough to help show the consistency. It should only be a little bit sticky, and hold together into a firm shape when pressed.

The dough should hold together into a somewhat sticky but smooth piece when pressed

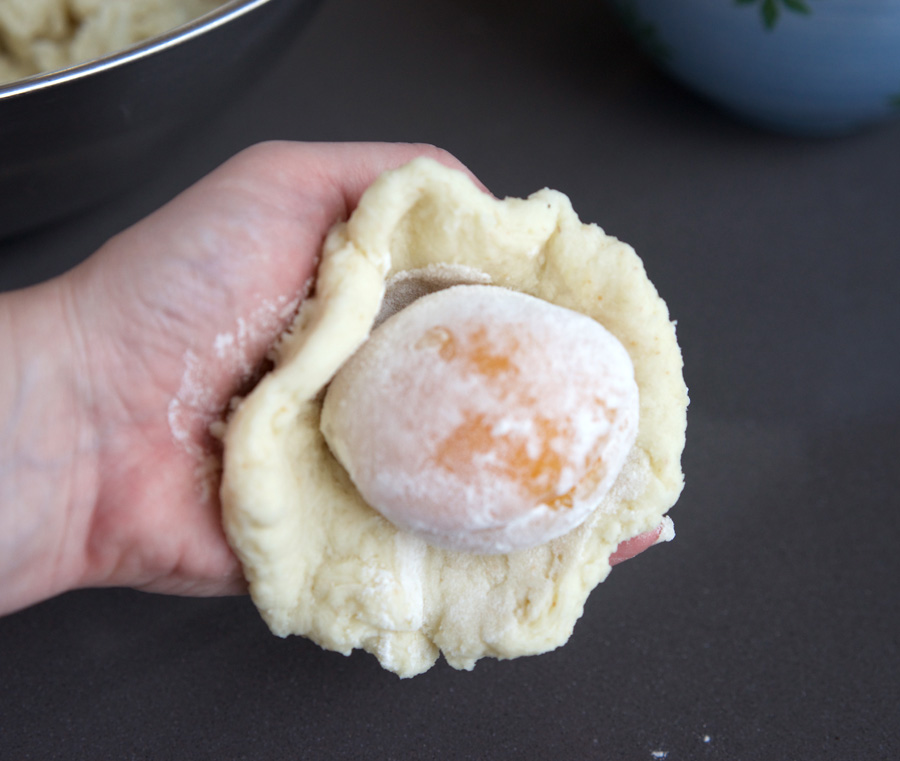
Once you have the dough ready, roll each whole apricot into a little bit of flour. Take a handful of dough, and flatten it into your hand so it is big enough to wrap around the apricot (smaller apricots are ideal to use here). Fit the dough around the apricot and press it together so there are no gaps—this is important as you will be boiling them later so you can’t have any water getting in. If you are finding that the dough is tearing and not forming well around the apricot, you probably need more flour. Roll it in your hands a few times to even out the dough and press out any air gaps that may have formed between the dough and the apricot. Set on a plate while you make the rest.

Once you have used all the apricots, there is usually some dough left. This is perfect for what we call “wutzels” (I don’t even have a story of where that name comes from, just go with it!) This is where you just take a small amount of dough and roll it out to the size and shape of a plump finger. Make a bunch of these and cook them with the dumplings.

Flatten a ball of dough in your hand and insert the apricot

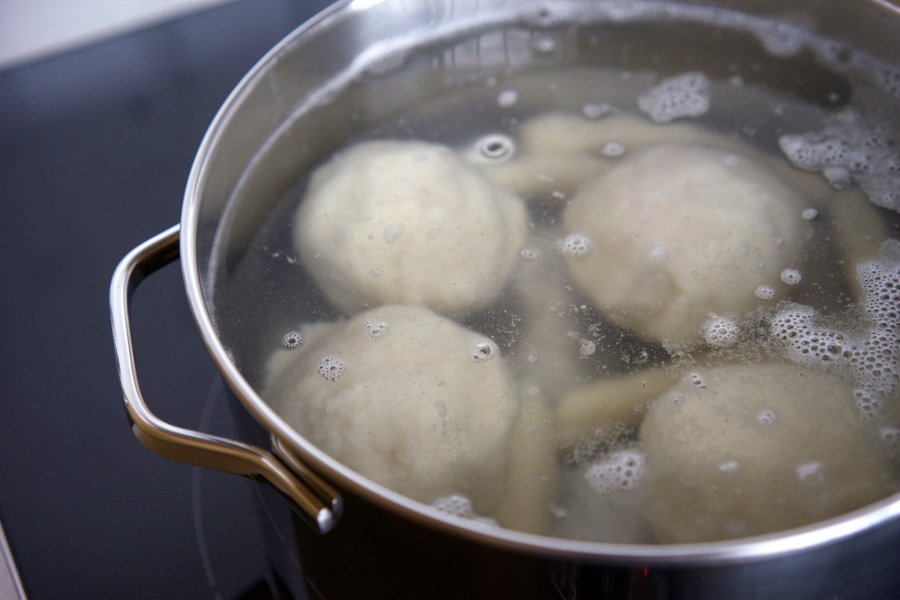
Once they are all ready, get a large pot of water boiling on the stove. Not a rolling boil, as the dumplings are a wee bit delicate; you want a nice, steady simmer. Gently drop the dumplings (don’t forget the wutzels!) into the water.

Dumplings cook in gently simmering water

While they are cooking (usually takes about 20–25 minutes), pull out a large skillet and melt some butter. Add the breadcrumbs and white sugar, and cook on medium-high heat to toast the breadcrumbs. Be careful here, I find it tends to go very slowly at first, so I’ll walk away and ignore it for a while, only to come back to find it on the edge of burning. Once they get going, you need to stir frequently to avoid burnt crumbs on the bottom of the pan (or turn the heat way down).

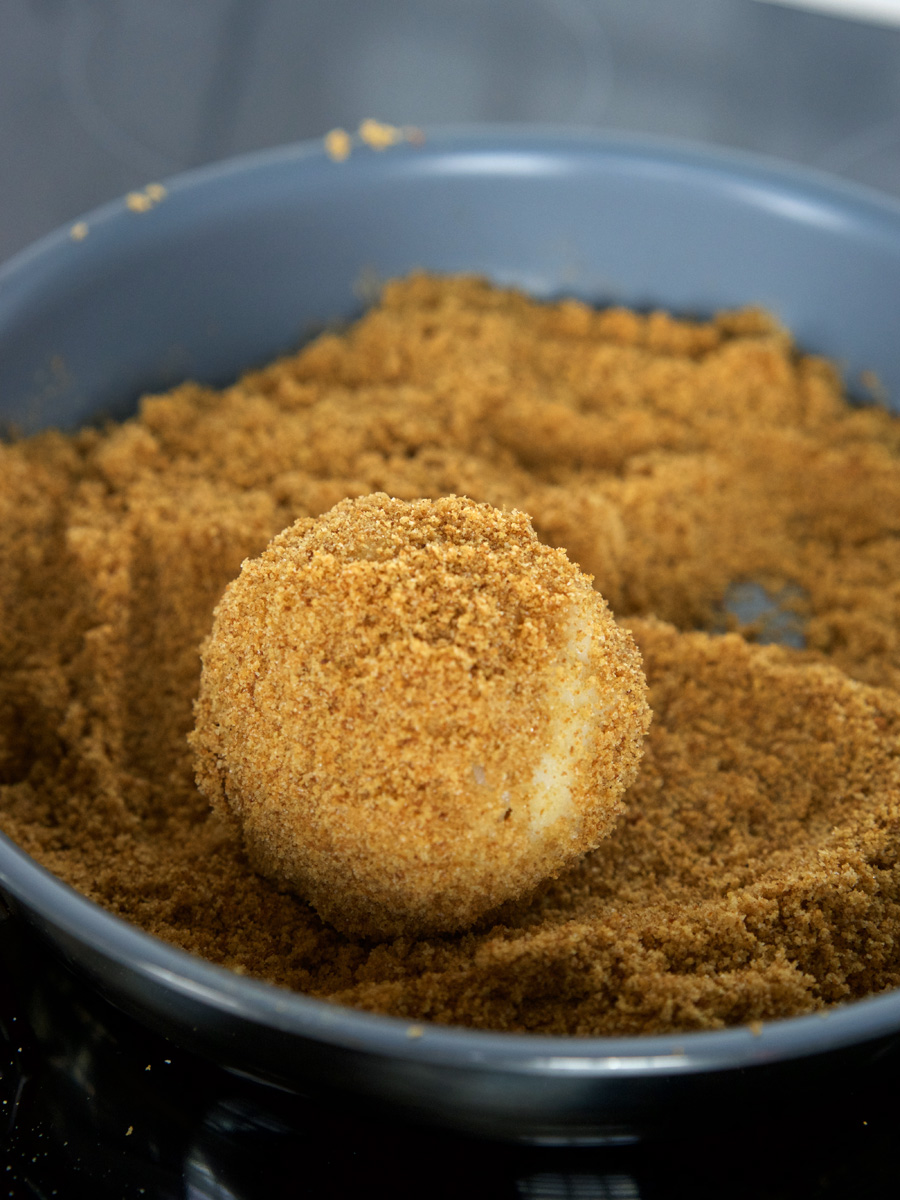
When the dumplings start to float in the water, they are almost done. I give them about 5 or so minutes after they start floating, and then out they come and straight into the breadcrumbs.

Roll cooked dumplings in toasted breadcrumbs

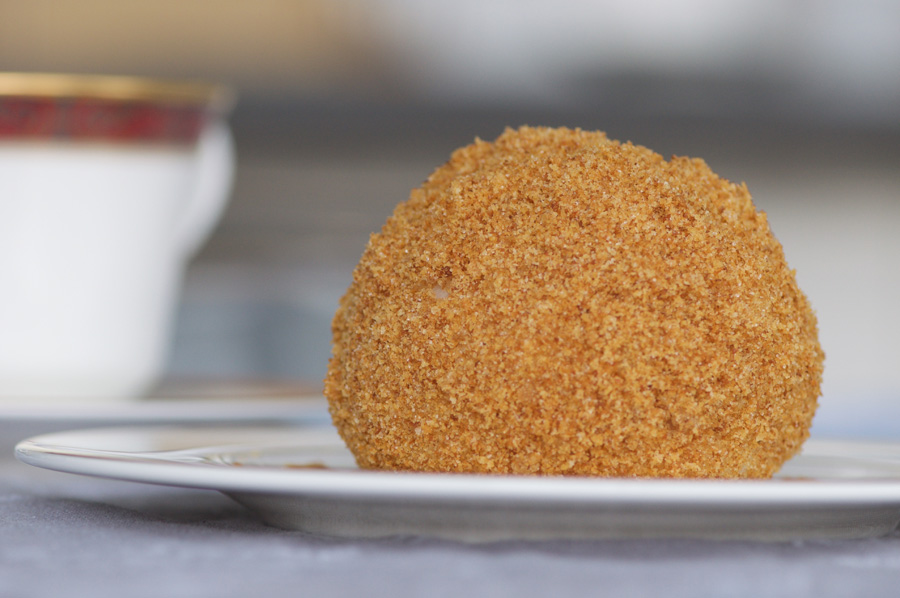
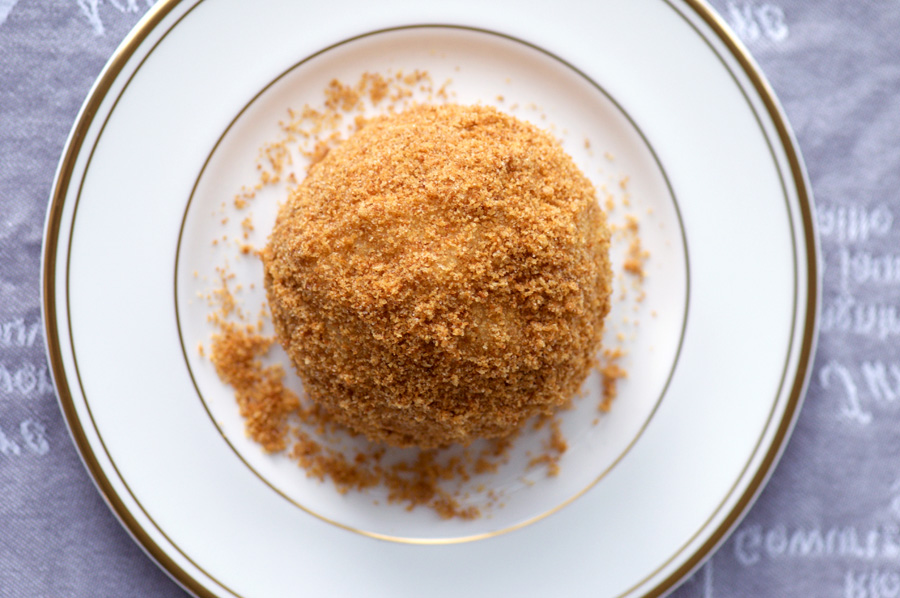
Roll them around and your finished product will look something like this:

The finished dumpling with a golden breadcrumb crust

Dumpling from above

Many recipes call for the removal of the pit, to be replaced with a sugar cube. I find it much easier to just cook these whole, and remove the pits while eating. Adding sugar to your own taste is nice, and I find you can sprinkle it more evenly over the fruit that way.

Have you tried making Schvetskins? If so I’d love to hear what you thought of them!

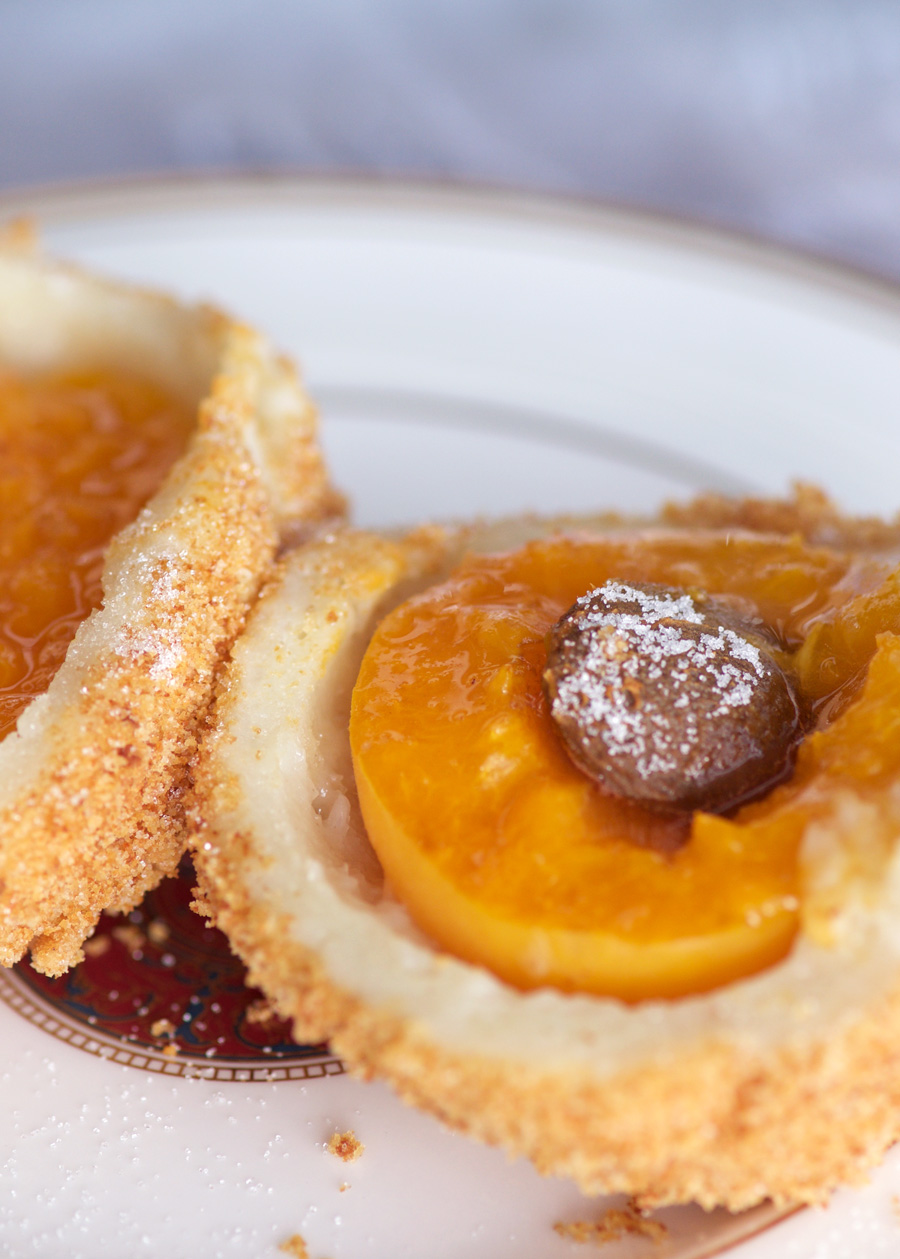
Juicy apricots are lined with the thick potato dumpling

Close up shot of juicy apricots inside fluffy potato dumplings
4.5 from 2 votes
Print

Schvetskins (Apricot Potato Dumplings)

A traditional Austrian treat otherwise known as Marillenknodel.

Course Dessert, Lunch
Cuisine Austrian
Prep Time 40 minutes
Cook Time 25 minutes
Total Time 1 hour 5 minutes
Servings 6

Ingredients

  • 4 Russet baking potatoes
  • 2 eggs
  • 3 cups All purpose flour, + additional for dusting apricots
  • 2 tbsp Cream of wheat
  • 10 Apricots (fresh) smaller size preferred
  • 3 tbsp Butter
  • 1 cup Breadcrumbs
  • 1/3 cup White sugar

Instructions

  1. Boil whole potatoes with skin on until cooked through. (Leaving the skin on keeps the potatoes more dry). Remove skins and process through a potato ricer (or mash very fine until no lumps remain). Place into a large bowl.

  2. Add flour, cream of wheat and eggs. Blend with a fork until mostly combined, then knead into a dough. Texture will be slightly sticky but it should be fairly firm and able to hold together well.

  3. Rinse fruit, roll in additional flour. Pack some dough in your hand about 1/4" thick, large enough to wrap around an apricot. Fit the apricot into the dough, sealing around fruit so there are no openings or cracks. Roll around in your hands to even out the dough and eliminate any air gaps. Repeat until all dumplings have been formed. (If your hands are getting out-of-control sticky, flour them)

  4. Roll any leftover dough into "wutzels"--finger length dumplings without any fruit. 

  5. Place a large pot of water to boil on the stove. Bring to a gentle boil, and drop dumplings carefully into the water, along with the wutzels. Cook at a simmer for 20–25 minutes. When the dumplings float to the top of the pot, give them about 5 more minutes and they will be cooked through.

  6. Meanwhile, melt butter in a large skillet. Add bread crumbs and sugar. Cook until the crumbs are a nice deep golden colour. When dumplings have cooked, add them straight to the breadcrumb pan and roll them to coat. Serve immediately with sugar on the side to sprinkle on the cooked fruit.


Filed Under: Dessert, Main, Recipe Tagged With: apricots, austrian, breadcrumbs, dumplings, German, Marillenknodel, potato, Schvetskins

German Pancake with Cinnamon Apples

June 29, 2017 By Caroline Leave a Comment

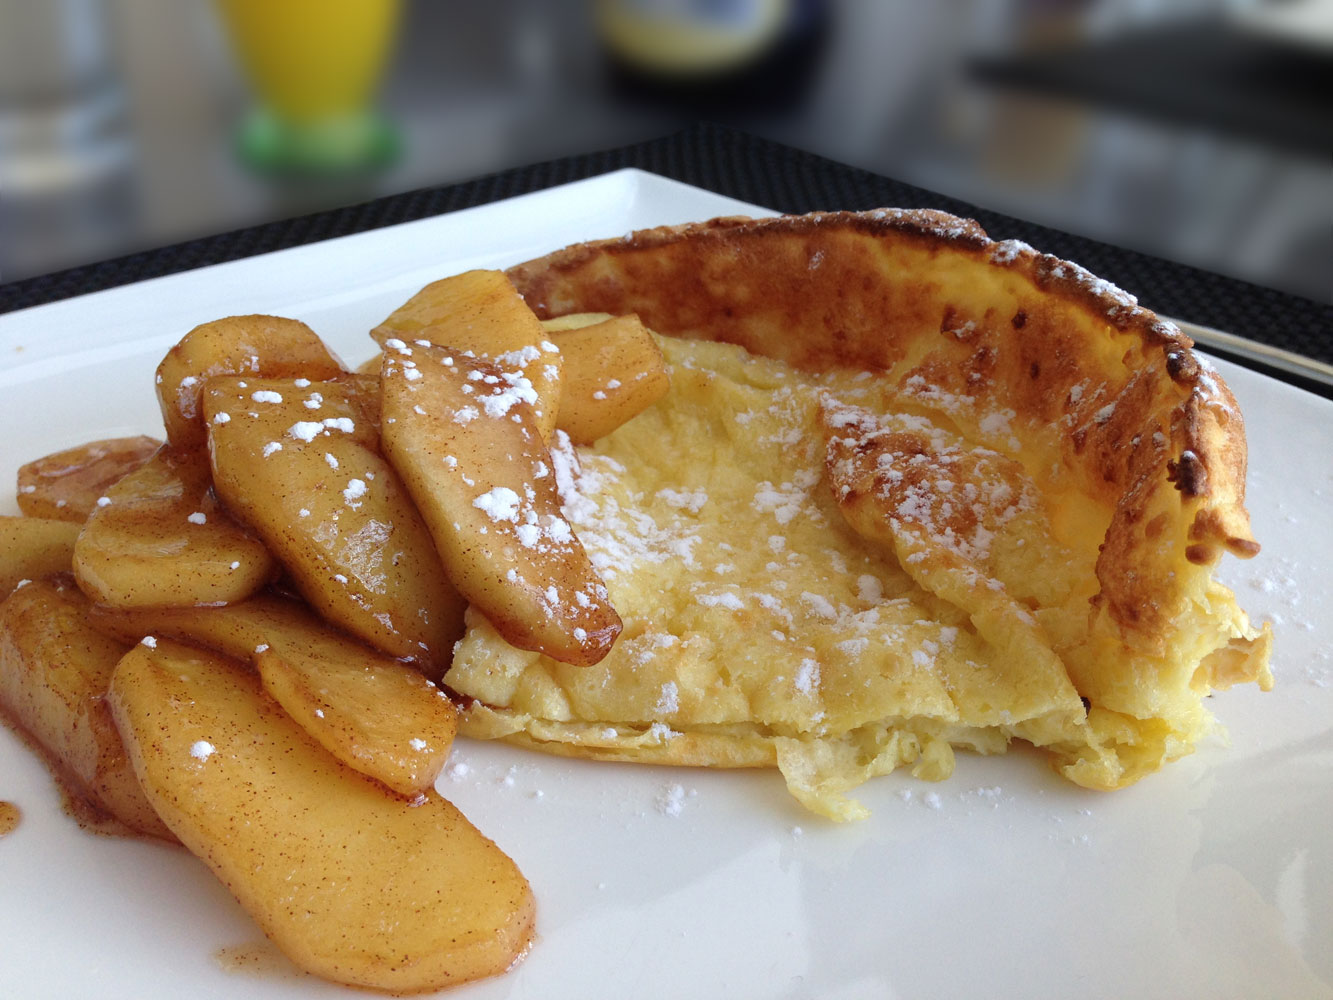
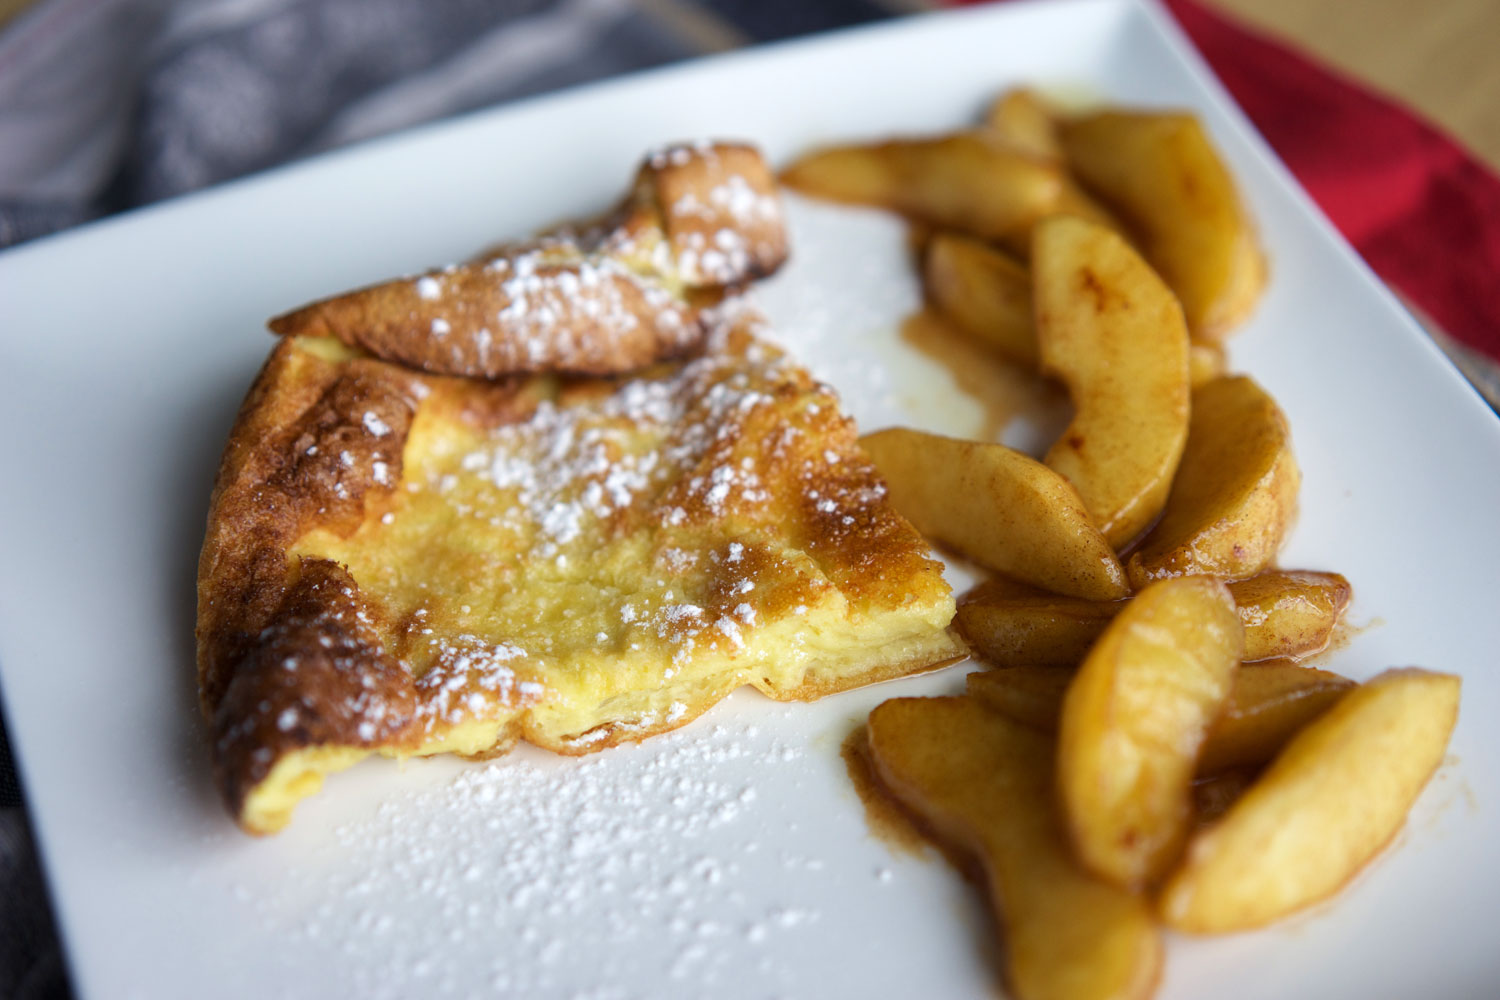
German Pancake with Cinnamon Apples

Slow down, relax and make this breakfast in your pyjamas while everyone else is still dozing this long weekend. The ingredients are simple, yet the result of a German pancake, glorious and puffy right out of the oven, is spectacular.

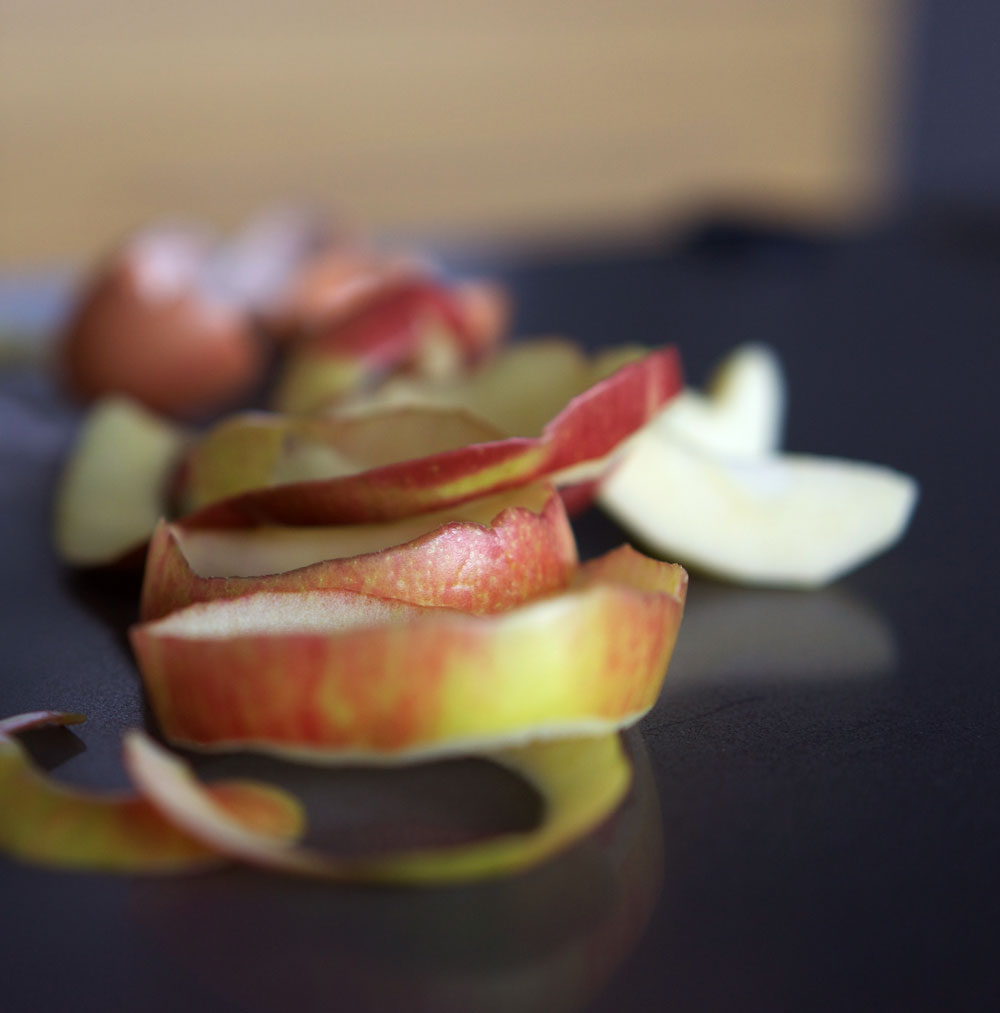
A twirl of apple peels in the foreground with slices in behind.

When I first started making this, every once in a while it would be disappointingly flat, and for the life of me I couldn’t figure out why. My husband was convinced it was the mixing, he thought for sure an electric mixer had to be used to add air to the batter. I tried that, but to no avail. Finally I figured it out. The key to puffy german pancake perfection is a really, really hot pan. So many recipes tell you to put the butter into your dish and heat it in the oven until the butter melts, but this is inadequate, your pan won’t be hot enough. And if you leave it in the oven too long with the butter, it will be scalded.

What I do is place an empty skillet into the oven right when I turn it on. That way I know the skillet will be at oven temperature (450°) when I’m ready to add the batter. Butter gets added while the skillet is searingly hot (the butter will sizzle and melt almost instantly when you add it to the pan—just like in the video below). Twirl the pan with the butter until it’s melted and add in the batter, and pop it into the oven. 15 minutes later, it will be three times the height, buttery, crisp and golden.

As for the pan, I use an old heavy skillet with the handle removed (as it wasn’t oven safe to 450° with the handle). An oven safe skillet (please ensure that it can withstand up to 450°), cast iron pan or glass pie baking dish will work just fine as well.

Apples frying on the stove with brown sugar and cinnamon scattered on top

While the batter is transforming in the oven, melt some more butter in a medium skillet, add the slices apples, brown sugar and cinnamon. Cook for 12–15 minutes until the apples are soft and the sugar has caramelized a little. And that’s it—serve with a dusting of icing sugar and maple syrup, drizzled with the apple juices from the pan. What better way to spend a lazy weekend morning?

Print

German Pancake with Cinnamon Apples

The ingredients are simple, yet the result of a German pancake, glorious and puffy right out of the oven, is spectacular. Cinnamon apples pan seared on the stove while the pancake bakes are the perfect accompaniment.

Course Breakfast
Cuisine American
Prep Time 10 minutes
Cook Time 15 minutes
Total Time 25 minutes
Servings 2

Ingredients

  • 4 tbsp butter (or margarine)
  • 3 eggs
  • 3/4 cup milk
  • 3/4 cup flour
  • 1/2 tsp salt
  • 2 apples peeled, cored and sliced into 12 slices each
  • 2–3 tbsp brown sugar
  • 1/2 tsp ground cinnamon

Instructions

  1. Place empty oven-proof skillet (safe up to 450°) into the oven with rack in middle position (batter will rise well above the pan so ensure there will be room). Preheat oven to 450°.

  2. Combine eggs, milk, flour and salt into a medium bowl. Stir with a fork until smooth and just a few small lumps remain. 

  3. When the oven has reached temperature, remove the skillet and add 2 tbsp butter. The butter will sizzle and melt; swirl the butter in the pan until melted, tilting to coat the sides with melted butter. Add the batter to the pan, and pop back into the oven. Bake 15 minutes, or until very puffy and golden. 

  4. While the pancake is in the oven, melt 2 tbsp butter in a medium skillet on the stove top, over medium high heat. Add apple slices and stir, turning to coat evenly with butter. Add brown sugar and cinnamon. Cook on high for 10–12 minutes, until the apples soften and the juices have combined with the brown sugar and cinnamon and cooked down into a syrupy sauce.

  5. Remove skillet from the oven, slice pancake and sprinkle with powdered sugar on top. Add sautéed apples to the plate, spooning the sugary juices on top of the pancake.

Filed Under: Breakfast, Recipe Tagged With: Apples, Cinnamon, German, German Pancake, Pancake, Puffy

Primary Sidebar

Welcome to my kitchen journal, a place where I will share my favourite heritage recipes honed over the years, as well as document new evolutions and experiments along the way. Great feasts become vehicles for fond memories—the best meals are the ones someone made with love, for you. Follow me to explore traditions, document stories and experience the joy of the feast. Read More…

  • Facebook
  • Instagram
  • Pinterest
  • Twitter
  • YouTube

Don’t miss a story!

Get email updates

Copyright © 2023