• Skip to content
  • Skip to primary sidebar

Feast & Lore

Food stories featuring heritage recipes and new experiments.

  • Home
  • Recipes
  • About

Pleb Feasts

Beef Bone-broth with Cream of Wheat Dumplings

March 18, 2018 By Caroline 7 Comments

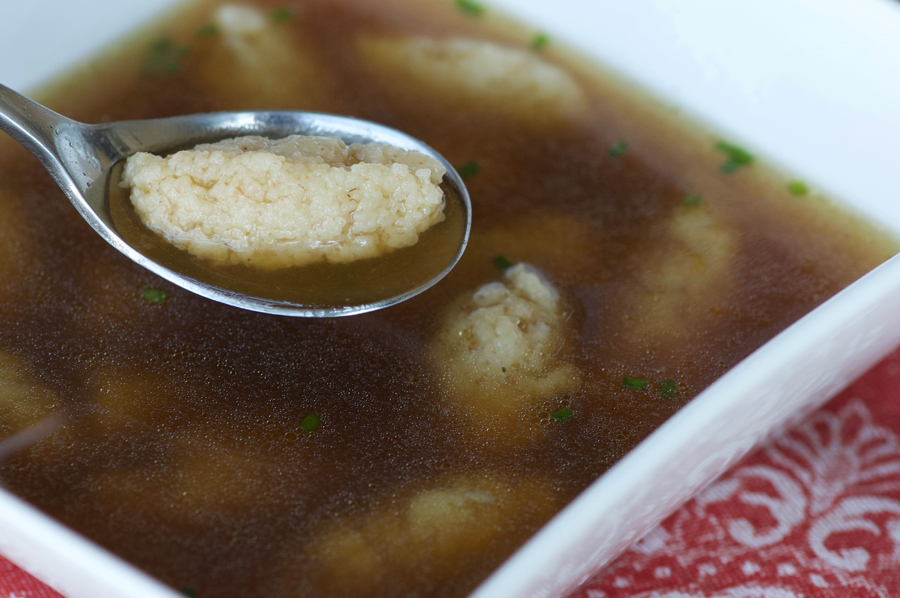
Rich and savoury beef broth with fluffy cream of wheat dumplings add up to pure comfort in a bowl. This recipe packs a two-for-one punch: make the broth recipe, use part of it for the dumpling soup, and then freeze the rest to use later as your very own personal stash of beef stock. It will do wonders for pan sauce, add body to gravy and is so much better than using canned broth.

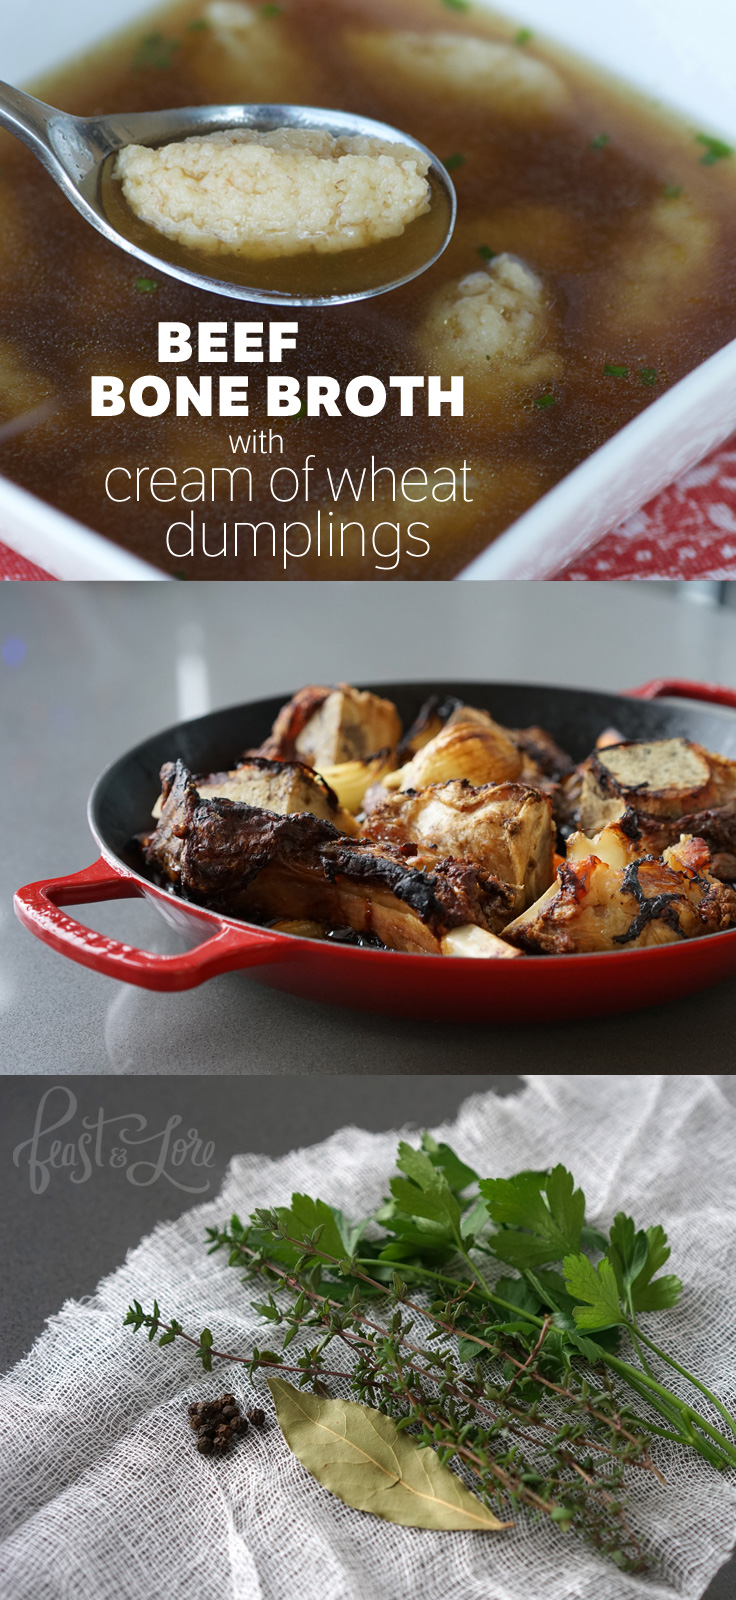
Beef Bone Broth Soup with Cream-of-Wheat Dumpings

There is something very satisfying about taking a cheap bag of bones from the butcher shop and turning them into a delicious, healthy broth. Making bone-broth changed me. Now I look at bones from roasts, steaks, etc as possible additions to my next bone broth—I simply carve off most of the meat (leaving a bit on helps flavour the broth) and freeze the bones, saving them up until my next batch.

While bone broth has been trending these days as a source of collagen and minerals, Grandmothers everywhere have been making it for decades, and for good reason. The nice thing is you really don’t have to worry too much about exact measurements when it comes to making homemade broth. Work with as many bones as you can fit into your stock pot, top with water, add a few veggies and flavourings and let it all simmer for hours.

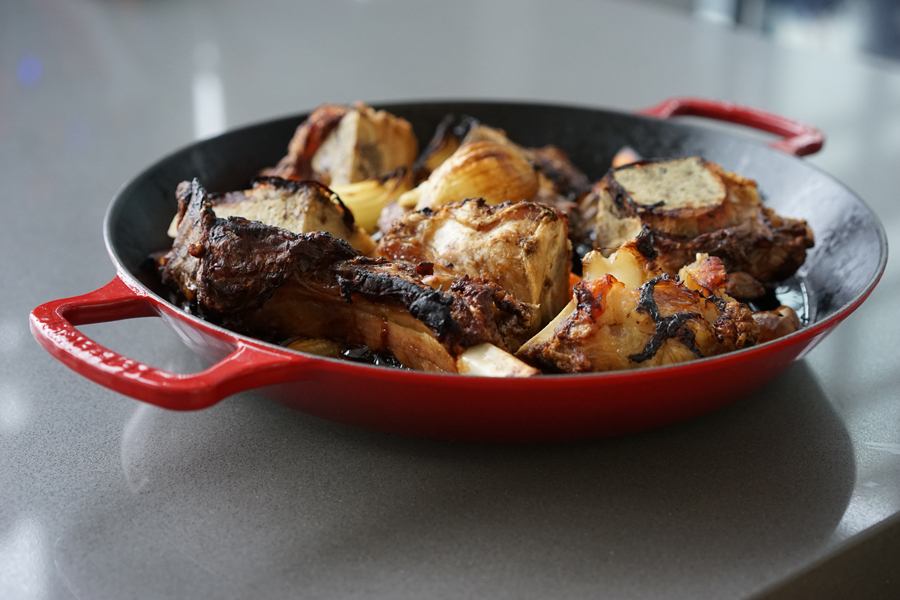
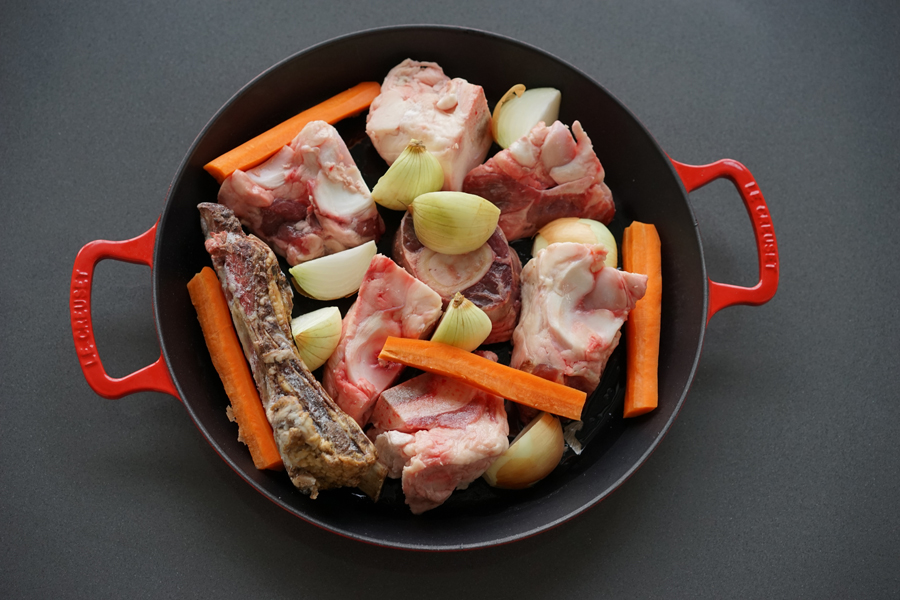
To extract maximum flavour from the bones, roast them in the oven first. This will provide crisp, darkened bits of flavouring to enhance your broth. I add the carrots and onions to bring out their sweetness as well. The roasting pan will emerge an hour later, crackling, sizzling and full of lots of browned bits.


Beef bones in a roasting pan with a few veggies

Beef bones roasted for bone-broth

While the bones are roasting, grab a few herbs (don’t overdo it, you don’t want to overly flavour the stock but just add a few subtle notes). Wrap them in a cheesecloth bundle and tie with kitchen twine, so they won’t fall apart during the hours of simmering to follow. This little package is also known as a “bouquet garni.”

Prep a bundle of herbs in cheesecloth to flavour broth

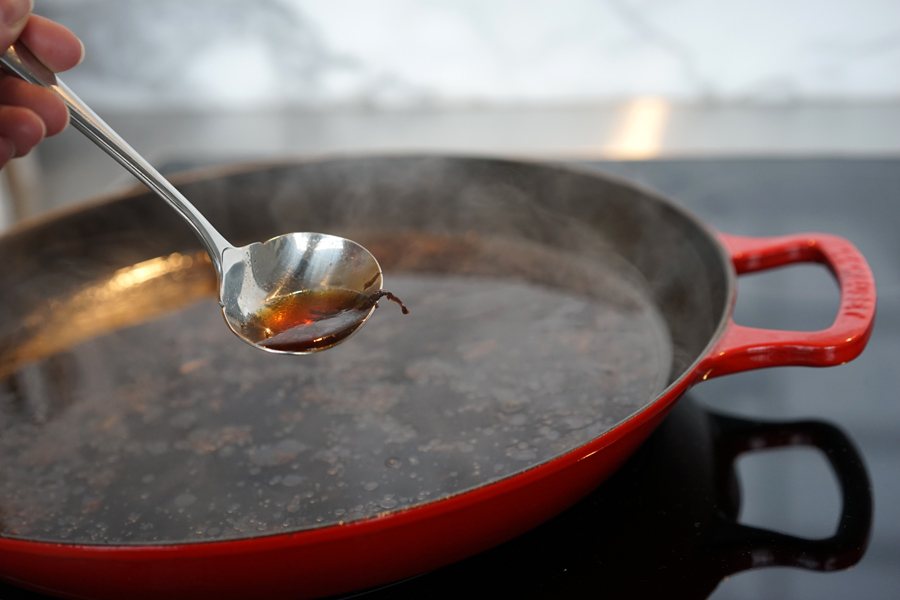
Once you’ve roasted the bones, remove them from the roasting pan and place them in a large stockpot. Add water to the roasting pan and scrape up the browned bits at the bottom of the pan (this process is similar to the early steps of making gravy). The water will take on a lovely deep golden hue as you pull up all the flavour from the roasted bones and veggies. Once you’ve scraped it all up, transfer the water and any browned bits to the stockpot. Add the bouquet garni, celery, and top with water to fully cover the bones.

Deglazing Extracts Flavour from Bone-Broth

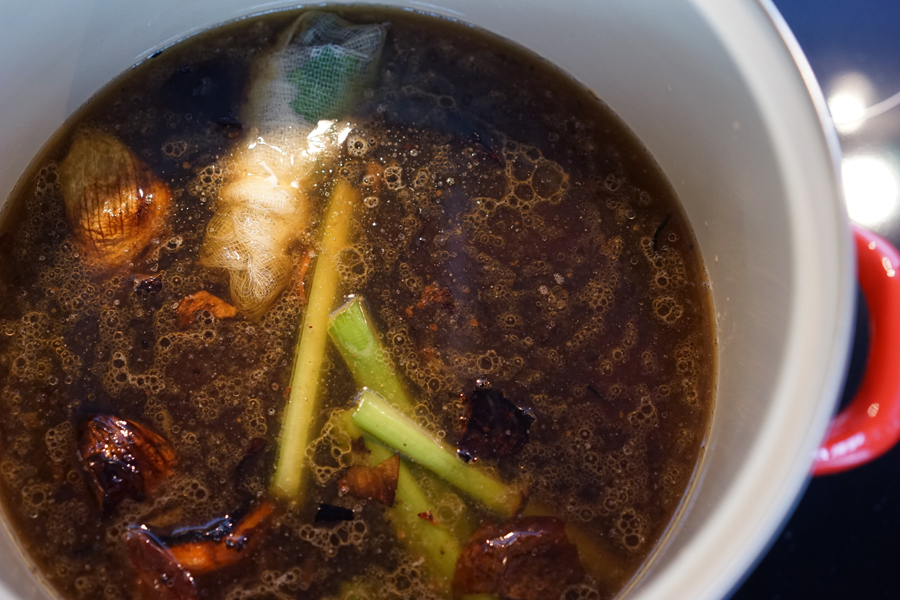
At this point, you can pretty much walk away, simmering the pot for hours, checking on it every hour or so to stir things up a bit. I simmer my broth uncovered to condense the flavours. It saves space in the freezer and I just add water back in as needed when I’m ready to cook with it.

Everything in the stockpot

Once done (five hours should be plenty of time but you can simmer a bit longer if you like) remove the bones and meat from the pot. (if you have a dog, they will go crazy for the soup meat (which you should remove from the bone before giving to them so they don’t choke on any bone pieces). Otherwise, it tends to be pretty flavourless after all that cooking and can be discarded.) Strain the stock into a separate container to remove any small bones or pieces so you are left with simply the pure, clear broth. Ideally, allow this to cool and place in the fridge overnight. This step will cause the fat to solidify at the top of the broth so you can easily lift it out in one piece and discard it. Otherwise, if you don’t want to wait, skim the fat from the top by hand before adding to any recipes.

With the fat skimmed off of the broth, one trick to freeze it is to use an ice-cube tray to freeze into 1-2 tablespoon cubes. You can freeze these in a ziplock baggie to drop into sauces, gravies etc. You can also use larger ziplock containers depending on how you plan to use it later. Remember to add a label with what it is and the date you made it!

Now, on to the Cream of Wheat Dumplings! These are based on a classic style of dumpling originating in Austria, known as Griessnockerl. Traditionally, I believe these were made with Semolina flour, however I use Cream of Wheat which is more readily available and makes for a nice, fluffy dumpling.

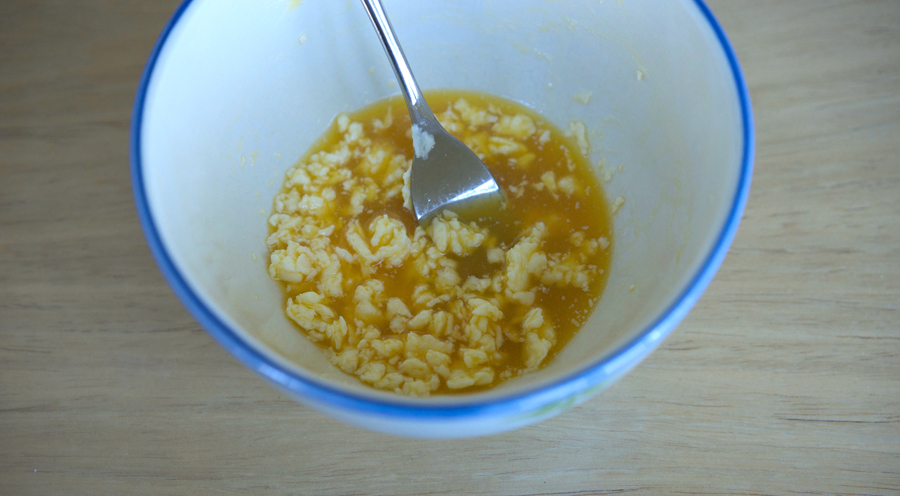
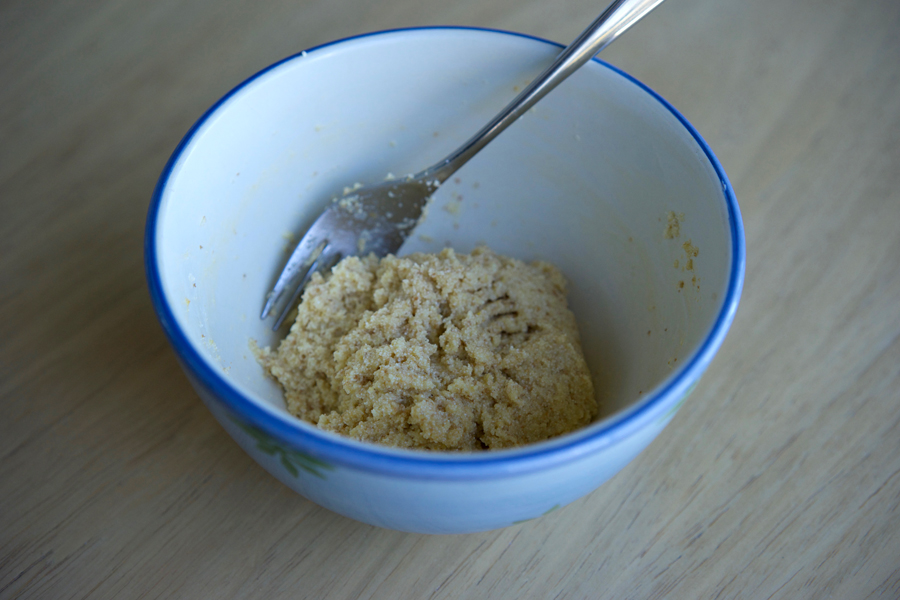
These are super easy. Start with room temperature butter, an egg, and some salt. Mix with a fork until the mixture is lumpy and looks like the photo below.

Make Dumplings Mix Egg Butter Salt

Next, add the cream of wheat and combine well with a fork, stirring and pressing for about one to two minutes. The mixture will be smooth and fairly firm. It should sit for ten minutes before you cook it. I once left it out for an hour causing it to get too soft. Then when I went to add it to the soup, it all fell apart. So don’t leave it for too long. Ten minutes is perfect. While it’s resting, heat up your beef bone broth and water. Add a bouillon cube and bring to a boil. Do a taste test for salt and flavour levels—usually I find more salt is needed. When the broth tastes right, and the dumpling batter is ready to go, it’s time to shape those dumplings!

Make Dumplings add Cream-of-wheat

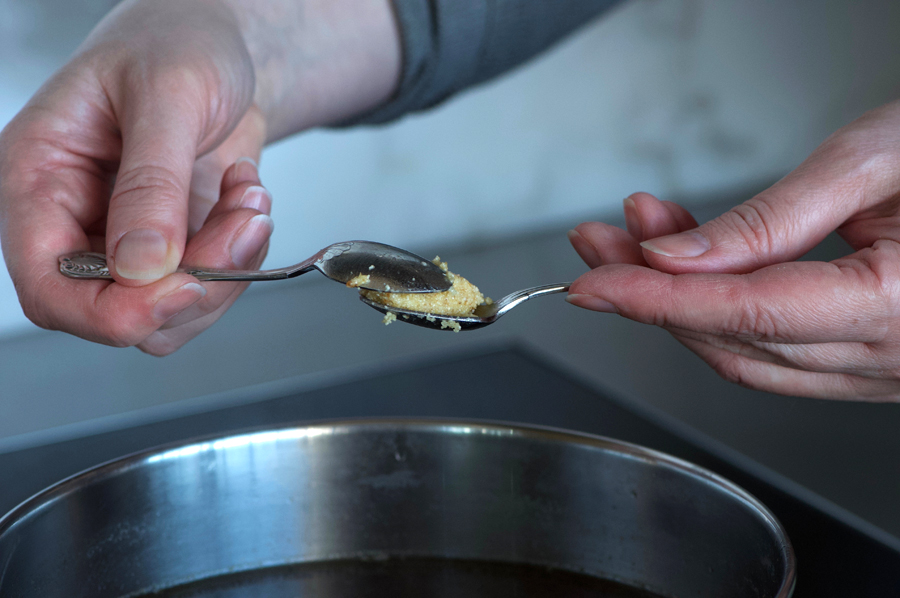
This step takes a bit of practice. Use two spoons (very small spoons, ideally, as these dumplings will easily double in size while they cook). Pick up about 1/2 teaspoon of the dumpling batter in one spoon. Use the second spoon to shape into an oval shape, pressing the dumpling together. Drop into the soup, and keep going until all of the dumplings are done.

A few notes to avoid any issues with the dumplings falling apart (which so far has only happened to me once!)

  • Use room temperature, not melted, butter for your batter
  • Allow the batter to rest for ten minutes before you start to shape the dumplings—but not much more than fifteen minutes, to avoid the batter becoming too soft.
  • Don’t have the broth at a rolling boil when dropping the dumplings in, keep it at a gentle simmer.
  • Shape the dumplings fairly tightly so they hold together well. If they are too loose they might fall apart in the broth.

Depending on how large you made them, the dumplings usually take about ten to fifteen minutes to cook. They will float to the top when they are close to being done. Test one first, by cutting through it. The inside should be a uniform consistency. If the centre is still hard, you need to cook them a bit longer.

Use two small spoons to shape dumplings

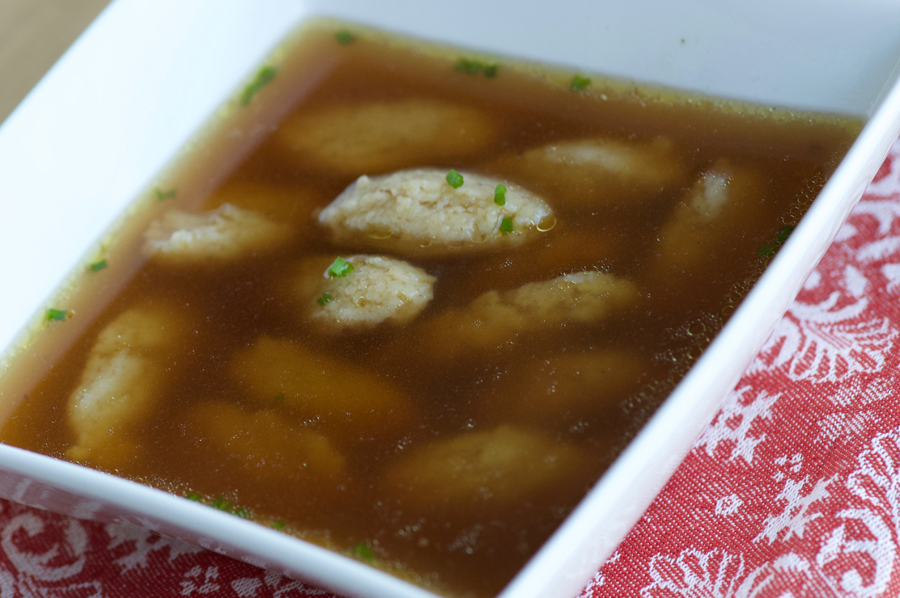
Serve sprinkled with freshly chopped chives. Some Maggi (seasoning sauce) at the table is always a good idea too in case anyone wants a bit more flavouring in their soup. A nice appetizer before a meal, or as a light lunch, this soup is both comforting and delicious!
Beef Bone-Broth Soup with Cream of Wheat Dumplings

Beef Bone Broth Soup with-Cream-of-Wheat Dumpings
4.5 from 2 votes
Print

Beef Bone-broth with Cream of Wheat Dumplings

A beautiful savoury beef broth full of natural collagens with fluffy cream of wheat dumplings. A traditional Austrian soup often served as a first course.

Course Appetizer
Cuisine Austrian
Servings 4

Ingredients

Beef Bone Broth

  • 2-3 fresh parsley sprigs
  • 2 fresh thyme sprigs
  • 1 Bay leaf
  • 5 black peppercorns
  • 4-5 lb meaty beef shanks/bones
  • 1 meaty veal shank
  • 2 onions: peels on, quartered
  • 1 large carrot, quartered
  • 2 ribs celery, quartered
  • water to cover bones
  • 1 1/2 tsp salt

Cream of Wheat Dumplings with Beef Bone Broth

  • 4 cups beef broth
  • 2 cups water
  • salt to taste
  • 1/2 beef boullion cube
  • 2 tbsp softened unsalted butter
  • 1 egg
  • 1/2 tsp salt
  • 1/2 cup cream of wheat
  • chopped chives to taste

Instructions

Beef Bone Broth

  1. Preheat oven to 450°. Spread bones, veal shank, onion and carrot in a roasting pan. Transfer to the oven and roast until dark brown in places, about one hour.

  2. Make bouquet garni: wrap herbs, Bay leaf and peppercorns in a cheesecloth and tie with kitchen twine.

  3. Transfer the roasted bones and veggies into a large stockpot. Add approximately two cups of water to the roasting pan, scraping up browned bits from the bottom. If you roasting pan is stovetop-safe, heating it on the stove may help loosen more bits. Add to stockpot with celery pieces. Top pot with water until bones are covered, and bring to a boil. Add salt. 

  4. Froth will develop at the top of the stock, especially during the first hour. Skim and discard the foam. Simmer gently uncovered for five to seven hours. Remove large bones and pieces from the pot and discard. Strain the broth through a fine sieve. Cool and refrigerate overnight to allow the fat to solidify at the top, remove. Transfer to storage containers and freeze/use as needed.

Cream of Wheat Dumplings with Beef Bone Broth

  1. Heat beef broth and water, add bouillon and taste and adjust seasoning as required. Bring to a gentle simmer.

  2. In a small to medium bowl beat egg. Add butter and salt, and combine well with a fork. Add cream of wheat and mix well with a fork, pressing to combine ingredients. Allow to rest for ten minutes.

  3. Using a very small teaspoon, take 1/2 tsp of batter and use a second spoon to shape it into an oval dumpling, pressing together. Drop into the broth. Continue with the rest of the batter. If your spoons get sticky, drop into the broth between shaping.

  4. Keeping the broth at a light simmer, cook the dumplings until they float to the top, about ten minutes. Check to see if they are done: cut one if half and see if the centre is consistent. Taste—if the middle is hard, cook for an additional five minutes or so. Serve topped with finely chopped fresh chives.
Rich and savoury beef broth with fluffy cream of wheat dumplings add up to pure comfort in a bowl.

Filed Under: Pleb Feasts, Recipe, Soup Tagged With: austrian, beef, Bone-Broth, Bones, Cream of Wheat, dumplings, German, Griessnockerl, soup

Lunch-Prep Acorn Squash Farro Salad

November 20, 2017 By Caroline 2 Comments

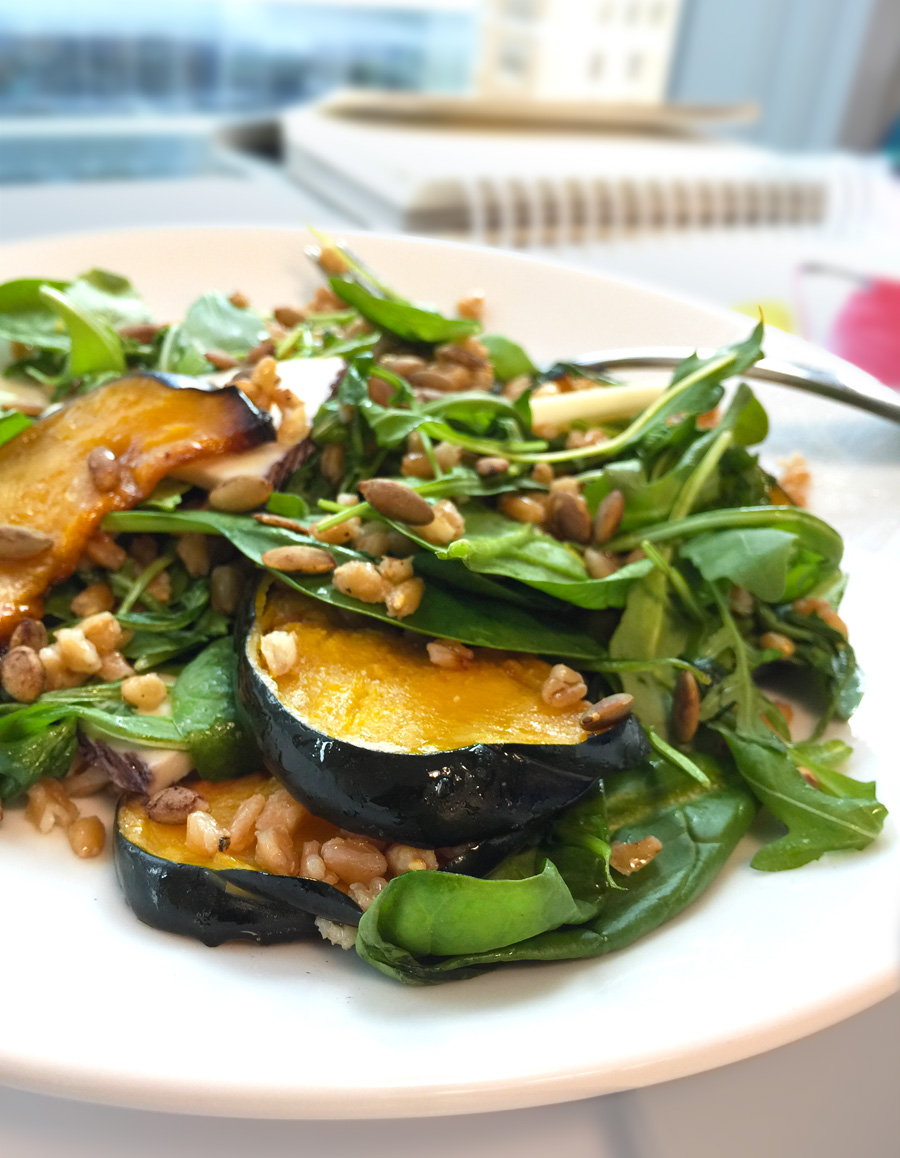
Most salads just don’t cut it for me when it comes to lunch. I still feel hungry and typically find myself rewarding my “healthy lunch” with cookies to fill the void in the afternoon, offsetting any healthy gains I thought I was making. Not to mention, leaky salad dressing making a mess of my containers (or worse, my backpack!) is not fun. Read on to learn how to meal prep this salad with all the flavour but none of the leaking. With hearty acorn squash, farro, pumpkin seeds and a few slices of aged goat cheese, this salad is satisfying and delicious. Oh, and pretty good for you, too!

Peppery arugula, sweet squash, faro and a cider dressing make a satisfying lunch you can take to work

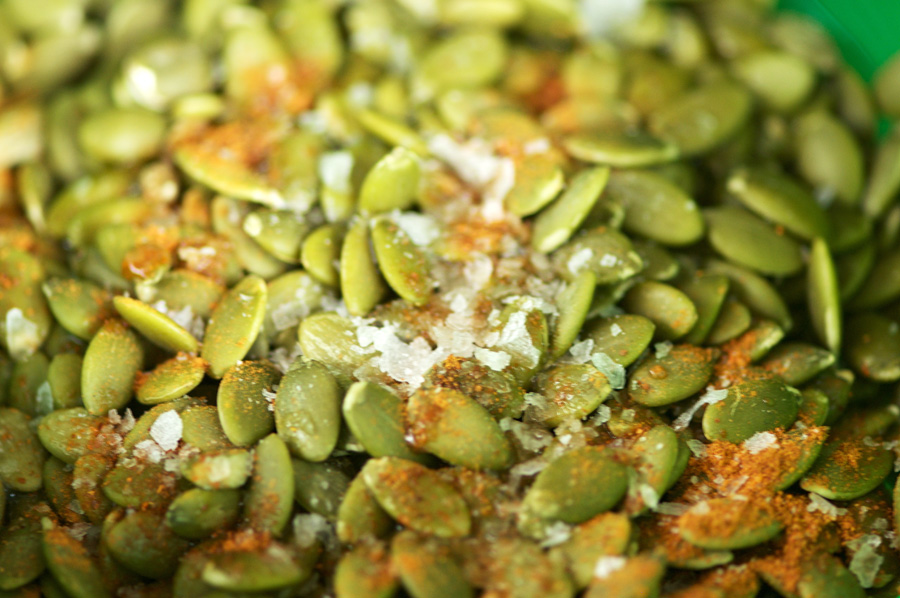
The recipe does involve a few steps and isn’t the quickest to make, but the final product is so delicious and a great way to fuel your body for a healthy week. If you’re short on time, you could cut out the pumpkin seeds, but I absolutely LOVE them and find them totally worth the couple of extra steps. To begin, toss raw pumpkin seeds with lemon juice, salt and a bit of cayenne pepper. (I know, lemon juice seems weird when you want to roast the seeds and make them crunchy, right? But trust me it provides a lovely zing and makes them irresistible for snacking.)

Season raw pumpkin seeds and add lemon juice before roasting

Roast in the oven and the raw green seeds transform into golden brown, crispy snacks. Good thing there’s extra so you can munch on these while you make the rest of the salad 🙂

Raw pumpkin seeds are transformed into crunchy goodness

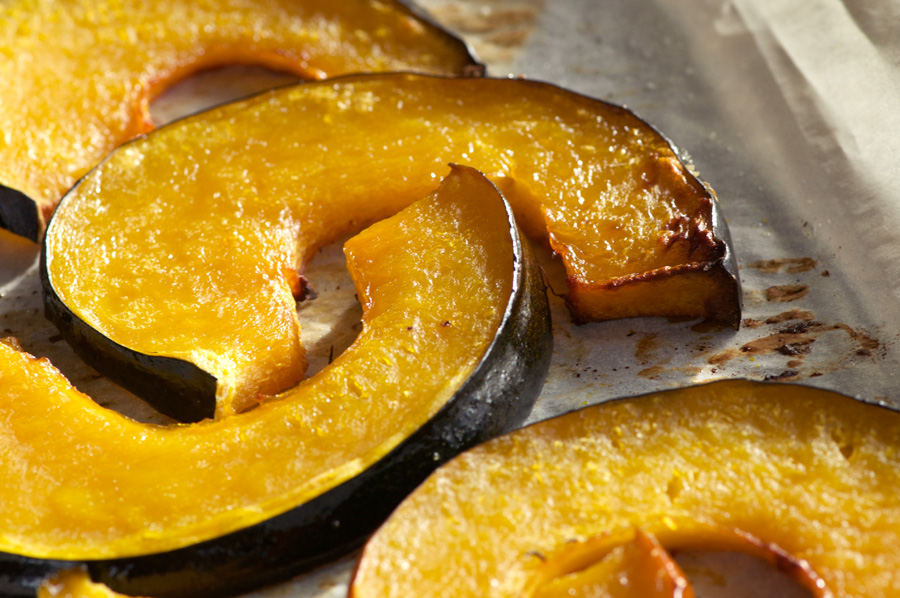
Next, prepare two baking sheets with parchment paper (or just use a light coating of olive oil on a baking sheet if you don’t have parchment—mainly I find the parchment helps speed up the cleanup afterwards). Place slices of acorn squash on top (with a light coating of olive oil, salt and pepper). Roast until golden and tender when pierced with a knife.

Roasted acorn squash slices fresh from the oven

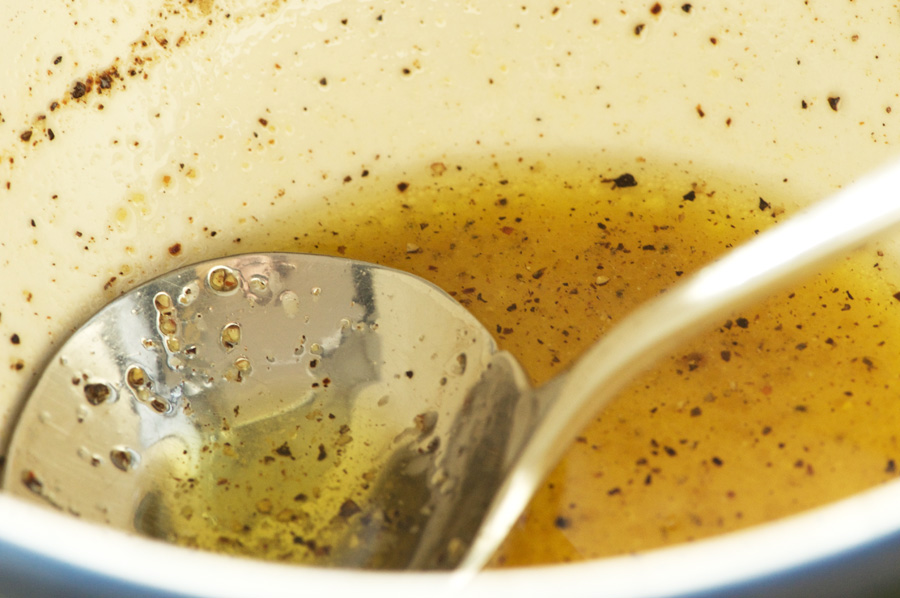
Then, whip up the dressing. Apple cider, cider vinegar, Dijon mustard, olive oil, and seasoning blend together to create a tart dressing for the farro to offset the sweetness of the squash.

Cider Dijon Dressing is tossed with cooked faro, nice and tart to offset the sweet squash

While the squash is in the oven, cook the farro. Farro is a really healthy grain that’s great to add to your regular diet. It’s higher in fibre than many other whole grains—twice the amount found in quinoa, and three times the fibre of rice. Cook according to the package directions. I cook mine like pasta, using more water than needed and draining once cooked, which usually takes about 30 minutes. You’ll want to let it cool a bit before dividing it among four lunch containers, spreading it out to cover the bottoms. Then, spoon the dressing overtop and stir it into the grains. This is the secret to avoid leaking—the farro absorbs much of the dressing and also keeps it from making the arugula layer soggy.
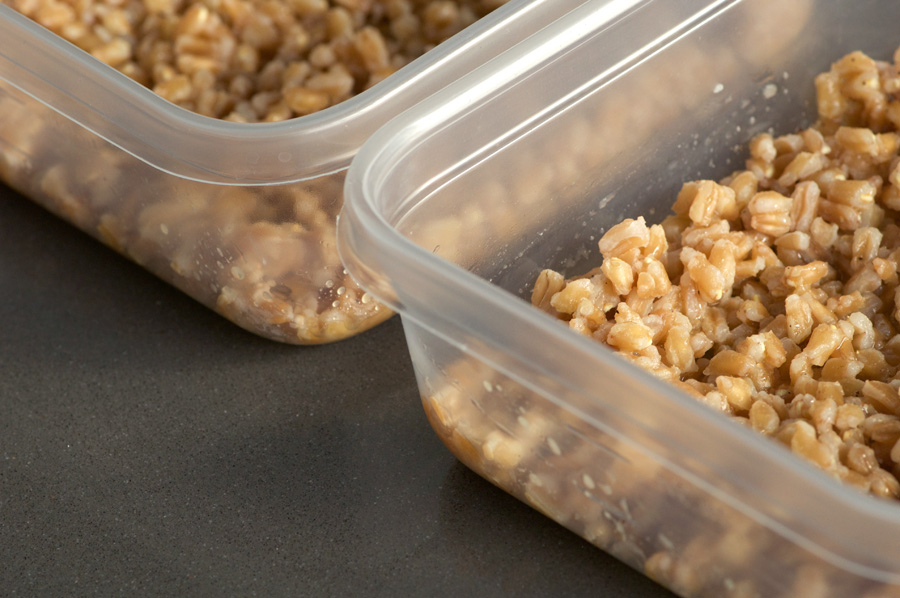
Divide faro between four lunch containers

Next, layer the roasted squash. Finally, top with arugula and cheese slices.

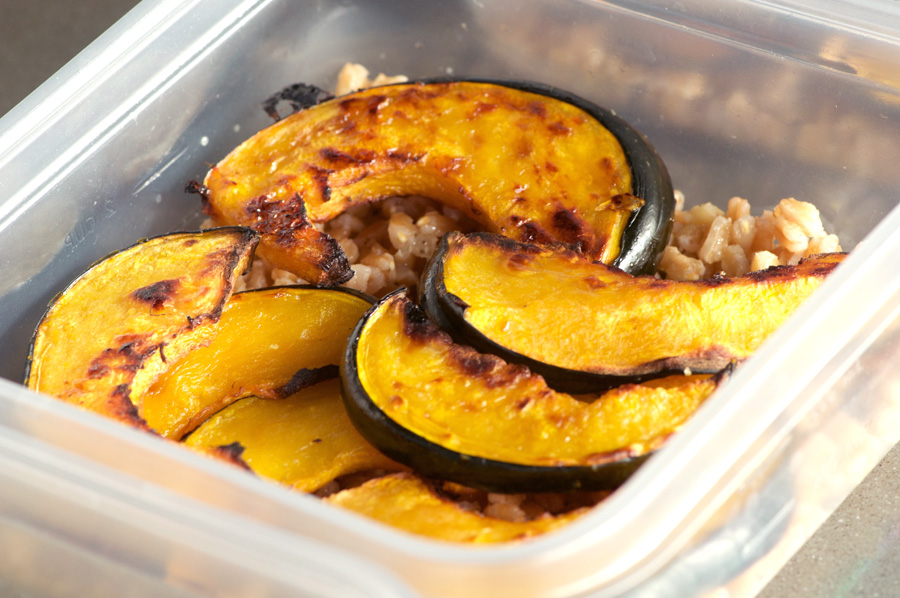
Squash is layered onto faro, to be topped with arugula and goat cheese

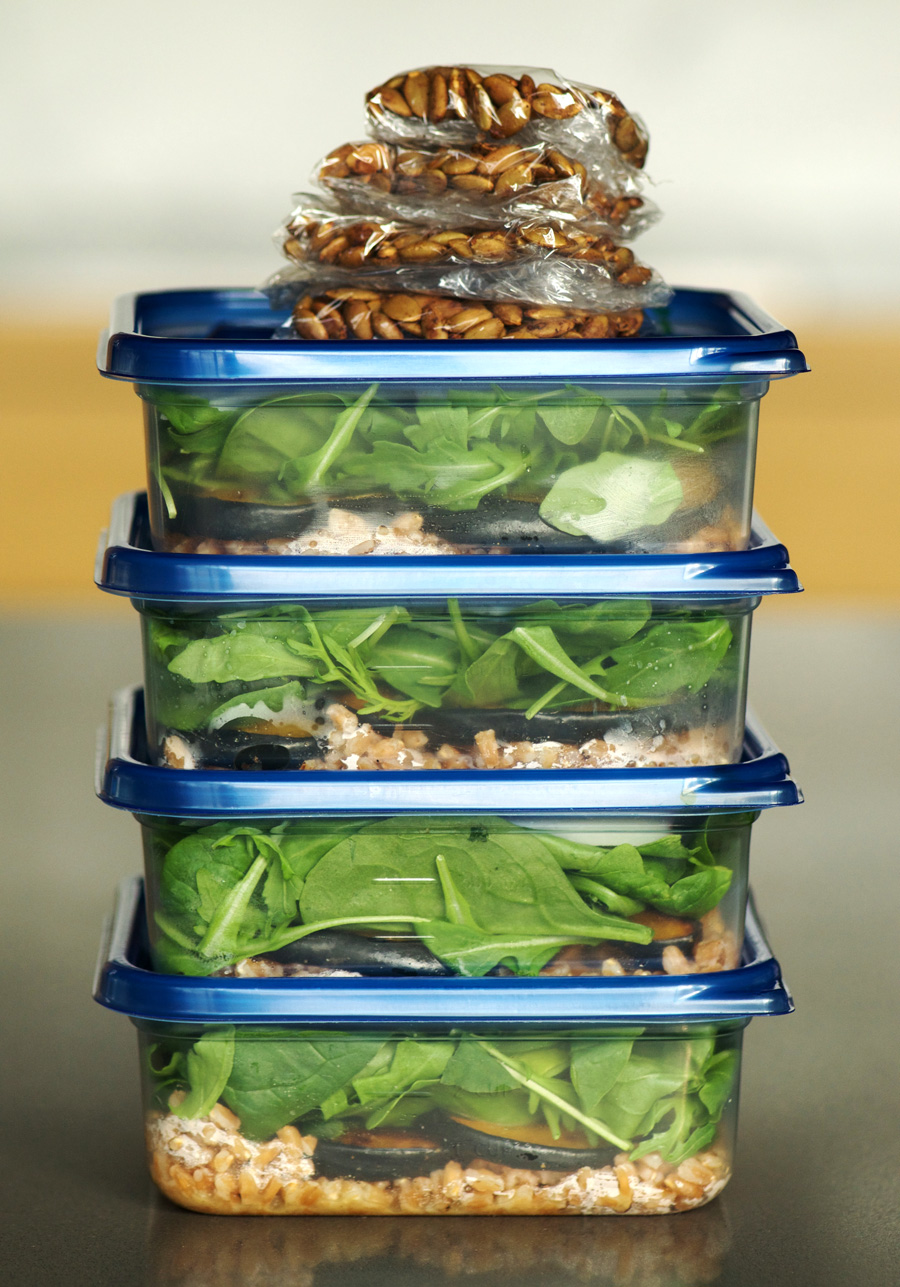
To avoid the pumpkin seeds losing their crunch , I wrap them into four little plastic wrap bundles separately, and then add them onto the salad right before eating. If you are able to get a plate at your office, I like to remove the lid from the container, place the plate upside down onto the container and flip it, so that the lettuce is on the bottom of the plate and the grains are on top, and then stir it all together. You want to stir the layers just before eating to ensure the flavours of the dressing and farro interact with the arugula and squash. If you want to eat this right out of the container I suggest using one that’s a bit larger so you have room to stir everything up.

Don’t forget to sprinkle with the pumpkin seeds before eating like I do half the time! If you forget, no worries, they make a great snack on their own. Invest some time in yourself this week and stock your fridge with containers of Acorn Squash Farro Salad for lunches!

Lunch Prep Faro Squash Arugula Salad

Make-ahead salad with farro, squash and arugula wins lunch!
5 from 1 vote
Print

Lunch Prep Acorn Squash Farro Salad

A satisfying salad that won't leave you hungry, with instructions on how to prep this for lunches you can bring to work without any leaking or sogginess!

Course Lunch
Prep Time 15 minutes
Cook Time 1 hour
Total Time 1 hour 15 minutes
Servings 4

Ingredients

  • 1 cup raw pumpkin seeds
  • 1 tbsp fresh lemon juice
  • 1/4 tsp cayenne pepper
  • sea salt
  • 1 acorn squash, seeded and cut into 1/3" slices
  • 1 tbsp olive oil
  • 1 cup cooked farro, cooled
  • 6 oz arugula leaves, or arugula baby spinach mix
  • 6 oz aged goat cheese, sliced
  • 1/4 cup fresh apple cider
  • 2 tbsp cider vinegar
  • 1 tsp Dijon mustard
  • 1/2 tsp salt
  • freshly ground pepper
  • 1/4 cup olive oil

Instructions

  1. Preheat oven to 300°. Toss seeds with lemon juice, cayenne and sea salt to taste. Spread on a parchment lined baking sheet and bake for 12 minutes. Flip/stir the pumpkin seeds and bake another 10 minutes, until golden and crisp. Remove from oven and cool.

  2. Increase oven temperature to 400°. Line two baking sheets with parchment paper, and add acorn squash slices. Spray with a light coating of olive oil (if you don't have olive oil spray, toss with approx 1 tbsp olive oil) and season to taste with salt and pepper. Roast for 40 minutes, flipping halfway through, until golden at the edges and soft when pierced with a knife. Remove from oven and allow to cool.

  3. Cook Farro according to package directions, and allow to cool.

  4. Make dressing: combine apple cider, cider vinegar, Dijon, salt and pepper. Whisk in olive oil until blended. 

  5. Once the farro is cool enough, divide it among four lunch containers spreading the grains to fill the bottom. Spoon the dressing over the farro and stir to combine. Add acorn squash in a layer on top, dividing between the four containers. Finally top with arugula and goat cheese slices. Seal and store in the fridge up to four days.

  6. Wrap four bundles of roasted pumpkin seeds in plastic wrap to take with the packaged lunch containers. To serve, either stir up in the container and top with pumpkin seeds right before eating, or invert onto a plate, stir, toss pumpkin seeds on top and enjoy!

Acorn Farro Salad with Pumpkin Seeds

Note: recipe adapted from Roasted Acorn and Delicata Squash Salad on Epicurious.

Filed Under: Pleb Feasts, Recipe Tagged With: Acorn Squash, Arugula, Farro, lunch, Lunch Prep, Meal Prep, Pumpkin, Pumpkin Seeds, Salad

Forbidden Mango Peanut Rice Salad

September 26, 2017 By Caroline 16 Comments

Have you tried Forbidden Rice? At one time in China it was reserved for royalty alone, which is how it got its name. It seems those emperors were onto something—black Forbidden Rice has more powerful antioxidants, fibre and protein than both red and brown rice. Not only is it good for you, it tastes great and looks striking, especially when set off by the gorgeous mango and orange in this recipe. Make it on a Sunday afternoon, pack and enjoy for heathy lunches during the week.

After cooking the rice, spread it out on a baking sheet to make it easier to evenly drizzle the dressing over. It also helps speed up the cooling process.

Black rice spread evenly onto rimmed baking sheet

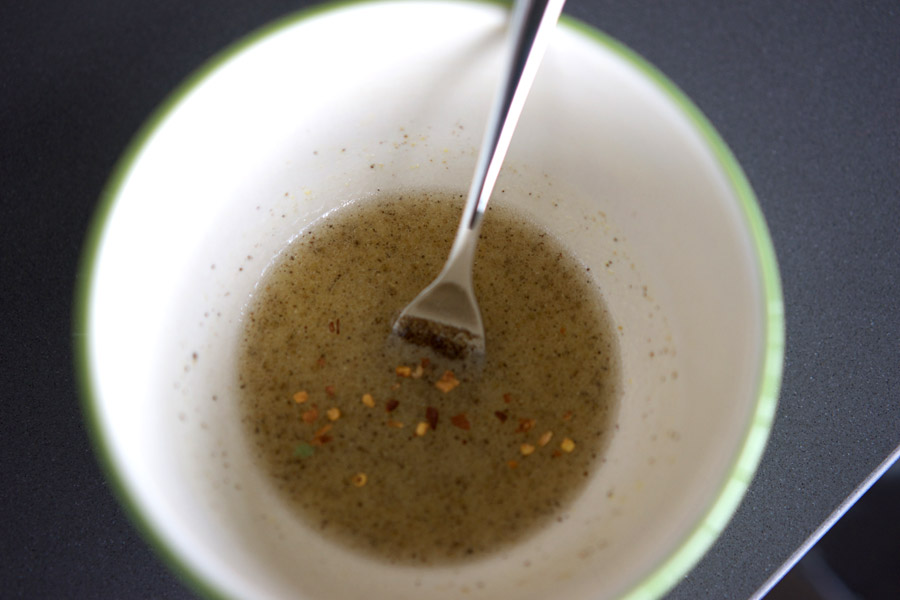
The dressing is a simple mix of lime and orange juice with olive oil and some chilies, salt and pepper.

Citrus dressing in a bowl

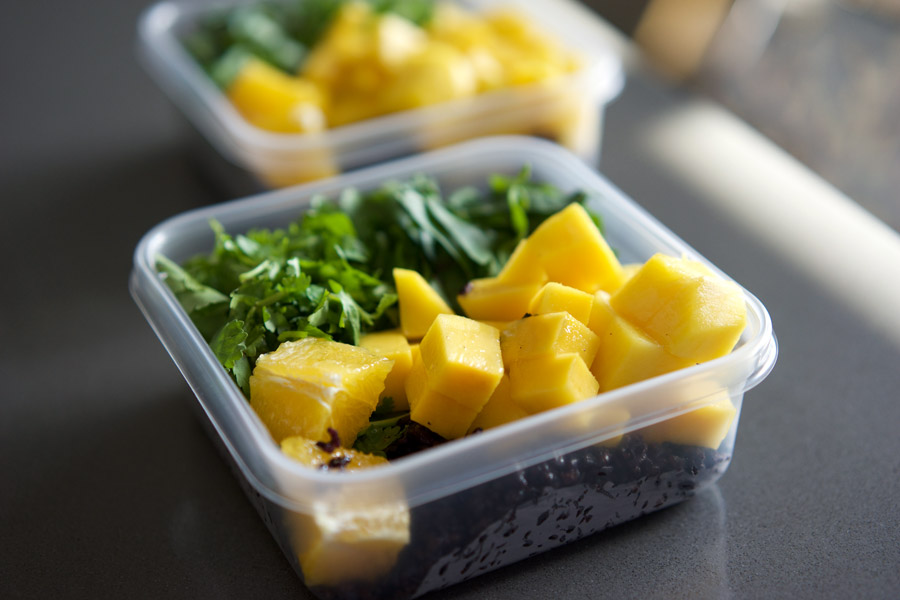
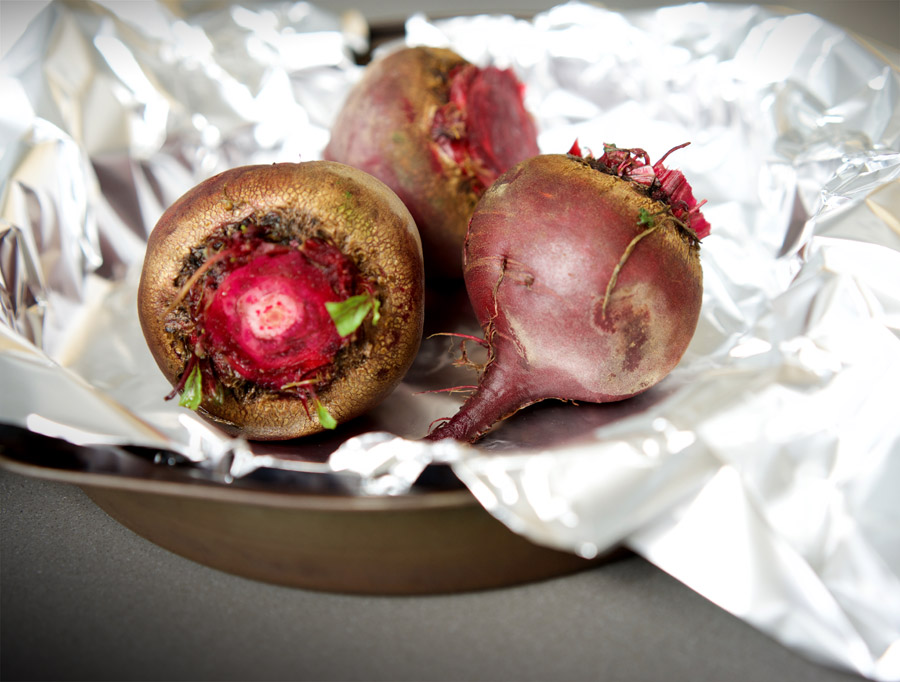
Depending on the season, I like to change up some of the vegetables a bit. For hot summer weather like we’ve seen in Toronto the past few weeks, I like to go with cucumbers and cilantro. When it gets a bit cooler, I switch the cucumbers up for roasted beets, cutting up some of the beet greens to mix in as well. To roast the beets, wrap in foil and bake at 400° for about 1 hour, until a knife slides through easily, cutting off the outer skin after roasting.

Beets in foil

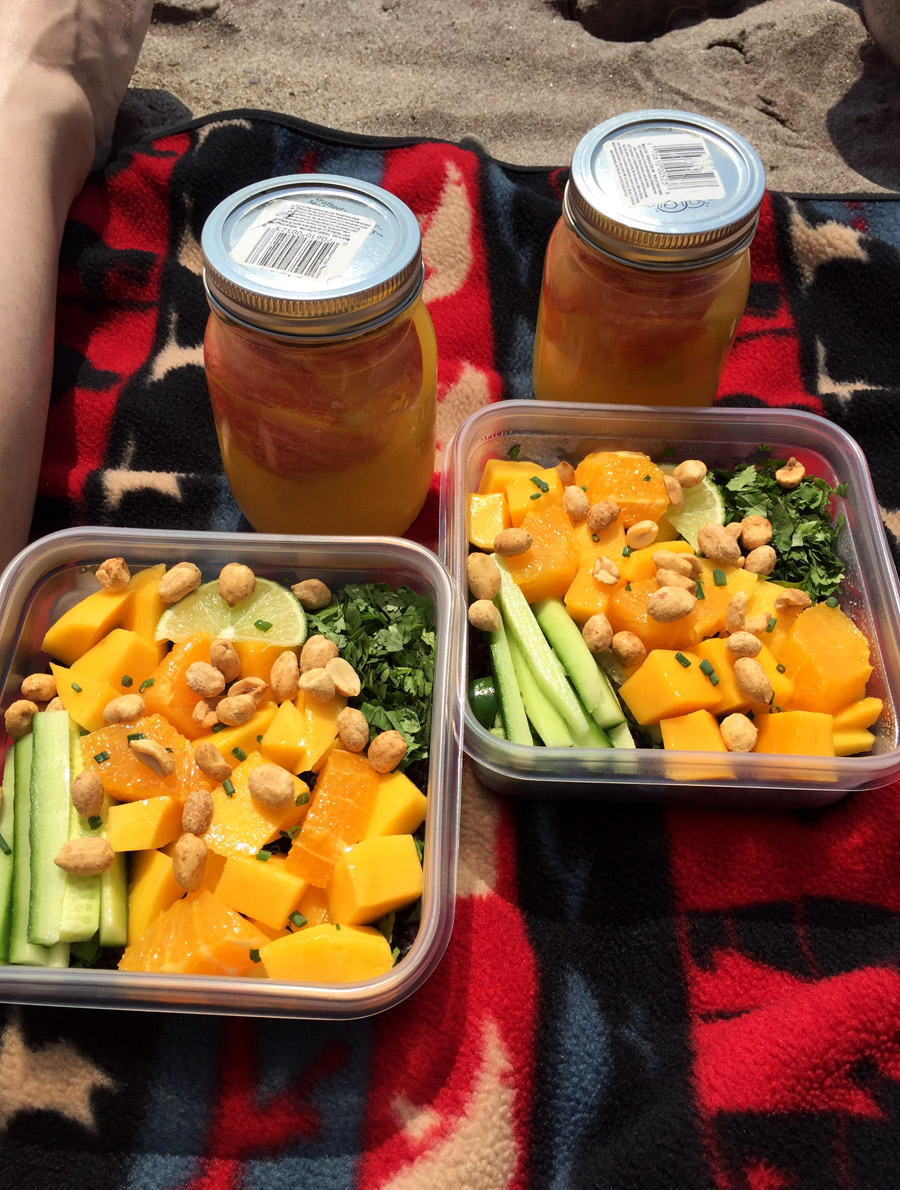
Also makes for a killer picnic salad to take along to the beach! This recipe was inspired by the Black Rice Salad with Mango and Peanuts via Epicurious.

Mango salads shot from above, on a beach blanket


Forbidden black rice not only looks striking, it's even better for you than brown rice!


4 from 5 votes
Print

Forbidden Mango Peanut Rice Salad

Lush mango and bright citrus top healthy and delcious "forbidden" black rice with cilantro and a few other crunchy vegetables. Topped with dry roasted peanuts and spicy peanut sauce, this is a great portable lunch feast great for a summer picnic or working lunch.

Course Lunch, Salad
Prep Time 15 minutes
Cook Time 25 minutes
Total Time 40 minutes
Servings 4

Ingredients

  • 2 oranges
  • 2 tbsp fresh orange juice, gathered from cut up oranges
  • 1/4 cup fresh lime juice
  • 2 tbsp vegetable oil
  • dried chile flakes to taste
  • 2 cups Forbidden black rice
  • 2 fresh mangos
  • 1 cup fresh cilantro leaves roughly chopped
  • 1–2 jalapenos, to taste seeded and sliced
  • 1 seedless cucumber sliced into 2" lengths, 1/4" wide
  • 2 tbsp chopped fresh chives
  • 2 red beets, roasted and chopped (optional)
  • 1/2 cup beet leaves, sliced (optional)
  • 1/2 cup salted, dry-roasted peanut
  • 1/3 cup Thai style peanut sauce

Instructions

  1. Bring rice and 2 3/4 cups water to a boil in a large saucepan. Season with salt to taste. Cover, reduce heat to low, and simmer for about 25 minutes, until liquid is absorbed and rice is tender. Remove from heat and let stand, covered, for 15 additional minutes. 

  2. Slice top and bottom from orange, cutting through the peel and pith to reveal the fruit. Working top to bottom, slice the peel and pith from the sides of the orange. Cube orange, discarding the centre pith and any seeds. Combine lime juice, orange juice, oil and dried chiles in a small bowl. Season with salt and pepper to taste. Whisk to blend. Reserve orange cubes. 

  3. Spread rice onto a rimmed baking sheet and drizzle the juice dressing over the rice, stirring to coat. Season with additional salt if required. Divide rice among four plastic lunch containers. 

  4. Top each container with cut up mangoes, cilantro leaves, jalapenos, cucumber and roasted beets and sliced beet leaves if using. Drizzle evenly with peanut sauce.

  5. Wrap peanuts in plastic wrap or wax paper. Pack separately and sprinkle onto salad immediately before eating, to ensure they remain crunchy.

Filed Under: Pleb Feasts, Recipe Tagged With: Black Rice, Cilantro, cucumber, Forbidden Rice, Mango, orange, peanut sauce, peanuts, pleb feast

Roasted Chicken & Veg Penne

July 19, 2017 By Caroline 2 Comments

vegetables, pasta and chicken are prepped

Roasted vegetables, balsamic chicken and penne make for a great pasta salad you can enjoy hot or cold. A favorite I make often over the summer, it makes four generous lunch servings that taste great cold the next day. Or, if you’re looking for a quick weeknight dinner, grill and enjoy immediately.

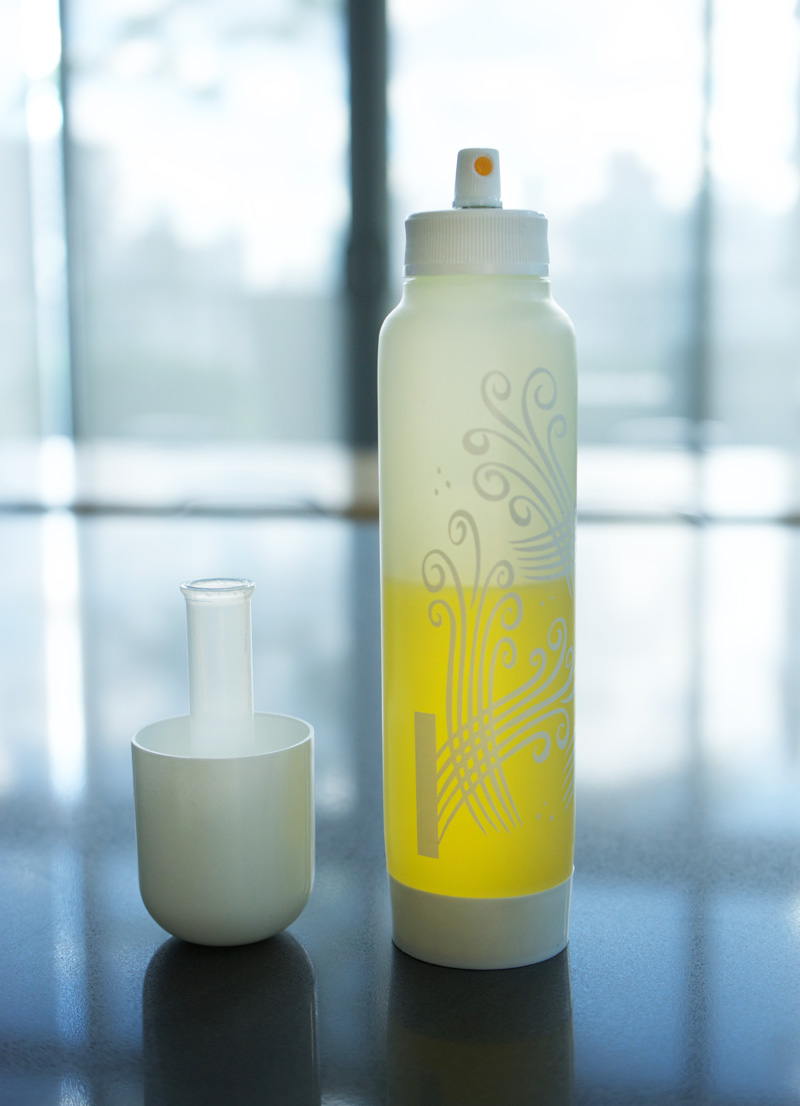
Refillable cooking mist spray bottle with olive oil

A big timesaver when it comes to grilling is using an olive oil spray bottle—I prefer to buy the bottle and fill it with my own olive oil so I know exactly what’s in there. I fill it up with just a regular olive oil (saving the extra-virgin for drizzling or making dressings where you can savour the difference). The bottle I have has a pump in the lid so you can remove the air, allowing it to spray into a fine mist perfect for lightly coating the vegetables in this recipe.

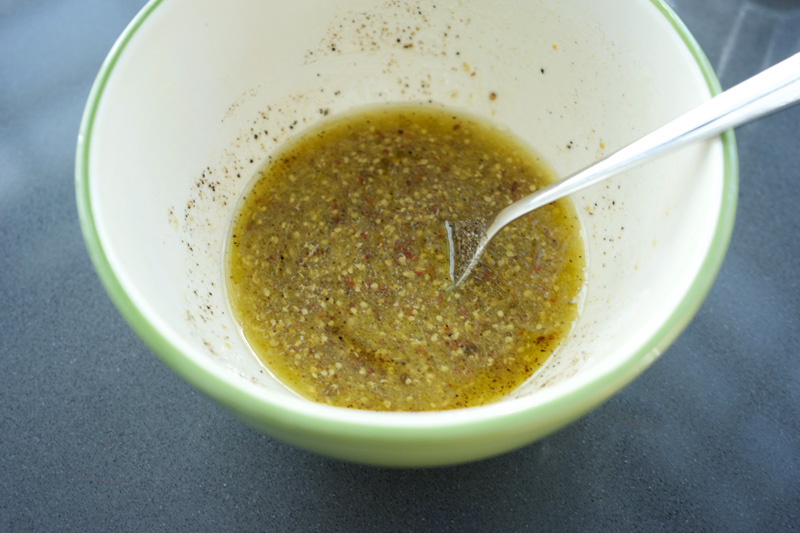
Mustard dressing mixed in a bowl

I used to toss this pasta salad with a pesto, and that works out ok, but I’ve come to prefer this grainy mustard dressing. It coats the pasta and lightly dresses the vegetables without overpowering the dish.

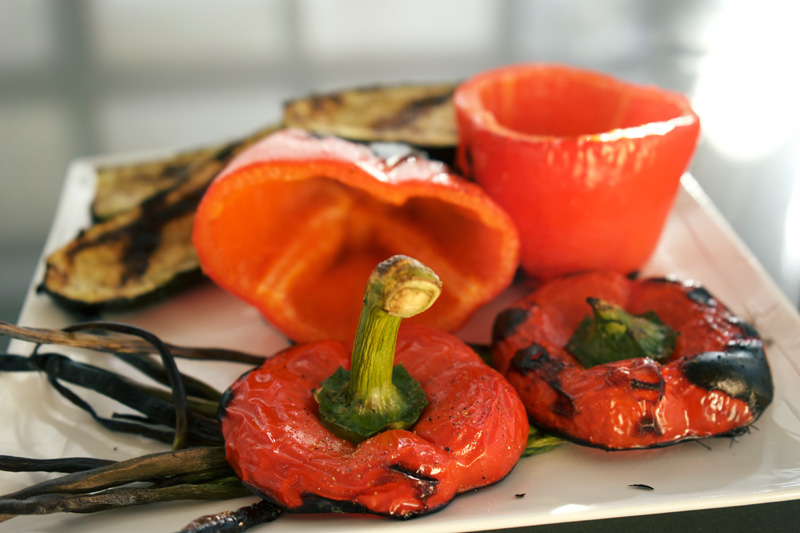
Roasted vegetables ready to be chopped up

I have a love-hate relationship with roasted red peppers. It took me years to figure out how to roast them to get the skins off. Unless you really, really blacken the skins like the pepper lid top right, it’s pretty tough to remove the skins. So, depending on my mood (and whether I forgot about the peppers and left them on the grill too long!), I either just under-roast the peppers a bit and leave the skins on (remove them before they get papery), or really blister them for deeper roasted peppers where the skins come off. Or sort of go half-and-half, like the peppers shown above, removing the blackened bits that come off easily.

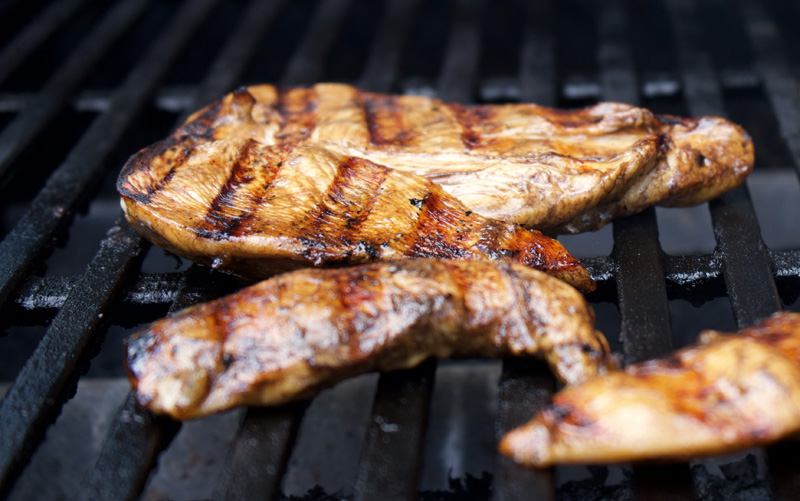
Chicken on the grill

Marinating the chicken briefly in balsamic vinegar and olive oil gives a great flavour and depth of colour when grilled. I separate the tenders and slice the chicken breasts to flatten them, so that the thickness is more even. that way they cook through quickly and won’t dry out. You’ll want to pull the tenders off earlier as they will cook more quickly than the larger pieces.

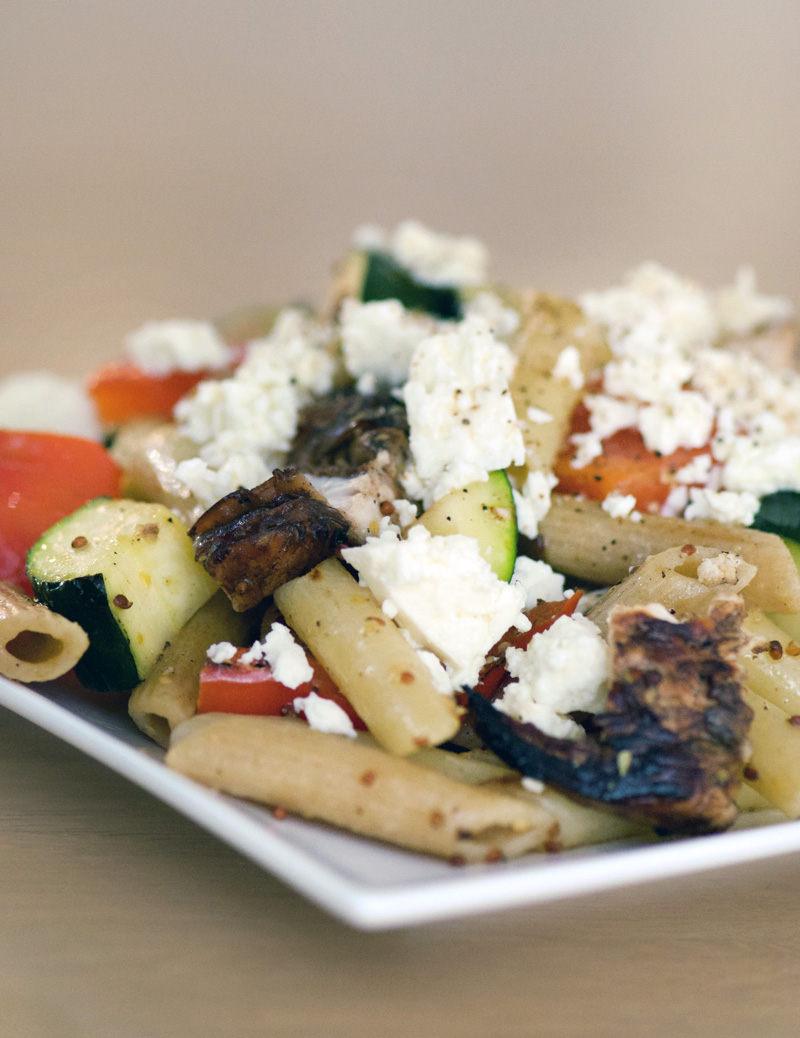
Penne with balsamic chicken and roasted zucchini and red peppers with feta

The final plated pasta topped with fresh ground pepper and some crumbled feta. You can always mix it up with this recipe: try it with mushrooms, goat cheese, asparagus or toss in some spinach while the pasta is hot to wilt it.

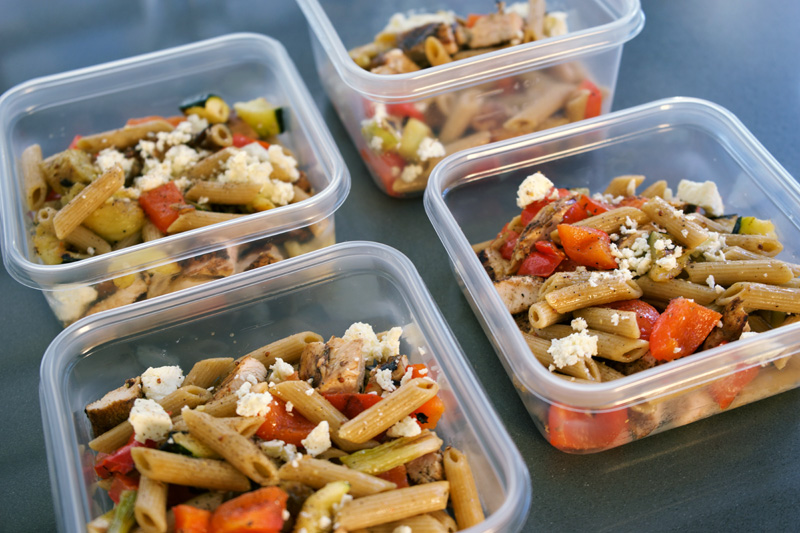
Four lunch containers with pasta and veg ready to go

Lunch feasts packed up and ready to go. A great and healthy way to fuel your week at work.

Print

Roasted Chicken & Veg Penne

Pasta, peppers, zucchini and mustard dressing come together for a quick and healthy meal.

Course Lunch, Main Course
Cuisine American
Prep Time 20 minutes
Cook Time 20 minutes
Total Time 40 minutes
Servings 4

Ingredients

Pasta

  • 3 cups whole wheat penne
  • 2 chicken breasts, boneless, skinless
  • 1/3 cup balsamic vinegar
  • 1/3 cup olive oil + additional for veggies
  • salt
  • freshly ground pepper
  • 2 red peppers tops cut off, seeds & ribs removed
  • 2 zucchini sliced in half lengthwise
  • 3 green onions
  • 100 g crumbled feta cheese (about 1/2 cup)

Grainy Mustard Dressing

  • 1 1/2 tbsp grainy mustard (medium hot)
  • 4 tbsp extra virgin olive oil
  • 2 tbsp white wine vinegar
  • salt
  • pepper, freshly ground

Instructions

  1. Combine olive oil and balsamic vinegar in a dish large enough for the chicken. Prep chicken breasts: remove the tenders, and slice into the thickest part of the breast, opening it up like a book. Set chicken breasts and tenders into the prepared dish and marinate for 15–30 minutes.

  2. Heat grill to 400°. Prep vegetables: spray lightly with olive oil and season with salt and freshly ground pepper to taste. 

  3. In a small bowl, combine the grainy mustard dressing ingredients.

  4. Cook penne according to directions, drain and place into your final serving bowl. Add a few tbsp of the dressing to keep it from sticking while you prep the remaining ingredients.

  5. Grill vegetables to desired tenderness. If you're in a hurry, grill the red peppers lightly so you can leave the skins on and simple dice and serve. If you have a bit more time and prefer to roast them fully, blister the skin so that you can more easily remove it before chopping and adding to the pasta. When the vegetables are cooked, chop them up and add them to the pasta. (Discard the green onion ends, and just adding the chopped roasted bulbs)

  6. Lightly oil the grill; place the balsamic chicken breasts and tenders onto the hot grill. After 2 minutes, reduce heat to 350°. The tenders will cook more quickly, check them after about 8 minutes and remove when cooked through. Continue cooking the breasts an additional 5–6 minutes until cooked. Remove to a cutting board and chop, adding to the pasta bowl.

  7. Add remaining dressing to the pasta bowl, season with additional salt and freshly ground pepper to taste if needed. Divide among serving plates, and top with crumbled feta.

Filed Under: Main, Pleb Feasts, Recipe Tagged With: balsamic chicken, chicken breast, grainy mustard, Grill, grilled red peppers, grilled zucchini, olive oil spray, penne, Red peppers, roasted red peppers, Veg, Vegetables, zucchini

Pleb Feasts: Apple Celery Tuna Salad Sandwhich

April 8, 2017 By Caroline 1 Comment

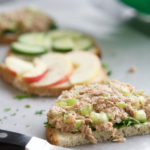
sandwich elements being assembled

In my never-ending search for better lunches to bring to the office, I bring you “Pleb Feasts”. It’s all too easy to be lured in by the foodcourts and unhealthy dining options available for purchase when buying lunch. On the other hand, making lunches takes time and planning, and I don’t want to compromise on flavour or freshness by eating something made in advance. What’s a common office pleb like myself to do? I’ve been working on some creative solutions. This sandwich is super easy and doesn’t take a lot of time. I’ve also included tips on how I like to wrap mine up for maximum freshness the next day.

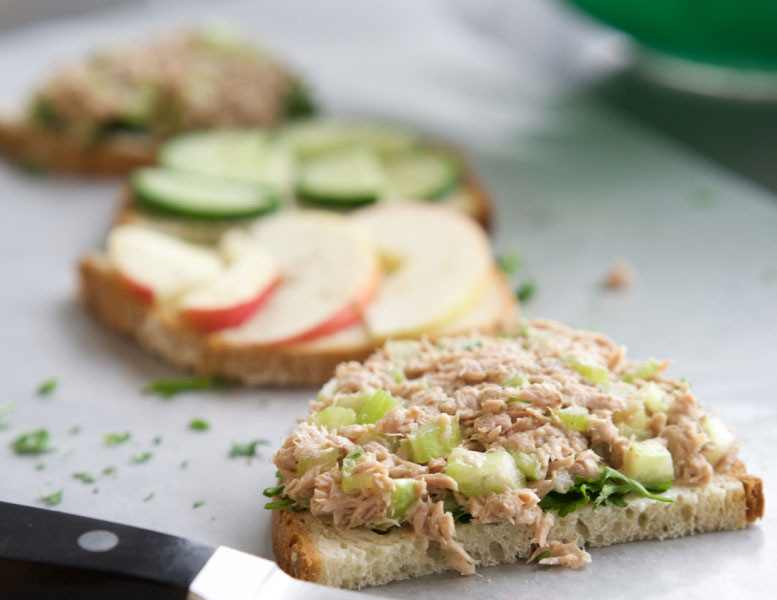
I’ve combined a favourite of mine—crisp apple celery salad, with tuna and light rye bread for these sandwiches. Parsley is a hardy herb that doesn’t get soggy; here it replaces your typical lettuce leaves to brighten up the tuna (and protect the bread from getting soggy).

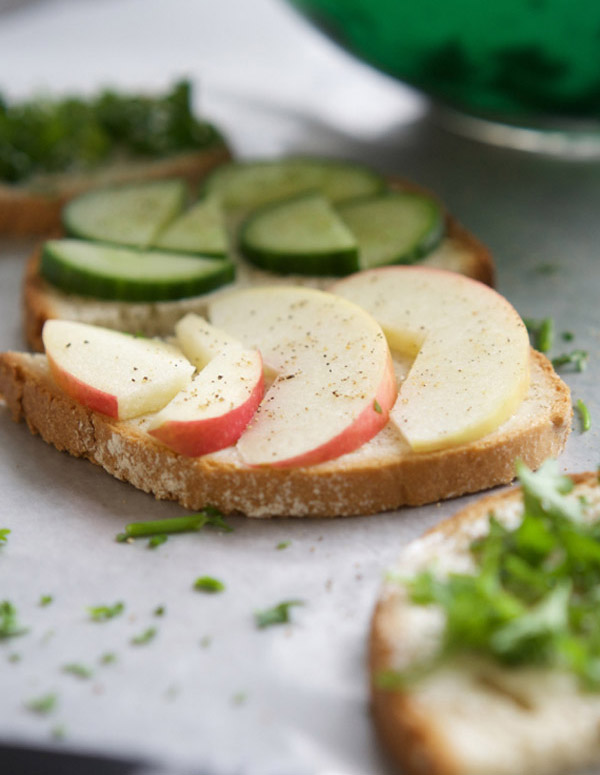
I experimented with apples on one half, sliced cucumber on the other. Apples won for me hands down, but you could make these with cucumbers as an option to change things up a bit.

Assembling the sandwiches

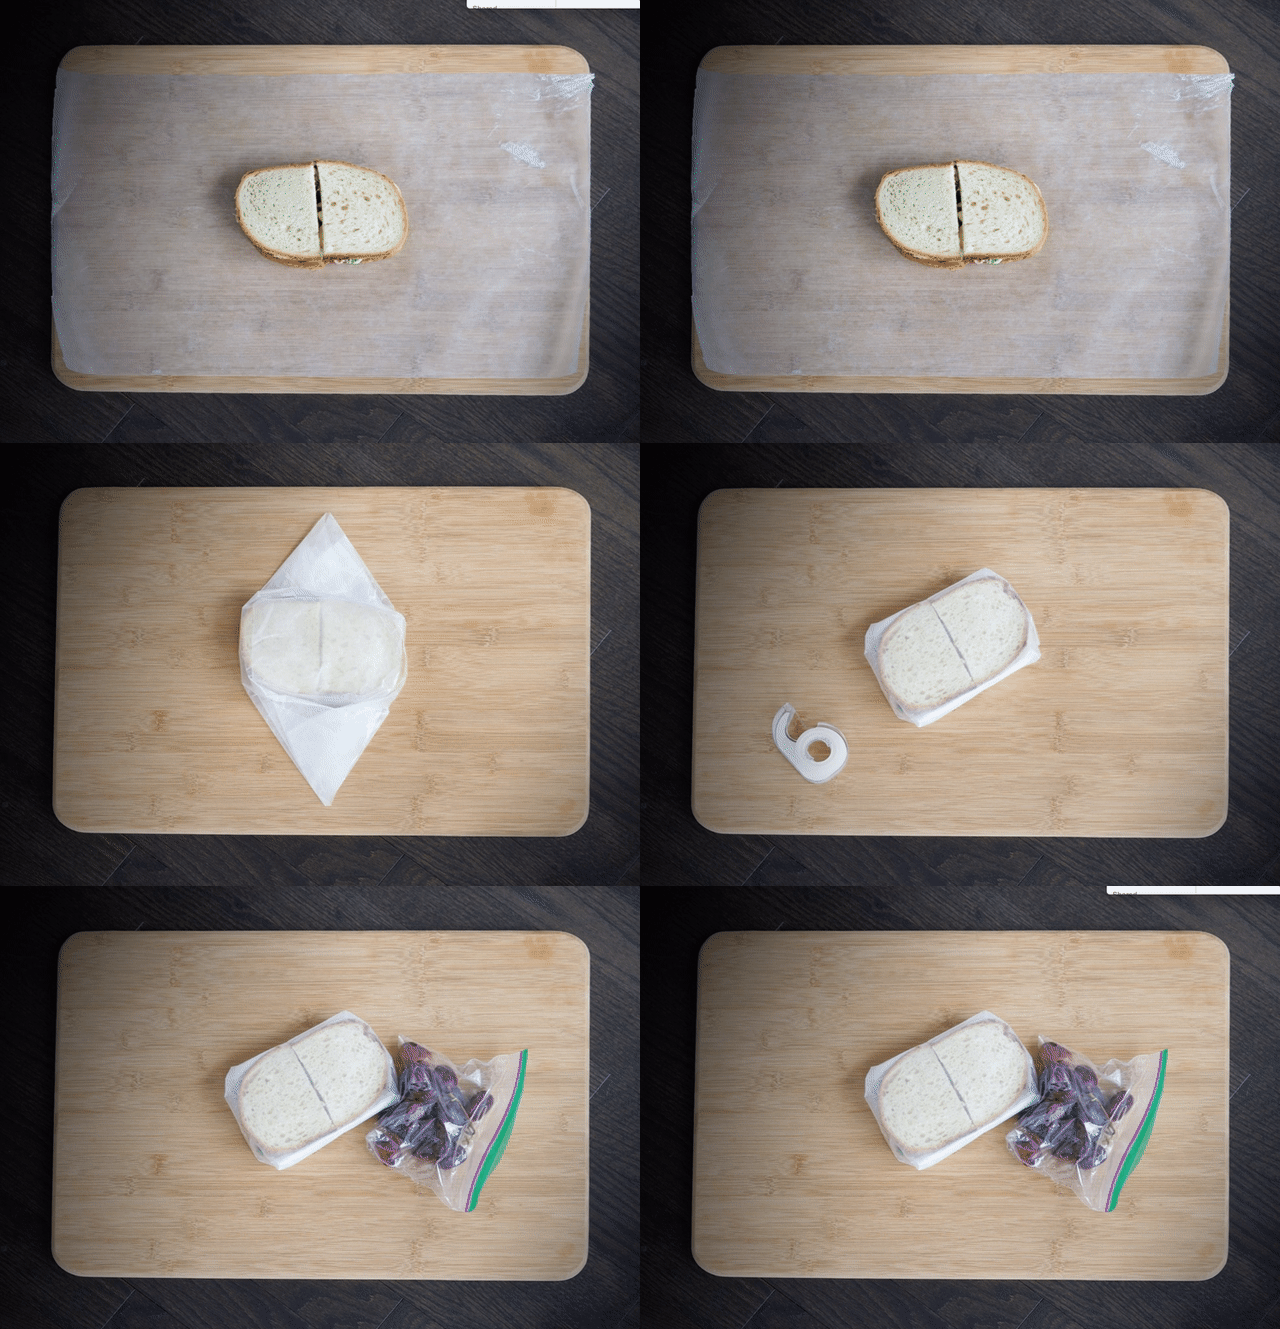
A note on the packaging. I find wax paper is the best wrap for sandwiches—enough protection to avoid drying the bread out, but not a tight seal like plastic where things start to get soggy. Roll out a piece of wax paper, build your sandwich on top, wrap it up, throw in a fruit snack and lunch is done!

sandwich assembly in progress
Print

Apple Celery Tuna Salad Sandwhich

A perfect lunch to take to work—quick and easy to make, and stays fresh.

Course Lunch
Cuisine American
Prep Time 10 minutes
Servings 2 sandwiches

Ingredients

  • 1 can solid white tuna packed in water
  • 3 tbsp mayonnaise
  • 1 tsp lemon juice
  • pinch salt
  • freshly ground pepper to taste
  • 1 celery stalk
  • 1/2 apple Gala or Empire, cored and sliced thin
  • 1 bunch fresh curly parsley roughly chopped
  • 4 slices light rye bread
  • 1/4 seedless cucumber (optional)

Instructions

  1. Drain water from tuna in can, place tuna chunks on a paper towel and pat away excess moisture. Place into a medium size bowl and break apart with a fork.

  2. Chop celery into 1/8" size pieces, and add to tuna with 1.5 tbsp mayo, lemon juice and salt to taste. Combine well.

  3. Place a wax paper sheet on counter top for each sandwich, and set out 2 slices of bread on each sheet. Cut slices in half and spread one side of each with the remaining mayo. Season bread slices with extra fresh ground pepper for extra kick if desired. Layer fresh parsley on half of the slices, and divide tuna mixture on top, patting tuna down to create a flat surface. Layer apple slices on top of tuna (or cucumber if preferred). Top with remaining slices and wrap each sandwich in its wax paper sheet.

Filed Under: Pleb Feasts, Recipe Tagged With: apple, cucumber, lunch, pleb feast, sandwich, tuna

Primary Sidebar

Welcome to my kitchen journal, a place where I will share my favourite heritage recipes honed over the years, as well as document new evolutions and experiments along the way. Great feasts become vehicles for fond memories—the best meals are the ones someone made with love, for you. Follow me to explore traditions, document stories and experience the joy of the feast. Read More…

  • Facebook
  • Instagram
  • Pinterest
  • Twitter
  • YouTube

Don’t miss a story!

Get email updates

Copyright © 2023