This post has been over three years in the making! It all started when I travelled to Hyderabad, India for a business trip in 2015. I was a few months into a new role as Creative Director, and it was my first visit to India. I was super excited to meet my design team as well as the extended Canadian marketing team in the area. It was an amazing trip where I experienced streets full of energy and life, colours, spices and the warmth of the local people.
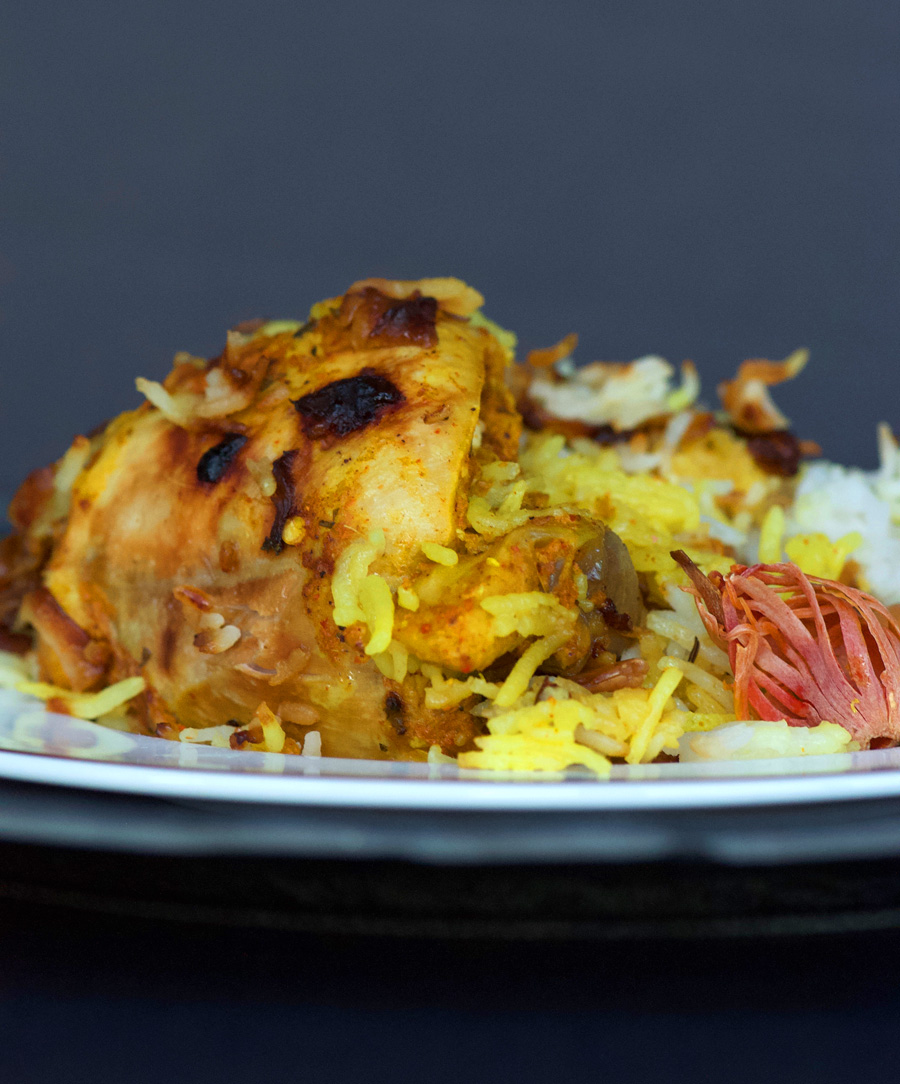
Hyderabad is known for Biryani and I enjoyed it several times during my visit. Most Biryanis were made with goat, and they were often served in the pot, brought right to the table. When you plunged the serving spoon into the Biryani pot, there were colourful layers—and at the bottom, tender, spicy meat.
On my last day, one of the designers gave me a parting gift—all of the spices one would need to make a Biryani! I asked if he had a recipe, but he didn’t and no one else I asked had one either. I wasn’t sure how I would replicate this dish at home, but was intrigued with the idea of trying to make this and share it with my friends and family.
Upon returning home, I was eager to try some local Biryanis in the Toronto area. However each time I was disappointed that they were more like a stir-fry and didn’t have the layering with tender meat like the ones I had in Hyderabad. I did some research, and learned that Biryani was believed to have originated in the kitchens of the Nizam of Hyderabad. I remembered I had visited the Nizam’s palace with one of the designers, it is so beautiful. A few photos are below:
After experimenting with several recipes, I developed the method shown here. Chicken is easier to come by here rather than goat meat, so I went with bone-in chicken thighs as this cut would remain tender.
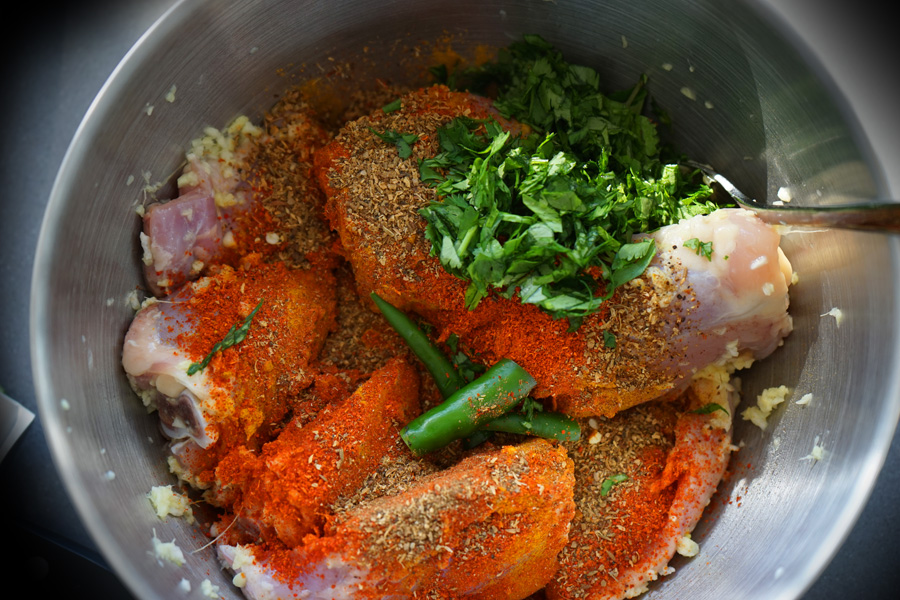
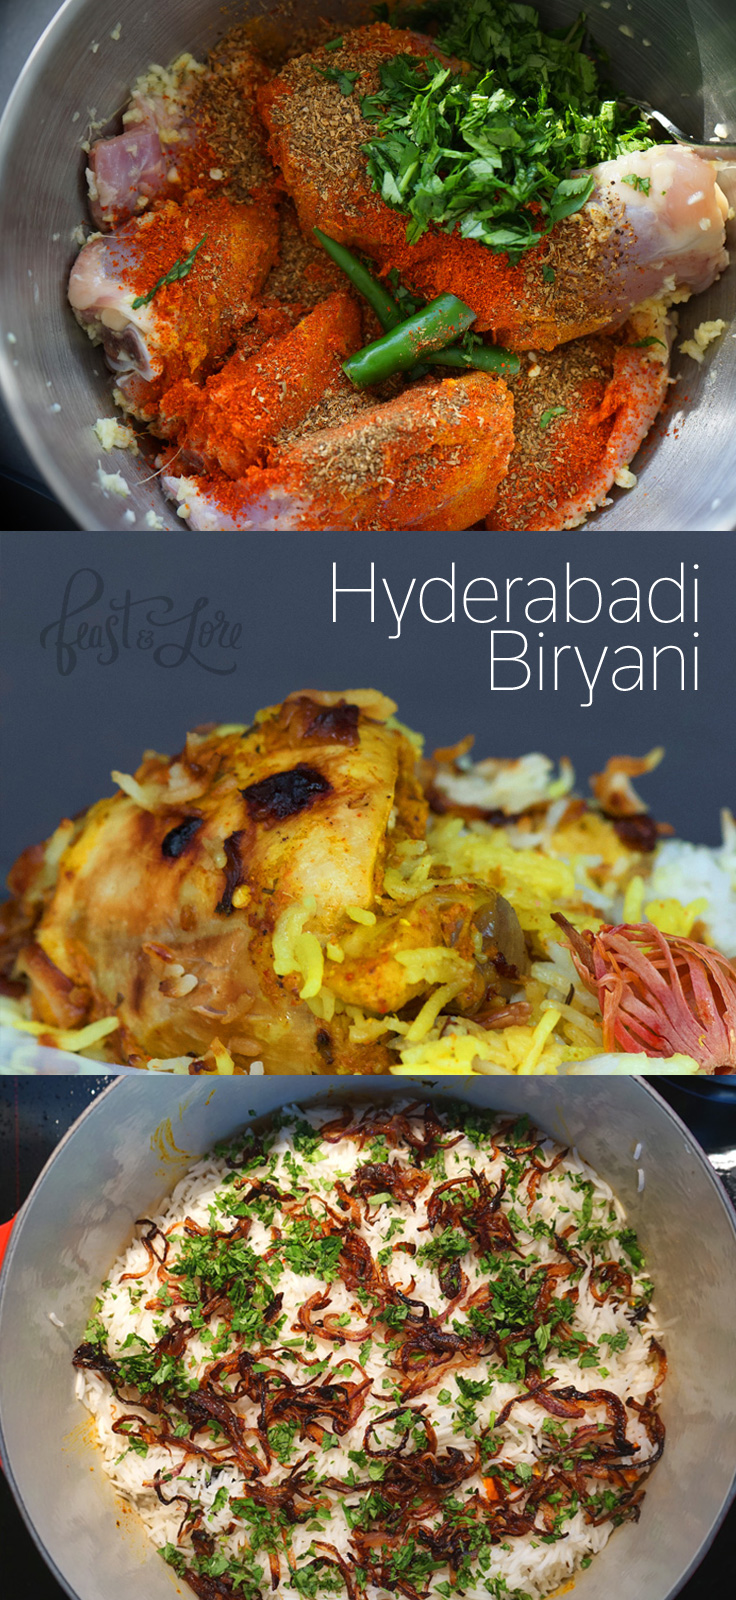
A key ingredient to locate was authentic red, spicy Indian Chili powder (not to be confused with Mexican/American Chili powder which is much darker in colour, contains ingredients other than pure chilies, and is much less hot). This recipe has been adjusted to use the spicy Indian Chili powder which is made from pure ground chilies. The heat is just a bit less than Cayenne pepper. Kashmiri Chili powder would also work well—if you find that type, you can probably use more as it is less hot than Chili powder. If you can only find the Mexican style Chili powder, you can mix about one part Cayenne Pepper to three parts Paprika to simulate Kashmiri Chili powder. Below you can see the brilliant colours coming together for the spicy chicken marinade.
Another key ingredient is Ghee—a type of clarified butter with a delicious nutty flavour. I’ve seen this around quite a few supermarkets, however it’s pretty easy to make yourself from regular butter (and less expensive). Google it, whip up a batch, and story any extra in a jar in the fridge. It pretty much lasts forever that way. Or just buy it—whatever works for you!
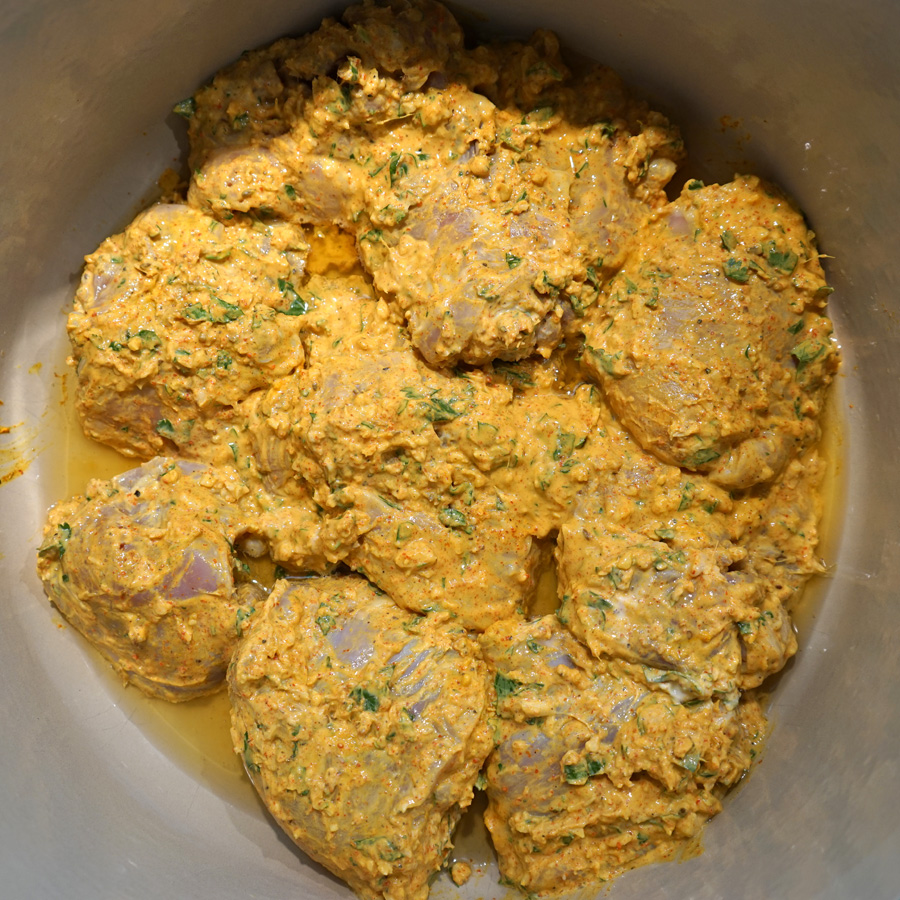
Once you’ve got the meat marinating, you’ll need to fry up the red onions and almonds in the Ghee. And when it comes time to start cooking the chicken, this is also cooked in Ghee at the bottom of the pot, as shown above.
The trickiest part of making this dish is getting the perfect cook for the rice. You par-cook Basmati rice and then add it to the pot with the meat to finish it. The first few times I made it, I had a tendency to over-cook the rice and it wasn’t quite as firm a texture as I would have liked. After making some notes and adjusting the par-boil cooking time down a bit, it came out pretty perfect.
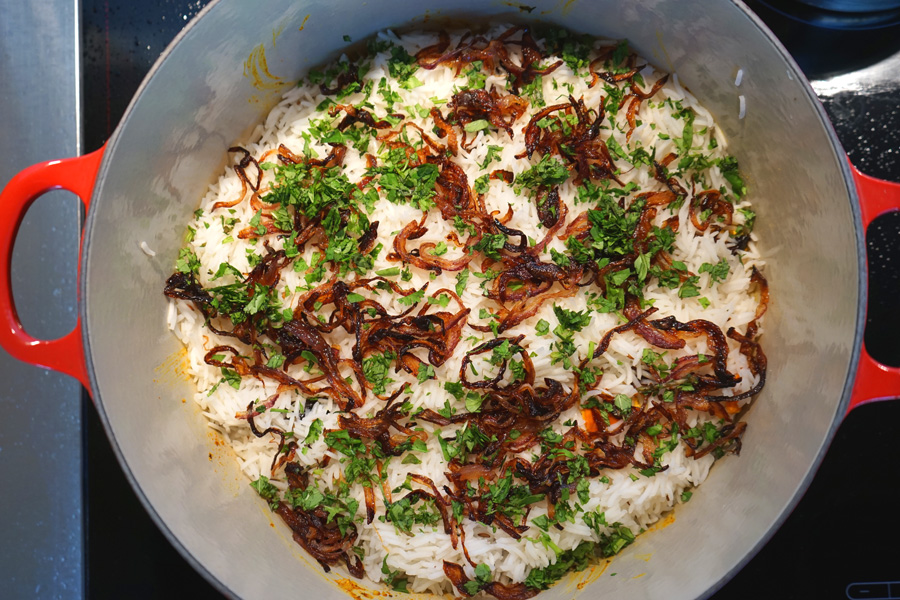
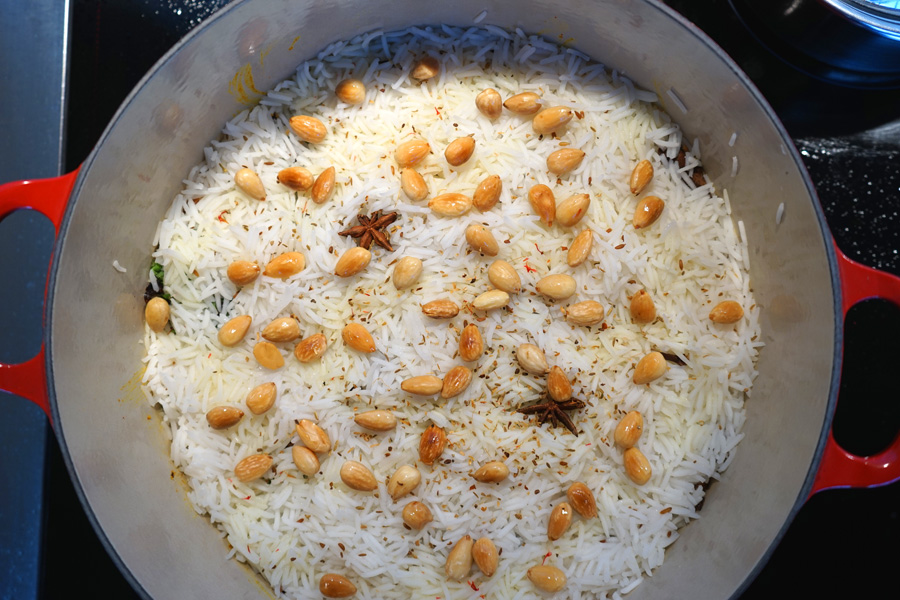
Above and below, you’ll see the layering happening: meat on the bottom, followed by fried onions and more ghee, then rice, followed by more fried onions and cilantro, followed by more rice, ending with fried almonds and a bit of mace.
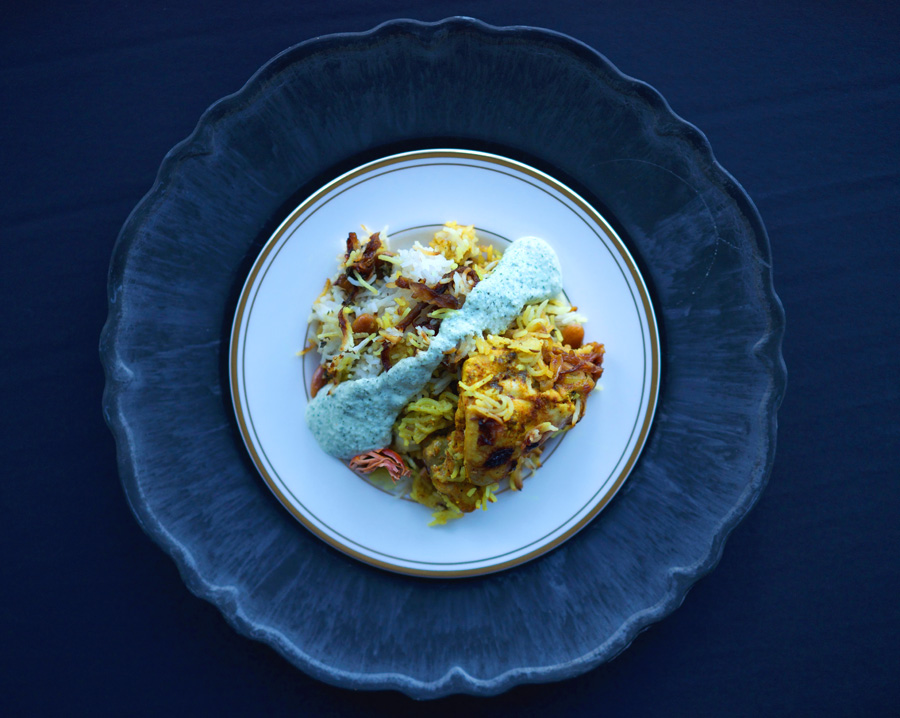
Finish the cooking with a tight-fitting lid and you are ready to serve up one awesome Biryani! I always accompany it with some home-made cucumber yogurt raita, which allows me to tolerate the spice factor of this dish.
This Biryani has vibrant colours and flavours, I will always remember my visit to Hyderabad and the wonderful people I met every time I make this dish. Give it a try, and let me know how you find it!
Below are a few of my favourite photos from the trip. In particular, the top centre photo always makes me smile. While touring Golconda Fort, people kept gesturing to me with their camera. I thought they were asking me to take their photo for them. My more experienced travel companion pointed out that actually, they wanted a photo of us! I guess they don’t see very many North Americans out this way. At one point, four people were taking my photo at once. It was so bizarre, I held up my camera and captured them all taking their photos of us. It was like having our own paparazzi crew following us around, LOL!
Hyderabadi Biryani with Raita
Fragrant, layered rice with tender spicy chicken at the bottom, this recipe promises an authentic Biryani experience.
Ingredients
For the chicken
- 8 - 10 bone-in chicken thighs
- 4 cloves garlic
- 1.5 inch fresh ginger, peeled and sliced
- 3/4 cup plain yogurt
- 1/2 tbsp Indian Chili powder
- 1/2 tbsp garam masala
- 1/3 cup chopped fresh cilantro
- 2 green chilies, sliced in half lengthwise and crosswise
For the onions and almonds
- 2 red onions, thinly sliced
- 3 tbsp ghee
- 2 tbsp vegetable oil
- 1/3 cup whole, peeled almonds
For the rice
- 2 cups Basmati rice
- 2 Bay leaves
- 6–8 whole cloves
- 2 medium pieces Cinnamon bark (cassia)
- 1/2 tsp whole Jeera (Cumin seeds) or Caraway Seeds
- 6 Cardamom pods
- salt
- 1/4 cup warm milk infused with Saffron
- 1 tbsp Mace pieces
Instructions
-
Place chicken thighs into a medium size bow, or into a large ziplock bag; set aside. In a small food processor, blend garlic and ginger into a paste. Add to bowl with chicken thighs along with the juice of 1/2 lemon. Stir well to combine and coat the chicken. Add spices, yogurt, half of the chopped cilantro and chilies. Stir to combine and marinate for a minimum of 30 minutes, or overnight in the fridge.
-
Peel and thinly slice the onions. Melt Ghee in a large frying pan and bring to high heat; add about 2 tbsp vegetable oil and the onions. Fry until golden and crisp. Remove from pan with a slotted spoon to a small plate and reserve. Next, add the almonds to the pan and stir until golden on both sides. Remove and set aside on another small plate. Reserve the Ghee/oil mixture from the pot into a small heat-safe container.
-
Rinse the rice, then place into a large bowl. Add water and soak rice for 30 minutes.
-
Add 3 tbsp reserved ghee to a large dutch oven, and heat to medium-high. Transfer marinated chicken to the pot, and cook for about 10 minutes.
-
Fill a medium pot of water set over high heat. Add Bay leaves, cloves, cinnamon, caraway, cardamon, salt, and the juice from 1/2 lemon. Bring to a boil. Drain the rice, and add it to the boiling water. (Cook it like pasta, draining excess water when it's ready). Start testing the rice at about 8 minutes—it's ready when it's possible to crush the rice, but it remains firm in the centre. You are aiming for it to be about 2/3 cooked. It shouldn't need to cook more than 10 minutes.
-
Drain the rice, and use a slotted spoon to transfer about half of the rice on top of the chicken mixture. Spread remaining fried onions and cilantro on top in an even layer. Transfer the remaining rice to the pot in an even layer. Sprinkle with a bit of rosewater, garam masala, fried almonds and mace pieces. Finish by spooning the saffron milk over everything. Cover the pot tightly, or place a damp towel between the pot and the lid to seal. Cook for five minutes on high. Lower heat to medium and cook for another 15 minutes, then reduce heat to low for 10 minutes. Finally, turn off heat and allow to rest for 10 minutes. Serve and enjoy with cooling raita!
Cucumber-yogurt Raita
A wonderful cooling sauce, perfect with a spicy Hyderabadi Biryani.
Ingredients
- 1 large unpeeled seedless cucumber, coarsely grated
- 1 cup plain greek yogurt
- 1/4 cup packed chopped fresh mint
- 1 tsp ground cumin
- pinch cayenne pepper
Instructions
-
Wrap cucumber in a kitchen towel and squeeze dry. Add yogurt, mint, cumin and a pinch of cayenne pepper into a small food processor. Add cucumber and blend until smooth. Season to taste with salt and pepper. Cover and refrigerate at least two hours for the flavours to meld—or overnight. Serve chilled.



 />
/>
omg this meal looks extremely good and fulfilling!! definitely a 5/5
thanks so much! you’ll have to share back how the recipe works out for you.
Such a delicious and authentic meal!
Thank you–it was really rewarding to have the opportunity to try a unique dish in a far-off place and then work out how to bring those flavours home so I can enjoy them anytime 😉
This looks so good!!
Oh, this looks like such a yummy dinner! I need more good ideas. Thanks for sharing!!! 🙂
Thanks! I will add that this also makes for great leftovers 🙂
Oh my goodness–this looks SO delicious. Love your step-by-step photos!
Thanks! Stopping while cooking to take the step-by-step shots slows me down but I think they help make the instructions more clear. Glad you enjoyed them!
Looks very delicious, Easy to read too. thank you for the detailed pictures!
I am going to attempt to make this!
Awesome! Please let me know how it turns out 🙂