• Skip to content
  • Skip to primary sidebar

Feast & Lore

Food stories featuring heritage recipes and new experiments.

  • Home
  • Recipes
  • About

Peach

Roast Garlic Herb Marinated Chicken Thighs

September 13, 2017 By Caroline Leave a Comment

Refuse to let go of summer—you can keep your BBQ going well into the fall (and sometimes early winter)! This bright green herb sauce with roasted garlic makes a wonderful marinade for chicken thighs. Make the marinade and coat the chicken the day before, for an easy dinner the next day that can be pulled together in time it takes to heat the grill and cook the chicken. Throw a couple of peaches (or figs would be great too) during the final 5 minutes or so of grilling for nice contrast to the garlicky, herbacious chicken.


Bright green pesto in a white bowl on a bright pink background

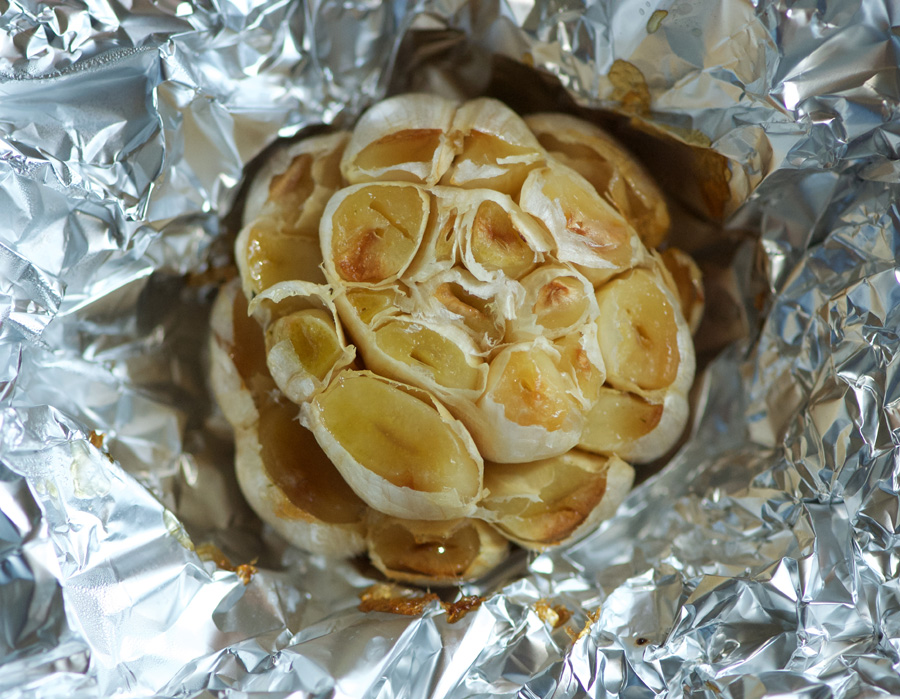
To roast the garlic, take a full head, and slice off the tops to expose the cloves. The cloves are at different levels so I cut the tops from each row/level separately rather than a straight cut across the top, to maximize the garlic. Drizzle or spray with a touch of olive oil, wrap in foil, and roast at 375° for about one hour, until the cloves are soft when pierced with a knife. Allow to cool, and pop out the cloves with a butter knife into your food processor or mini-chopper.

Fresh from the oven, a head of roasted garlic in crinkly foil

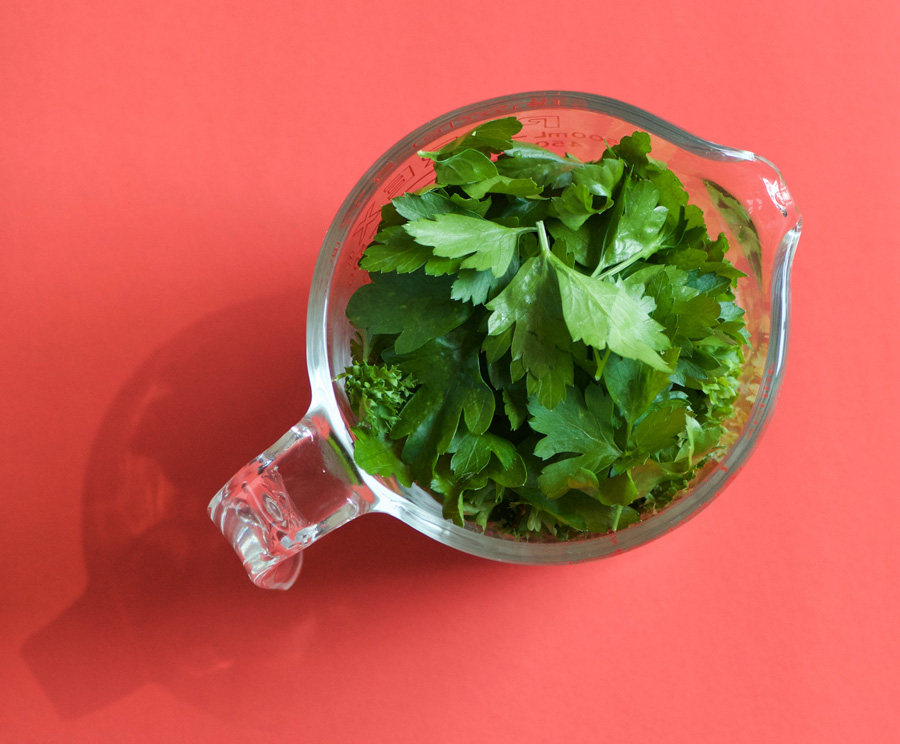
Clean and prep your herbs, no need to chop them as you’ll be putting them into a food processor to blend with the roasted garlic. Parsley and mint work well to offset the garlic and give the sauce it’s amazing green colour.


Parsley packed into a 2-cup pyrex

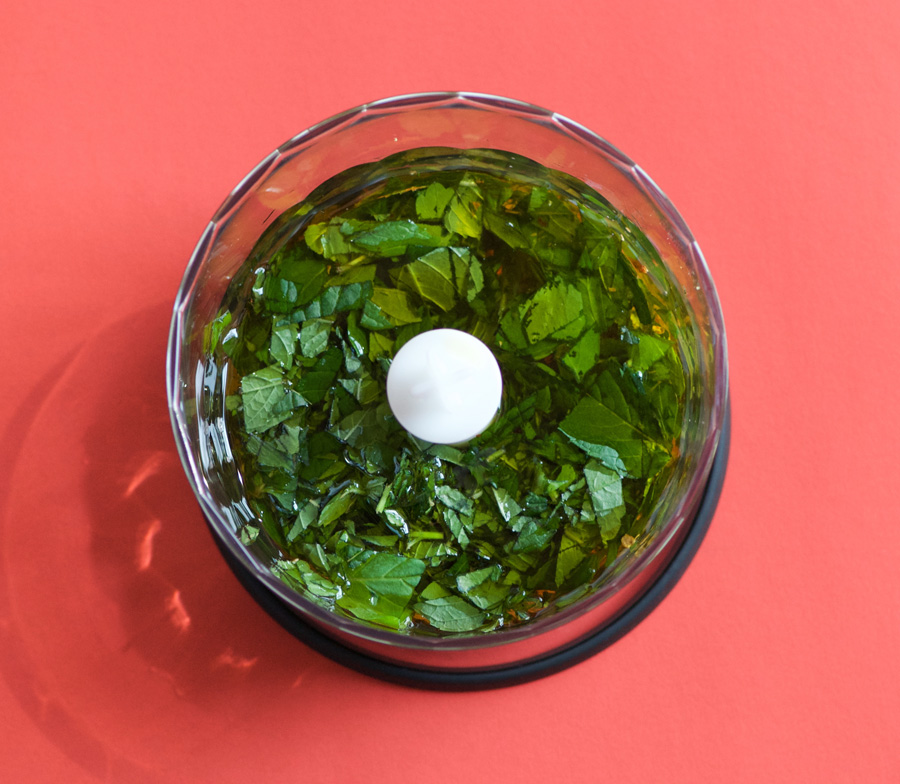
Add the remaining marinade ingredients into the food processor and blend until the herbs are finely chopped and the texture is smooth.

Pesto getting made in a mini-chopper

Next, loosen the skin on the chicken thighs and rub the marinade under the skin, and then all over the outside the chicken, before placing into a bowl. Cover and chill in the fridge for at least one hour—if you can do this the night before, even better.

Chicken thighs marinating in pesto in a green bowl on bright pink backgorund

Finally, remove the chicken about 30–45 minutes before grilling to take the chill off the meat for more even cooking. Heat the grill to about 400°, and brush with olive oil (or spray carefully with non-stick spray). Note: with all the olive oil in the marinade, the flames can really jump up when you put the chicken on the grill, so allow excess marinade to drip off into the bowl before placing the meat on the grill. Start the chicken thighs skin side down, and grill until the skin is nice and crispy, then turn down the heat and flip the chick over to finish cooking at a lower heat.

Grilled pesto chicken with peaches piled onto a plate

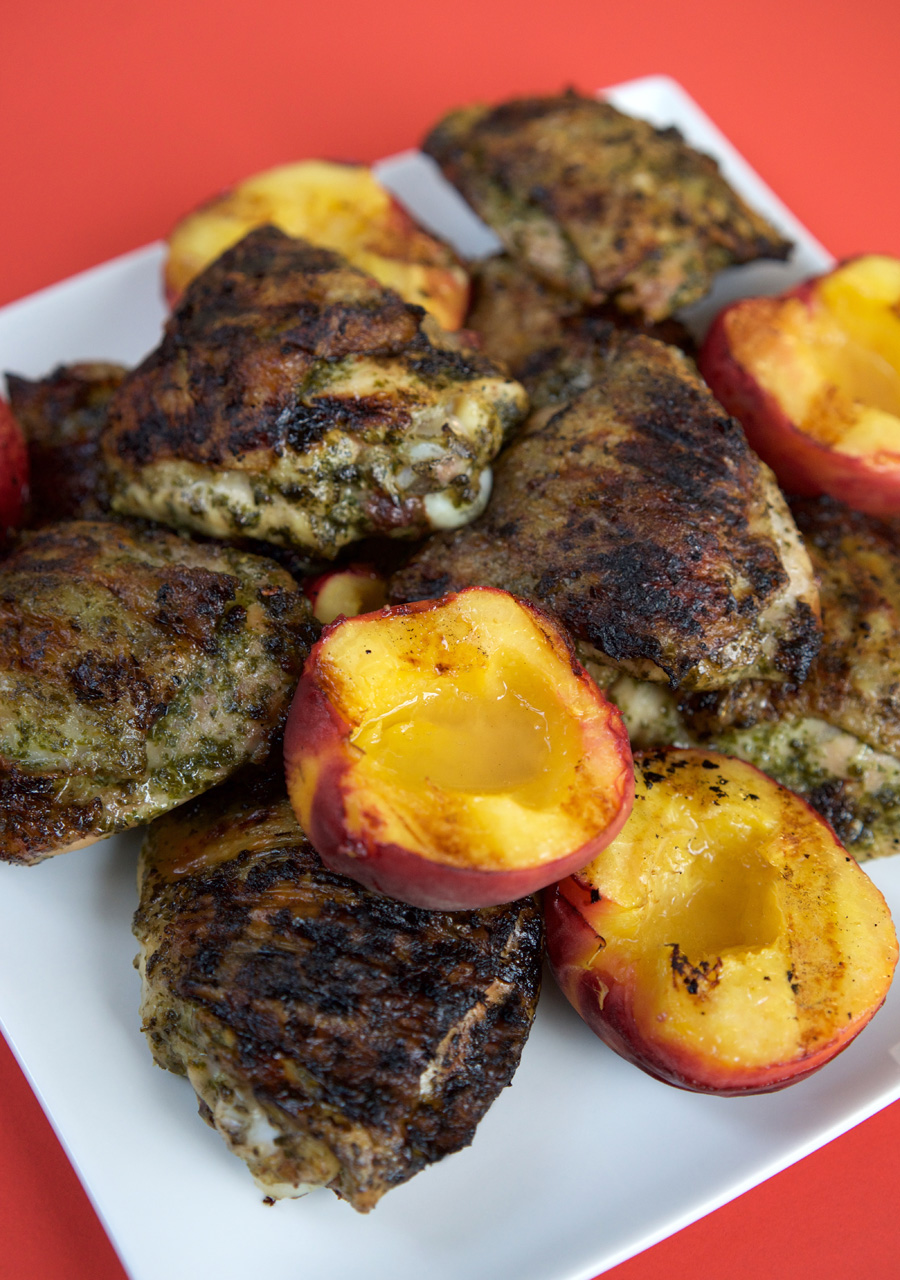
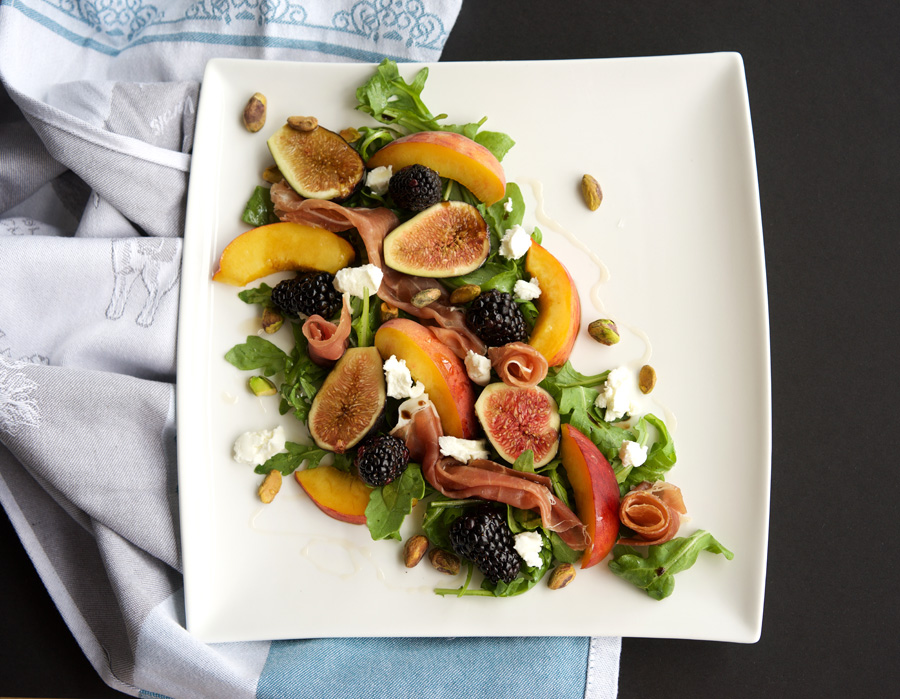
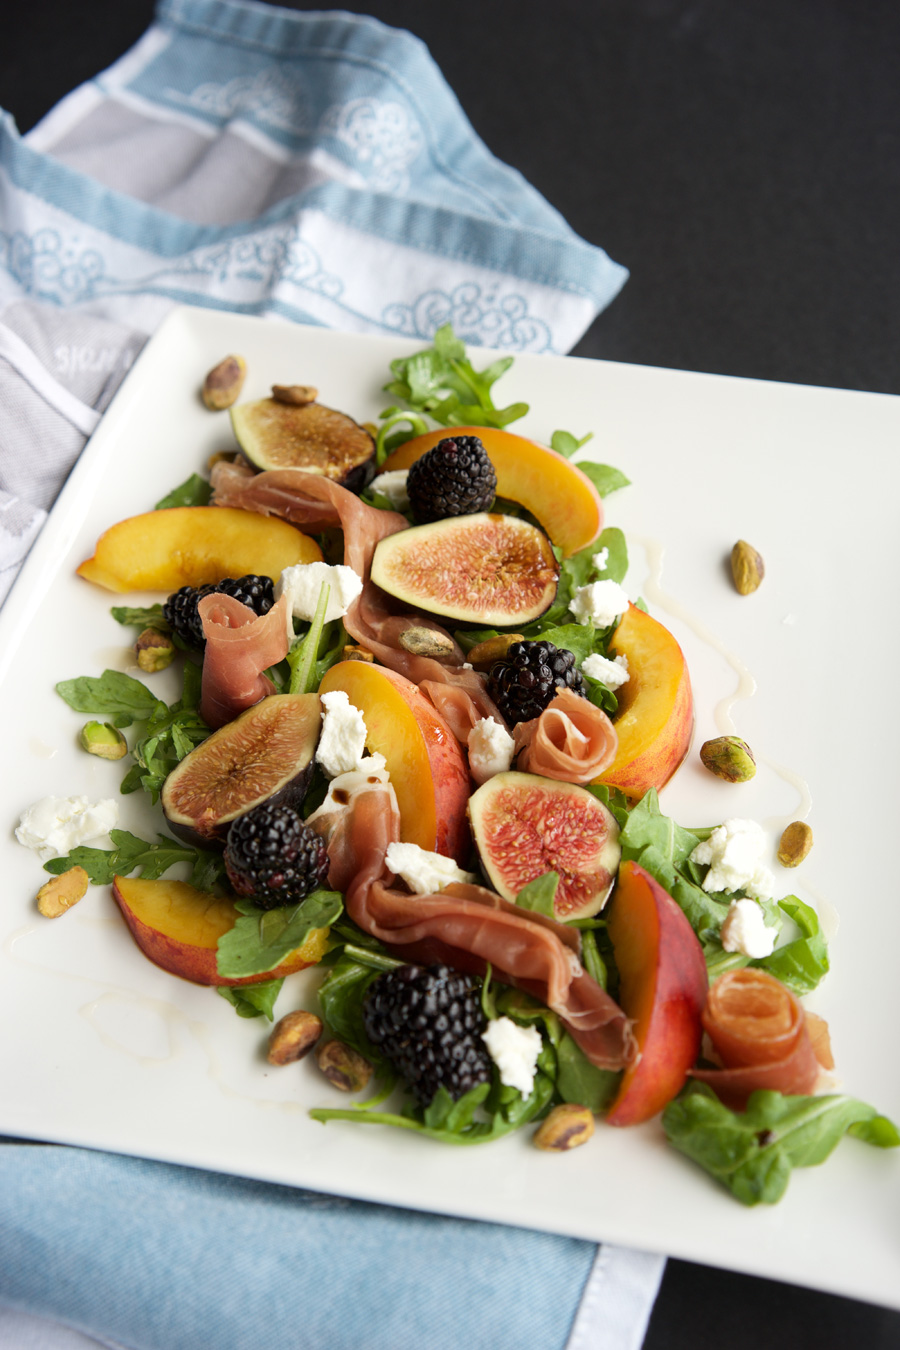
Plate with your peaches or figs, and serve!


Grilled pesto chicken with peaches piled onto a plate
Print

Roast Garlic Herb Marinated Chicken Thighs

Tender grilled chicken with an herbacious-garlic kick and crispy skin. The marinade can be made in advance to make this a quick weeknight dinner you can get on the table in 30 minutes.

Course Main Course
Cuisine American
Prep Time 1 hour
Cook Time 30 minutes
Total Time 1 hour 30 minutes
Servings 4

Ingredients

Marinade

  • 1 head roasted garlic cut top off garlic head, roast at 375°, wrapped in foil, for 1 hour until tender
  • 2 cups packed parsley
  • 3/4 cup packed mint leaves
  • 3/4 cup olive oil
  • 1 tbsp fresh lemon juice
  • 1 tsp crushed red pepper flakes
  • 1/2 tsp salt

Chicken Thighs

  • 8 chicken thighs with bones and skin
  • salt
  • freshly ground pepper
  • 4 peaches, split into halves, pits removed
  • olive oil

Instructions

  1. Squeeze cooled garlic cloves out of the head into a small chopper or food processor. Add remaining ingredients. Blend until herbs are finely chopped and a sauce forms. 

  2. Loosen skin from chicken thighs, and spoon herb sauce under the skin. Rub more sauce all over the outside of the thigh, and transfer to a bowl. Repeat with remaining meat. Cover and transfer to a fridge for a minimum of one hour, or overnight.

  3. Remove chicken from fridge and allow to rest at room temperature for 30 minutes. Heat a BBQ to 400°. Spritz grill with olive oil or cooking spray, then carefully add meat, skin side down, to the hot grill (all that olive oil can create big flames, so shake off excess oil/sauce before placing on the grill). Grill for approximately 10 minutes until the skin is well crisped and dark in colour.

  4. Reduce heat to 300° and flip chicken pieces skin-side up, positioning them in indirect heat (turn a zone in the BBQ way down or off, placing chicken into that zone). Cook over lower heat for another 20 minutes or so, until the meat is cooked through. (Temperature should be 165°—I press down on the chicken with my tongs to get a sense of the firmness to see how cooked they are. Firmer meat means more cooked).

  5. During the last seven or so minutes, mist the peach halves with olive oil and place on the grill, starting skin side up. Get some nice grill lines, then filp and finish cooking the peaches until juices are flowing and the fruit has softened.

  6. Serve the chicken and peaches together on a platter. 

Filed Under: Main, Recipe Tagged With: chicken, chicken thighs, Garlic, Grill, herbs, marinade, marinate, parsley, Peach, pesto, sauce, summer

Peach Raspberry Pie

September 5, 2017 By Caroline 2 Comments

It’s hard to believe the CNE is over, the Labour Day weekend has just passed, and everyone is “back to school”. But don’t fret, technically summer is still here until September 22, peaches are still plentiful, and now is the perfect time to bake up the best pie you’ll ever eat! So many people are afraid to make their own pie crust, and I have to admit it is almost magical how butter and flour can turn into something so flaky and delicious. But honestly, it’s not hard and the ingredients are so simple. You can totally do this, I have all the instructions and even some video to show you how it’s done.

One key thing to remember is the importance of keeping your pastry cold. The butter has to be cold right from the start, and you can’t skip the various stages of putting the dough in the fridge when directed.

To begin, combine flour, sugar and salt in a large bowl. Cut up two sticks of butter (keep them in the fridge right until you are ready to cut them) into cubes and cut the butter into the flour mixture. I like to use a pastry cutter, shown below, as it does a quick job of working the butter in. You can also use two knives. Some people use a food processor for this step, but I don’t actually own one that’s big enough, and I’d rather not clean all the food processor parts afterwards anyways 🙂


Cubed butter is about to be cut into flour with a pastry cutter.

Keep working the butter into the dough until the texture is a coarse, crumbly mix with even, peppercorn sized lumps of butter throughout. Add ice water (again, very cold water is key, I set aside a small bowl with cold water and add ice cubes, and measure out from there), a little at a time, mixing with a fork and adding only what you need for the dough to hold together. When you think it’s ready, take some in your hand and press it together. If it holds together and looks roughly like the photo below, it’s ready to be kneaded together.

Hand holding a pressed piece of dough that is holding together well

Knead the dough together until all of the crumbs are well combined into a nice, smooth (but somewhat craiggy) ball. While you don’t want to over-work the dough here and risk the butter getting too warm, you also don’t want to under-do it and end up with crumbly dough that won’t roll out nicely. I usually knead until it’s holding together well, then knead a few more times just to really combine everything well.


Ball of dough has been cut into two hunks

Divide your ball of dough in half, and then press each half onto a sheet of plastic wrap, forming each into a flattened disk about 1″ thick. I press them out with my palm and press the sides in to shape them as shown below. Then wrap them up and place into the fridge for about 50 minutes.

Dough is flattened and placed onto plastic wrap.

Meanwhile you can work on your filling. Peel and slice your peaches (fastest method: cut around the circumference of your peach to the pit, twist peach in half. Then slice peach into quarters. Hold a peach quarter in your hand, peach skin facing you. Slide your knife under the top corner of the skin, and in a single motion pull the skin off from top to bottom using the knife.) Another real time saver is to use frozen peaches (if you can find them—I get mine at MacMillan Orchards in Ajax) as they come already peeled and sliced. (Also this allows you to enjoy this pie all year round!) Mix the peaches with sugar and flour, and then add the raspberries.

Close up of fruit filling with sugar and flour

By now your pie crusts should be done chilling. Prepare your work area with flour and roll out the bottom crust. Once you’ve draped it over the pie plate, get it back in the fridge for a good 30 minutes. During this time you can make your Egg Wash and cut up the final two tablespoons of butter.

Here’s a video covering the next few steps:

Next roll out your top pie crust, and then add the filling to your lower crust. Dot with that butter, and brush the pastry edges with Egg Wash. Roll your top crust onto the bottom and trim the excess pastry from the edges of the pie plate. Crimp the edges together, and back in the fridge it goes for another 20 minutes or so, to allow the top crust to chill.

Pie bottom with filling and dots of butter

Finally, cut vents into the top crust, brush with Egg Wash all over, and sprinkle with coarse sugar. I love to get decorative with my pie crusts and make leaf shaped vents, and add extra leaves on top (“glued” with egg wash) to make the prettiest pie. You just can’t buy a pie that looks like this at the store (and the crusts on those don’t even come close to the flakiness level of this one!) Bake at high heat to brown the crust, then turn down the heat for the final phase to finish the pie and bake the fruit. I love to serve with vanilla ice cream on the side. Once you’ve had homemade pie like this, you’ll never want to go back to store-bought!

Golden and dripping with fruit juices, the pie is ready to eat!

Pie fresh out of the oven, photographed from above. Crust has vents shaped like leaves, with additional dough leaves creating a circular pattern on the crust.
5 from 1 vote
Print

Peach Raspberry Pie

My favourite pie, hands down, is this peach raspberry double-crust.

Course Dessert
Cuisine American
Prep Time 30 minutes
Cook Time 45 minutes
Total Time 1 hour 15 minutes
Servings 8

Ingredients

Pie Crust

  • 2 1/2 cups All-purpose flour
  • 1 tsp Salt
  • 1 tsp Sugar
  • 2 sticks Cold , unsalted butter (1 cup)
  • 5–7 tbsp Ice water

Filling

  • 4 lbs Peaches (about 8 medium) Peeled and sliced
  • 1/2 pint Raspberries
  • 1/2 cup Sugar
  • 1/4 cup All-purpose flour
  • 2 tbsp Cold, unsalted butter cut into pieces

Egg Wash

  • 1 egg
  • 2–3 tbsp milk

Instructions

  1. Make pie crust: Place flour, sugar and salt in a large bowl; stir to combine. Cut butter into small cubes and add to the flour mixture. Cut butter into flour using a pastry cutter or two knives, until the butter is broken down into tiny but discernible lumps with the flour.

  2. Mix in ice water with a fork until dough just comes together. Press some of the dough between your fingers to check the consistency, it should hold together well. Lightly knead the dough until all crumbs are incorporated into a craggy ball of dough. Don't over-knead at this point, but under-kneading will make fora  crumbly dough when you go to roll it out, so aim for fairly smooth ball.

  3. Divide the ball of dough into two, and press each half into a flat disk onto a piece of plastic wrap. Chill in the fridge for about 50 minutes. (If you forget it in there for longer than that, you'll just need to let it rest a bit when you remove it from the fridge before rolling it out)

  4. Lightly flour your work surface, and roll out your first dough half to approximately 1/8" thick. I always take my pie plate and hold it over the dough to see if it's been rolled out large enough. Use the rolling pin to lift the dough by gently rolling the dough onto the pin, starting from one of the edges. Drape the pastry over the pie plate, adjust to fit evenly over the dish and resist the temptation to fuss with it or press it down into the dish. Transfer to the fridge to chill for 30 minutes.

  5. Make the filling: Combine the peaches, sugar and flour, stir to combine. Add the raspberries last and combine gently to keep them intact as much as possible.

  6. Make Egg Wash: beat egg and milk together in a small bowl. Have a small brush ready. Cut up the final two tablespoons of butter and set aside. Roll out your second pie crust.

  7. Grab the bottom crust out of the fridge and add the fruit filling—if the mixture is looking really juicy sprinkle with a few more tablespoons of flour. Dot with butter. Grab the reserved Egg Wash and brush it onto the edges of the bottom pie crust. Use your rolling pin to pick up the top crust and place on top. Using a knife, trim the excess dough from the sides of the pie dish. Go around the edges of the dough crimping the top and bottom crust together by placing your index finger under the crust and pushing up while pressing down on either side with your other index finger and thumb. Chill in the fridge for 20 minutes or so.

  8. Heat oven to 425°

  9. Remove pie from fridge and cut vents in the top crust. You can either cut simple slits on top of your crust or get creative with them. I like to cut out leaf shapes in the centre. Then I take some of the extra dough, cut it into more leaves as needed, and use Egg Wash to "glue" the pastry leaves onto the top crust to make a decorative pattern. 

  10. Last step before baking: brush the entire top crust and edges with Egg Wash, and sprinkle with coarse sugar. Bake at 425° for 20 minutes. Reduce heat to 350°, and bake for 30 – 40 minutes more until the fruit is bubbling and the crust is golden. Resist slicing the pie for about 20 minutes or so to allow the filling time to thicken up slightly. I like to serve with some vanilla bean ice cream on the side.

Filed Under: Dessert, Recipe Tagged With: butter, crust, double crust pie, Peach, pie, pie crust, raspberry

Summer Salad of Peach and Fig

August 15, 2017 By Caroline Leave a Comment

Ahhh, peaches, your time has finally come! Niagara peaches in their prime are ideal for this gourmet salad. This recipe focuses on top notch ingredients from the sweetest, juiciest peaches, to beautiful fresh figs, blackberries and good quality balsamic vinegar, olive oil, salt and honey. Add some goat cheese, Prosciutto, pistachios and arugula, and you’ve got a showstopper that couldn’t be any simpler to make. Don’t worry about being precise with the measurements, adjust to suit your taste and you really can’t go wrong.

Close up of fuzzy Niagara peaches

I used a good quality Italian balsamic vinegar, Malden sea salt flakes and Savannah Bee Company’s Sourwood honey, but any good quality versions of these would be fantastic.

Fresh basil sprig, bottle of Aceto Balsamico Di Modena I.G.P., Malden sea salt and Savannah Bee Company raw Sourwood honey

To create this salad, start by tossing the arugula with some olive oil. Toss to combine, and lay it out on a plate. With my square plates I found using a diagonal line made for a pretty arrangement. Next, place your sliced peaches and figs on top. Add some blackberries in between. Then twist a few strands of Prosciutto and weave into the salad. Cut a few pieces of Prosciutto in half and twirl into roses and place around the salad to complete the design. Add soft goat cheese in dabs. Finally, sprinkle with balsamic, toss on some freshly roasted pistachios, drizzle honey all over and season with a pinch of sea salt flakes.

Sweeping arrangement of salad ingredients on a white square plate

The end result is almost too beautiful to eat! I promise, it tastes as good as it looks.

Salad ingredients all put together in a pretty arrangement showcasing the peaches, figs, blackberries, arugula, pistachios and honey drizzle.

Peach fig proscuitto salad closeup
Print

Summer Salad of Peach and Fig

A beautiful salad that elevates amazing summer produce into a show stopping and delicious dish.

Course Lunch, Salad
Prep Time 15 minutes
Servings 2

Ingredients

  • 2 cups Arugula
  • 1/2 tbsp Olive oil
  • 2 Peaches
  • 6 Black mission figs
  • 10 Blackberries
  • 6 slices Prosciutto
  • 2 oz soft goat cheese
  • Balsamic vinegar
  • Honey
  • Pistachios a handful, toasted
  • Malden sea salt

Instructions

  1. Toss Arugula with olive oil. Divide between 2 plates.

  2. Core and slice peaches into 6–8 pieces each. Slice figs in half vertically. Place peaches, figs and berries evenly over the arugula to create a balanced arrangement.

  3. Twist two slices of Prosciutto and weave into salad on one of the plates. Cut a third piece in half and twist each into a rosette and place onto the salad. Repeat on the second plate.

  4. Drop crumbled pieces of goat cheese evenly between the two plates. Drizzle with balsamic vinegar and honey. Add pistachios and a pinch of sea salt flakes. Serve immediately.


Filed Under: Recipe, Side Tagged With: Arugula, Fig, Goat Cheese, Gorgeous, Niagara Peach, Peach, Proscuitto, Salad

Primary Sidebar

Welcome to my kitchen journal, a place where I will share my favourite heritage recipes honed over the years, as well as document new evolutions and experiments along the way. Great feasts become vehicles for fond memories—the best meals are the ones someone made with love, for you. Follow me to explore traditions, document stories and experience the joy of the feast. Read More…

  • Facebook
  • Instagram
  • Pinterest
  • Twitter
  • YouTube

Don’t miss a story!

Get email updates

Copyright © 2023