• Skip to content
  • Skip to primary sidebar

Feast & Lore

Food stories featuring heritage recipes and new experiments.

  • Home
  • Recipes
  • About

Caroline

Bacon Cheddar Green Onion Scones

October 11, 2017 By Caroline 2 Comments

A savoury scone with melted cheese, bacon and green onions

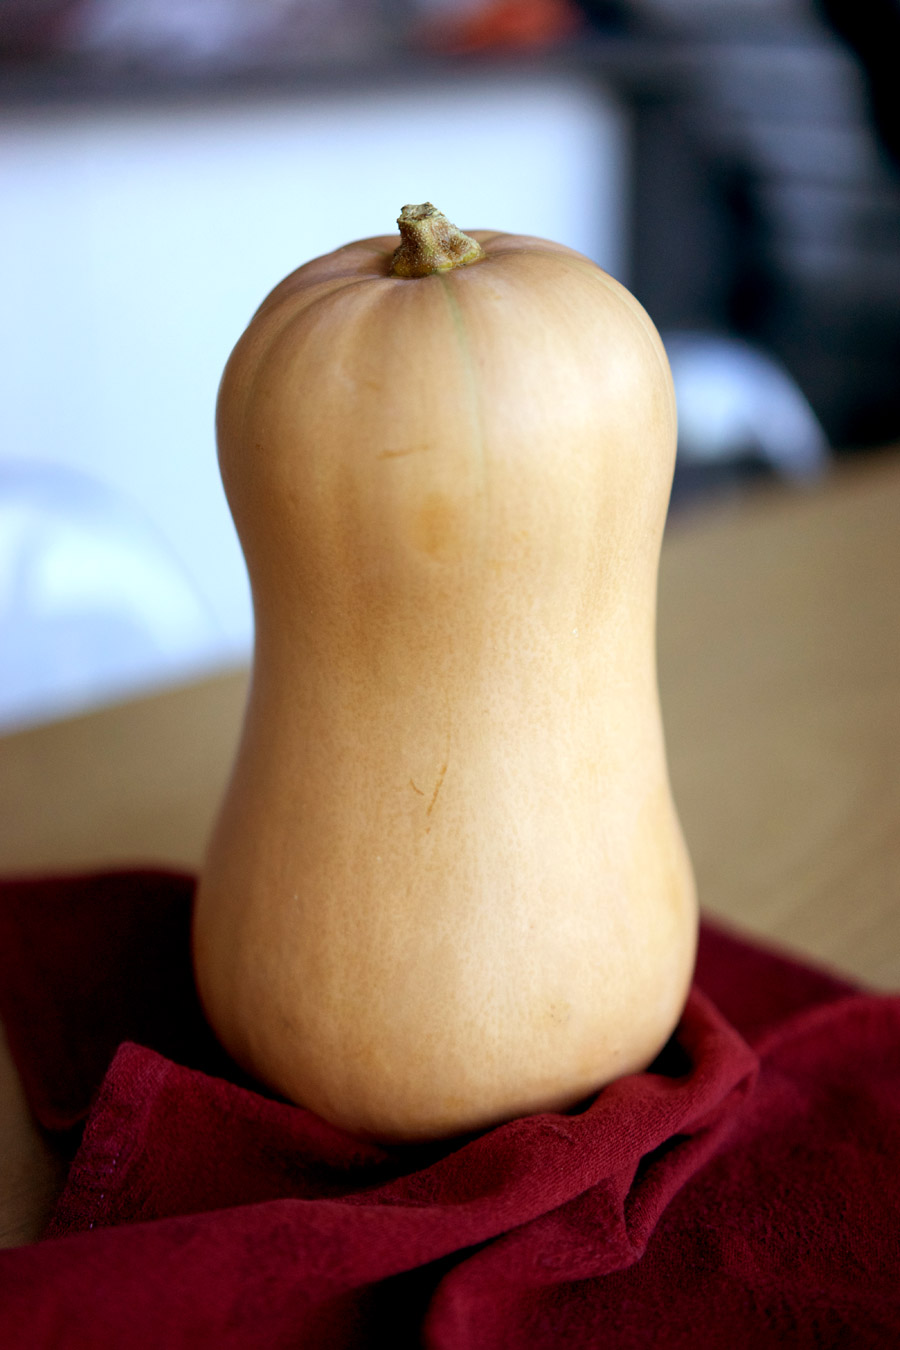
Savoury, crisp, buttery and melt-in-your-mouth—this is an excellent scone I love to serve with my fav butternut squash soup. These really hit the spot served warm with a little extra butter served on the side, because you can really never have too much butter! The green onions round out the bacon and cheddar and add something a little unexpected to these scones that really takes them over the top.

Based on Emeril’s Bacon Cheddar Cheese Scone recipe, I follow the original pretty closely except I typically use half-and-half cream rather than heavy (whipping) cream. I also prefer to cut in the butter first, as I find when trying to do this with the cheese and the onions at the same you aren’t able to blend the butter with the flour as well as I would like for optimal dough cohesion.

Cheddar and onions are cut into the dough

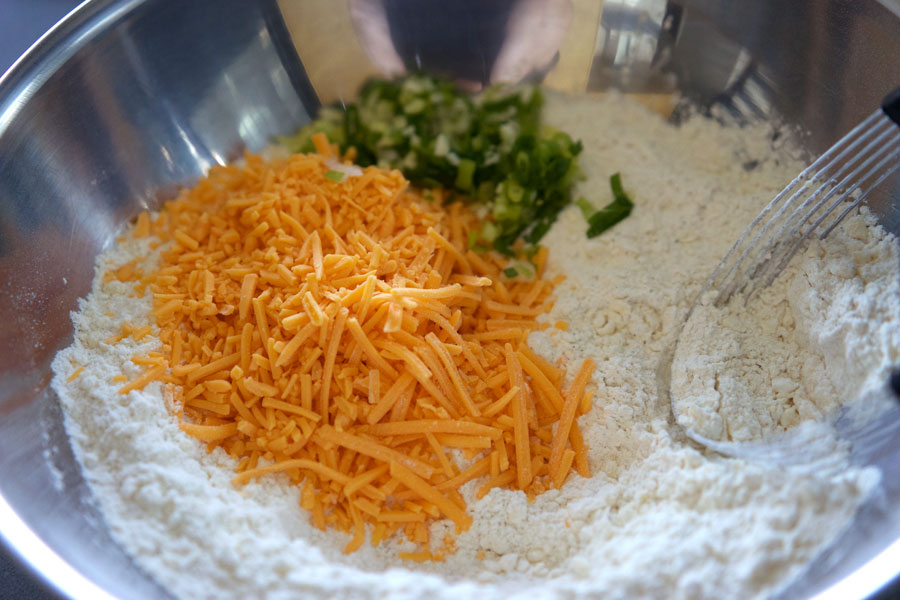
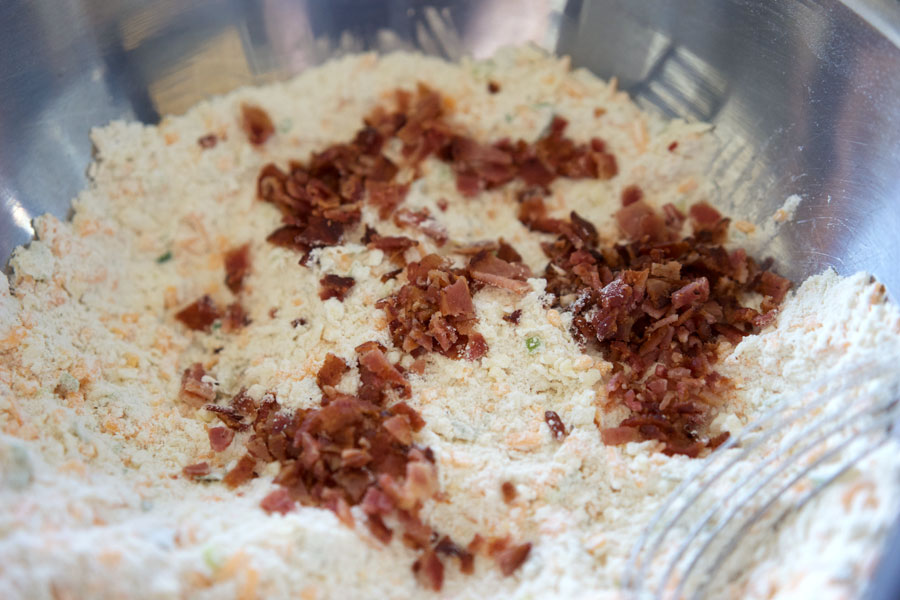
Above you can see the cheddar and green onions going in to the dry ingredients—you can see how the butter has already been cut in. Once the cheddar and green onions are well integrated, I add the bacon which will break up a bit more as you mix it in, which is just fine.

Closeup of bacon added to the dough

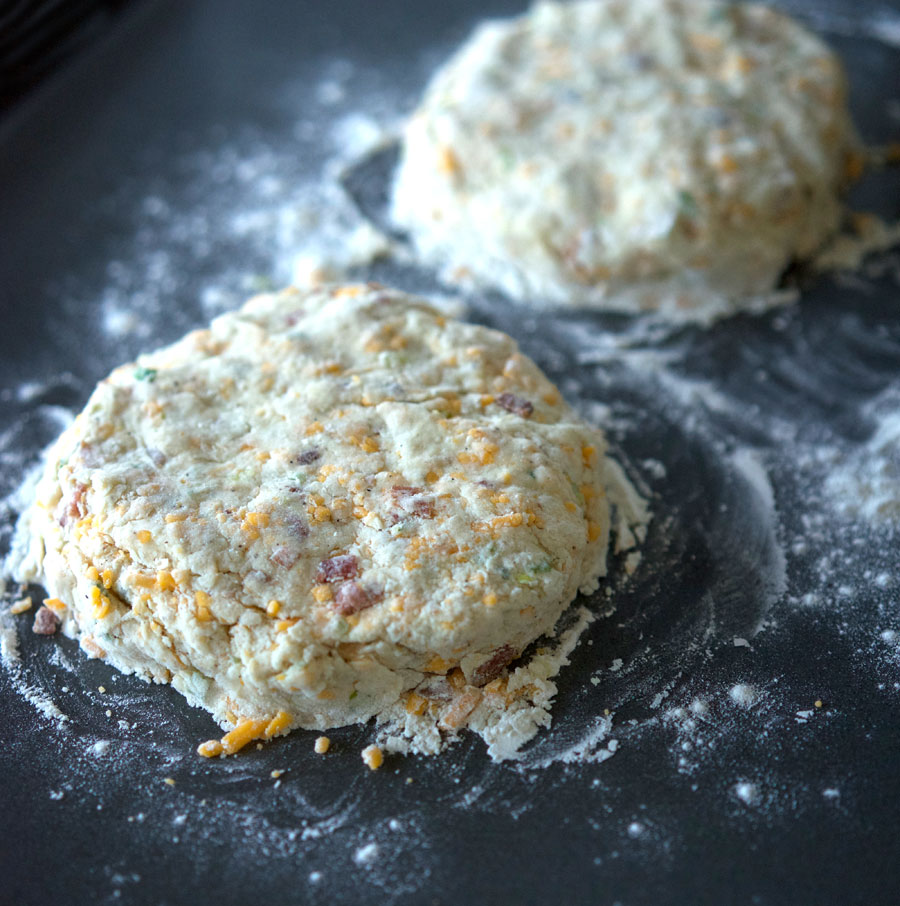
Once you’ve added the bacon, the cream is added and you can lightly work this into a dough. You need to knead the dough enough that you can’t see any more areas of flour and it’s just holding together. You don’t to overwork it. Then you divide the dough into two even halves. Either on a floured countertop, or directly on the prepared parchment, press each half into a flattened disc about 7″ wide. The disks need to be placed onto a parchment lined baking sheet.

Dough is flattened into 2 equal size disks

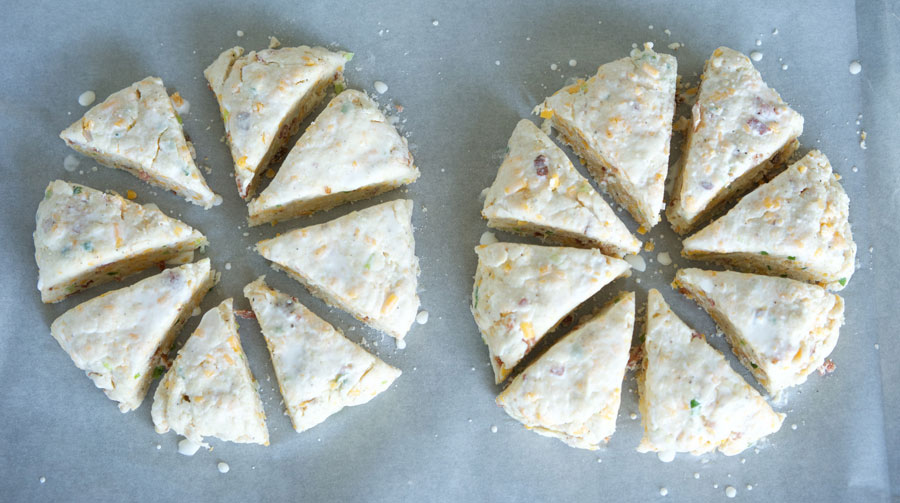
Cut each disc of dough into eight wedges, making 16 scones. Brush on some additional cream to create a lovely golden colour on the baked scones.

Each disk of dough is cut into 8 wedges and brushed with cream

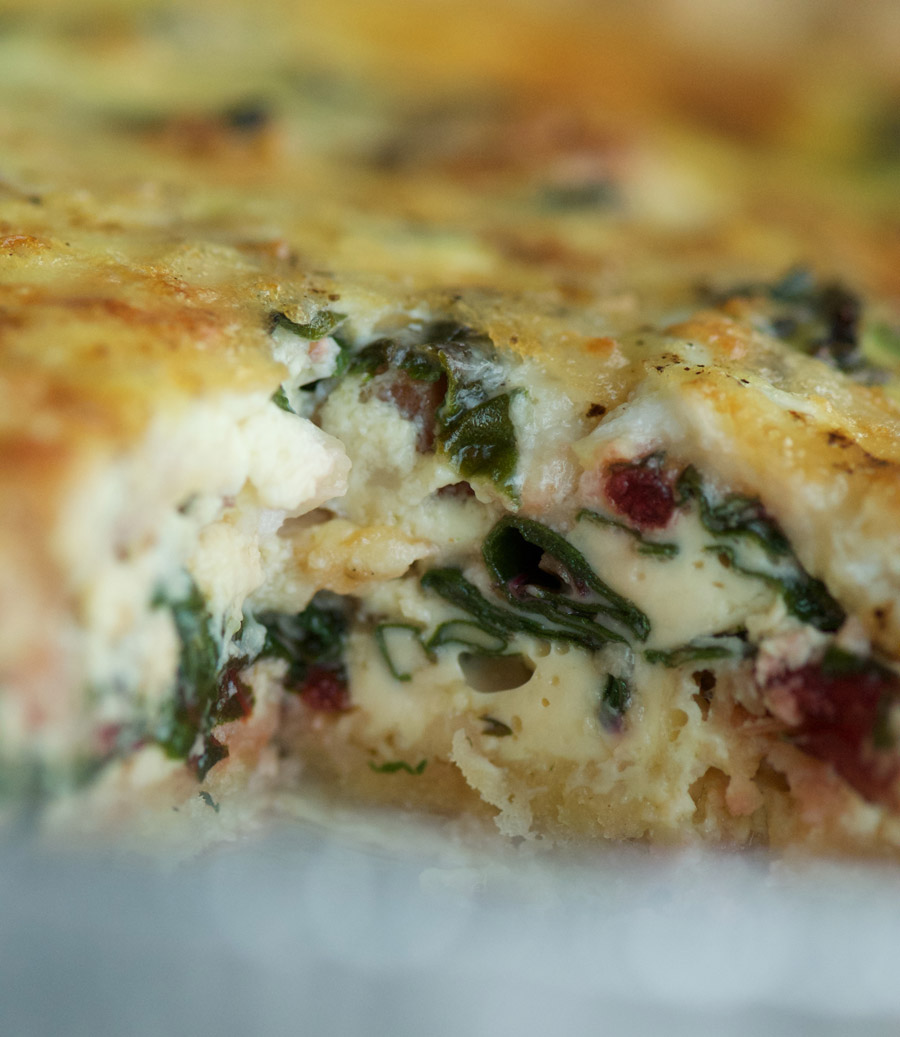
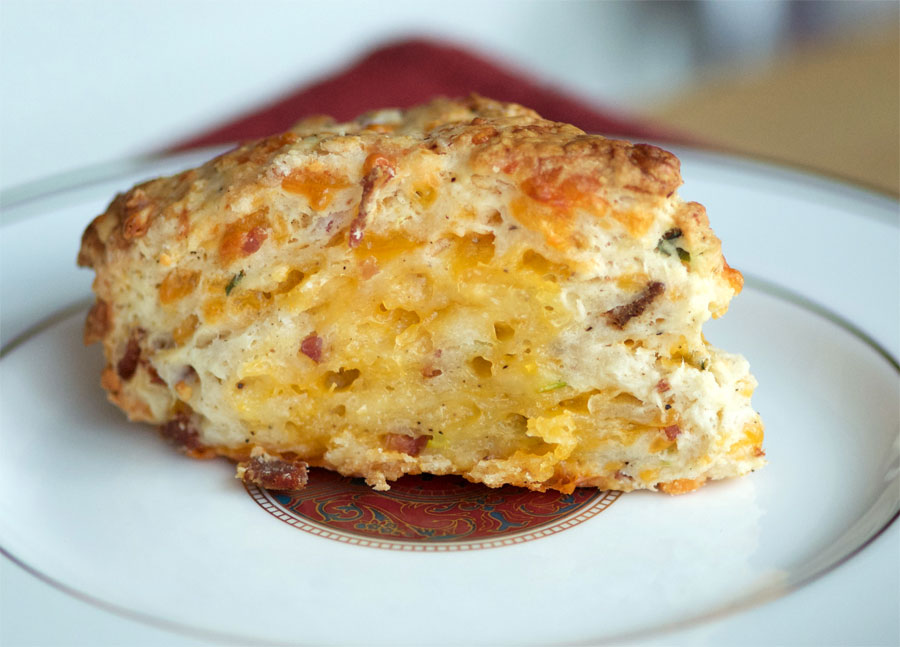
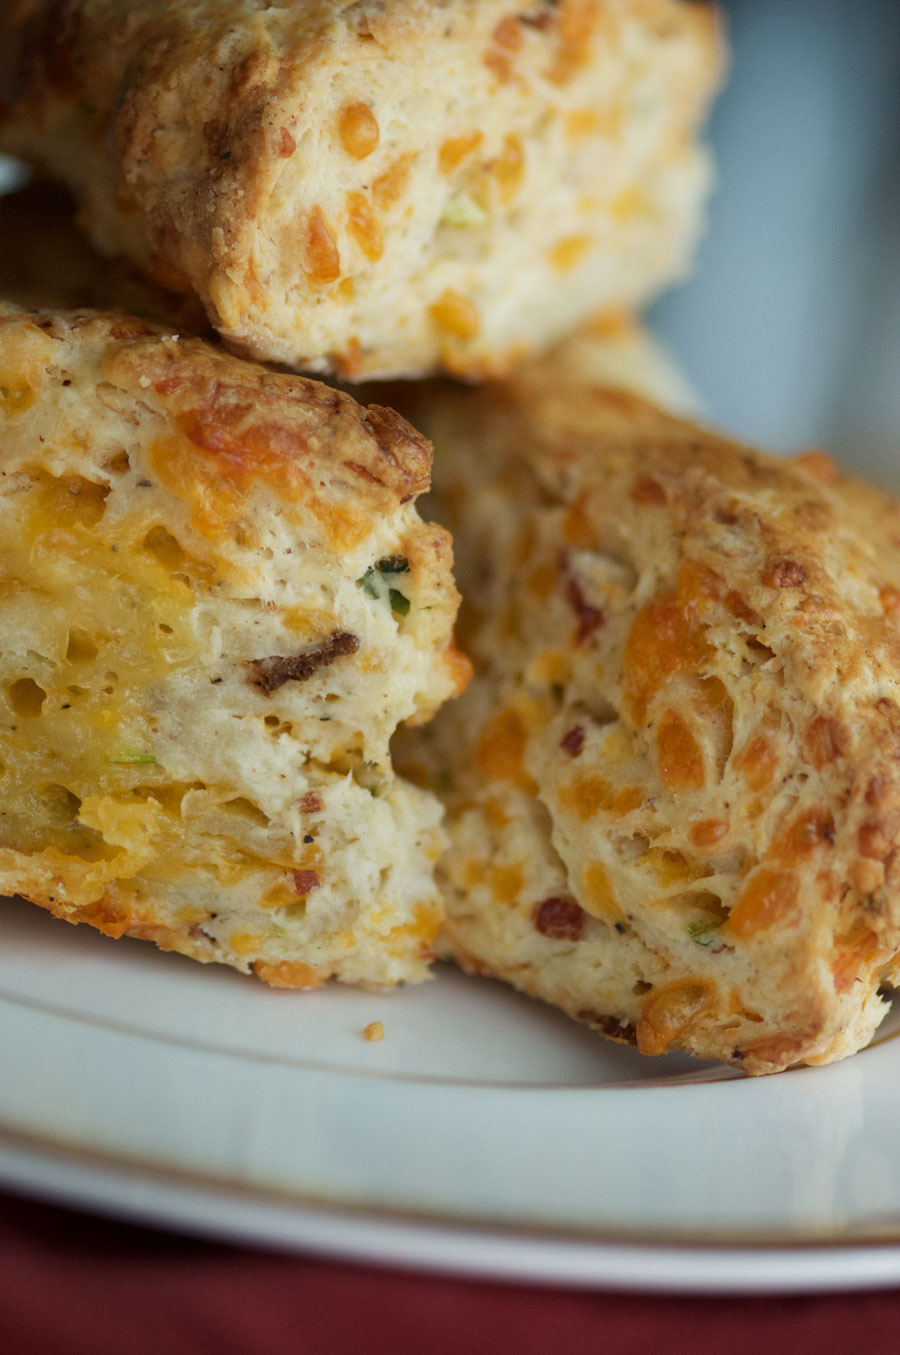
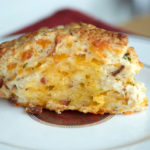
Warm out of the oven, the scones are crisp, buttery and flakey. At the same time they aren’t too heavy and I find the texture to be somewhat light for a scone. This recipe is a real keeper, I hope you’ll give it a try and let me know how it turned out!

Cheddar bacon scones, warm from the oven

A savoury scone with melted cheese, bacon and green onions
Print

Bacon Cheddar Green Onion Scones

Savoury, crisp, buttery and melt-in-your-mouth—an excellent scone I love to serve with my fav butternut squash soup.

Course Side Dish
Cuisine American
Prep Time 30 minutes
Cook Time 22 minutes
Total Time 52 minutes
Servings 16 scones

Ingredients

  • 4 slices bacon
  • 3 cups all-purpose flour
  • 1 tbsp baking powder
  • 1 tbsp sugar
  • 1 1/2 tsp salt
  • 1/2 tsp freshly ground black pepper
  • 1 stick unsalted butter, cut into pieces
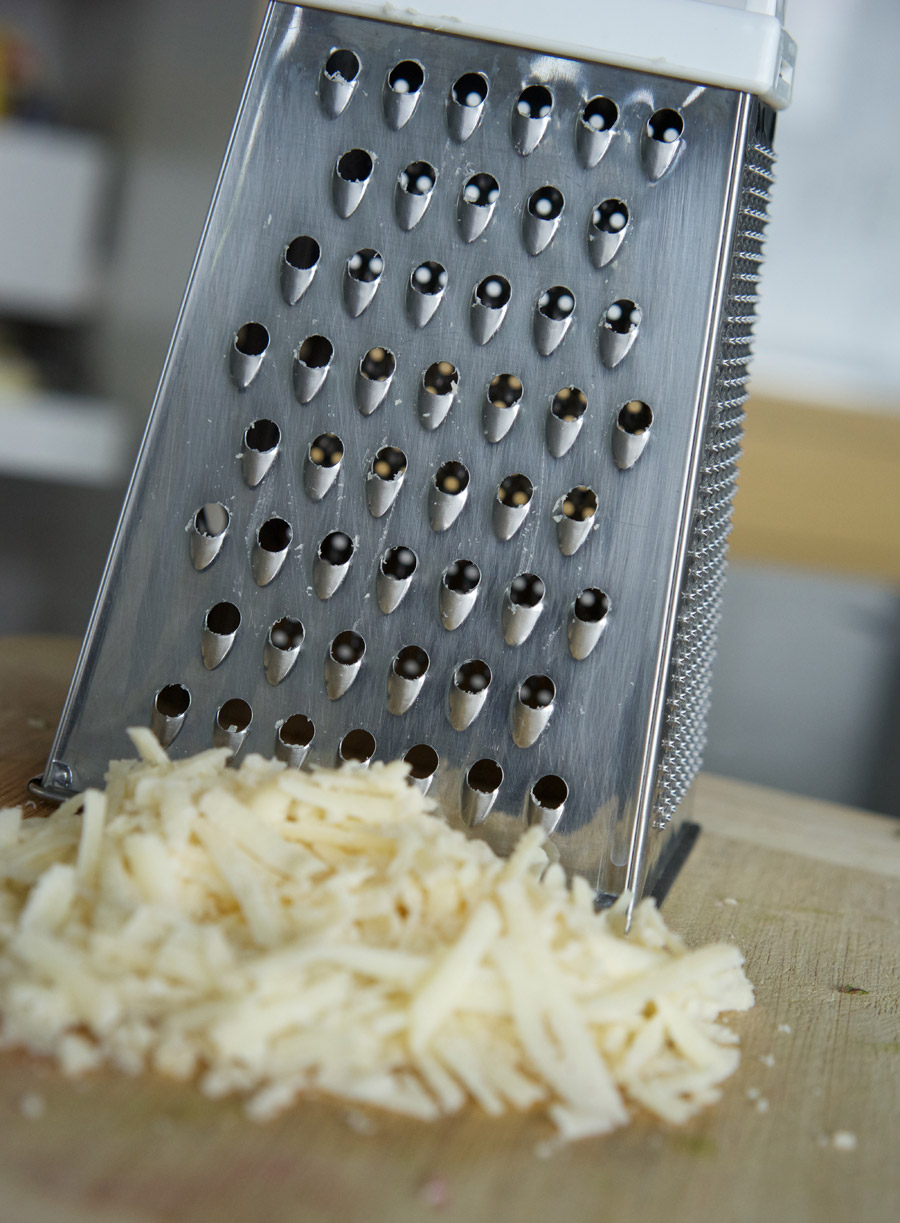
  • 6 oz sharp cheddar cheese, grated (about 1 1/2 cups)
  • 1/2 cup thinly sliced green onions
  • 1 cup half-and-half cream plus 2 tbsp

Instructions

  1. Prepare a large baking sheet with a sheet of parchment paper. Preheat oven to 400°.

  2. Cook bacon strips until they are crisp (I like to place bacon on a foil-lined baking sheet and bake at 400° for 15 minutes, flipping half-way through). Drain on paper towel dabbing off excess grease. Roughly chop and set aside.

  3. In a large bowl, combine flour, baking powder, sugar, salt and pepper. Cut in the butter with a pastry cutter or two knives until the texture consists of fine lumps. Add cheese and green onions, cutting the cheese into the flour mixture. Add bacon and combine. Add 1 cup of cream and work with your hands to mix into a sticky dough. Combine just until flour isn't visible and the dough holds together, don't overwork it.

  4. Split dough into 2 equal halves. Flatten each half into a circle on the parchment lined baking sheet, about 7" in diameter. Cut each circular disk into 8 wedges. Spread out the pieces to leave a 1/2" space between them. Brush the tops lightly with the remaining cream.

  5. Bake until golden brown, 20–22 minutes. Remove from the oven and serve warm.

Savoury scones with melted cheese and bacon
Savoury, crisp, buttery melt-in-your-mouth delicious!

Filed Under: Recipe, Side Tagged With: bacon, biscuit, bread, cheddar, green onion, scone

Butternut Ginger Soup with Parsnip Chips

October 3, 2017 By Caroline 5 Comments

Nothing says autumn like a crisp chill in the air, the distant smell of wood burning from someone’s chimney, and the warming comfort of a bowl of butternut squash soup. With its brilliant orange colour, warm gingery notes and earthy parsnip, this soup was made for fall. A simple recipe that comes together quickly, I make this often during the cooler months, in part by taking advantage of a time-saving tip: buying the squash pre-peeled and cut at the grocery store. Then again if you have the time, there is something really satisfying when you select a perfect, smooth and plump butternut squash like the one pictured below, and take the time to peel and and chop it yourself. This particular squash was so large, just the top half provided enough for this soup recipe. If you do cut your own, set the seeds aside and toast them with some salt at about 375° for 15–20 minutes until deep golden, they are such a tasty snack!

A beautiful, smooth and creamy coloured butternut squash on a deep red cloth

Once you’ve prepped all your veggies, start by gently cooking the leeks and garlic over low heat.

Leeks and garlic gently cooking in a red pot

Next add the ginger, turning up the heat to medium high and stirring that ginger around to draw out the flavour. Add the butternut and parsnip. Sauté in the pot until a slight brown crust develops on the bottom of the pan—these brown bits add a lovely depth of flavour to your soup when you add the chicken stock and scrape them up (for a vegetarian option you can go with vegetable broth instead).

saute butternut, ginger and parsnip until a golden crust forms at the bottom of the pot

Bring to a boil and simmer gently with the stock and some water for about 20 minutes (covered). When the squash and parsnip are soft, its ready to be puréed. I like to use an immersion blender as it saves the mess of having to transfer the hot soup into a blender (and avoids having to clean all those extra dishes!)

Chicken stock simmers with the vegetables

How gorgeous does that incredible orange soup look in that red enamelware pot?!

thick swirls of rich orange butternut squash soup in a red pot

Now you could stop here and serve the soup with some thin strips of Parmigiano-Reggiano cheese and enjoy. However, if you want to really turn this into a show-stopper, fry up some parsnip chips to use as garnish. I use a vegetable peeler to slice a parsnip into ultra thin strips, heat a small frying pan with oil and fry until golden and crisp. Toss with a bit of Malden Salt and they are divine earthy treasures that really lift the parsnip notes from the soup to elevate the dish.

Parsnip strips sizzle in vegetable oil

The colourful soup takes on a lovely modern style with the addition of the parsnip chips. The perfect bowl to celebrate the beginning of the harvest season!

The earthy sweetness of parsnip chips offset the gingery squash soup

Plated butternut soup with parsnip chip garnish on a deep red cloth


Earthy parsnip and warming ginger make this soup
Plated butternut soup with parsnip chip garnish on a deep red cloth
5 from 3 votes
Print

Butternut Ginger Soup with Parsnip Chips

A rich soup with the warming heat of ginger and a hint of earthy sweetness from parsnips. With no added cream, there is no guilt in treating yourself to this autumn favourite! The parsnip chips make for great presentation and add to the flavour, but If you don't have time, it is still a great dish without them.

Course Soup
Cuisine American
Prep Time 20 minutes
Cook Time 20 minutes
Total Time 40 minutes

Ingredients

  • 8 cups Butternut squash, cut into 1/2" pieces (2.5 lbs)
  • 2 tbsp Olive oil
  • 2 cups Medium leeks, white and green parts, cut into 1/4" pieces (approx 2 leeks, 7 oz)
  • 3 cloves Garlic, peeled and minced
  • 2 tsp Fresh ginger, finely grated
  • 1 cup Parsnips, peeled and cut into 1/4" pieces
  • 1 tsp salt
  • 1/2 tsp freshly ground pepper
  • 4 cups chicken stock
  • 2 cups water
  • 1 parsnip, sliced into thin strips using a vegetable peeler
  • 1 cup canola oil
  • 2 oz Parmigiano Reggiano cheese, thinly sliced

Instructions

  1. Cut and prep all of the ingredients. Heat olive oil in a large stockpot or dutch oven over medium-low heat. Add garlic and leeks and cook, covered, for about 5 minutes until the leeks have wilted and softened. Add ginger and cook for about 30 seconds, stirring well. 

  2. Increase heat to medium high and add squash, parsnip, salt and pepper. Cook, stirring frequently, until a golden crust forms on the bottom of the pot. This will help develop a rich flavour for your soup. Add the chicken stock and water, scraping up all the browned bits from the bottom of the pot.

  3. Bring stock to a boil, cover, reduce heat and simmer for 20 minutes. Test the squash and parsnips to ensure they are soft and cooked through. Once ready, blend the vegetables and stock into a puree using an immersion blender. Do a taste check to ensure the salt levels are good, and keep on low heat while you make the parsnip chips.

  4. In a small sauté pan, heat the canola oil on medium high. Test the oil to see if it's hot enough by placing a single piece of parsnip in the oil—if it sizzles you can add enough to loosely fill the pan as shown, two batches worked well for my 6" pan. Don't overfill or the oil temperature will get too low. Fry the chips until they are a nice golden brown, then transfer to a paper towel lined plate and sprinkle with salt to taste (Malden works nicely if you have it).

  5. Once all the chips are ready, serve the soup into bowls, add slices of Parmigiano Reggiano and top with a bundle of parsnip chips.

Filed Under: Recipe, Soup Tagged With: autumn, butternut, butternut squash, comfort food, fall, ginger, parsnip, soup, squash

Forbidden Mango Peanut Rice Salad

September 26, 2017 By Caroline 16 Comments

Have you tried Forbidden Rice? At one time in China it was reserved for royalty alone, which is how it got its name. It seems those emperors were onto something—black Forbidden Rice has more powerful antioxidants, fibre and protein than both red and brown rice. Not only is it good for you, it tastes great and looks striking, especially when set off by the gorgeous mango and orange in this recipe. Make it on a Sunday afternoon, pack and enjoy for heathy lunches during the week.

After cooking the rice, spread it out on a baking sheet to make it easier to evenly drizzle the dressing over. It also helps speed up the cooling process.

Black rice spread evenly onto rimmed baking sheet

The dressing is a simple mix of lime and orange juice with olive oil and some chilies, salt and pepper.

Citrus dressing in a bowl

Depending on the season, I like to change up some of the vegetables a bit. For hot summer weather like we’ve seen in Toronto the past few weeks, I like to go with cucumbers and cilantro. When it gets a bit cooler, I switch the cucumbers up for roasted beets, cutting up some of the beet greens to mix in as well. To roast the beets, wrap in foil and bake at 400° for about 1 hour, until a knife slides through easily, cutting off the outer skin after roasting.

Beets in foil

Also makes for a killer picnic salad to take along to the beach! This recipe was inspired by the Black Rice Salad with Mango and Peanuts via Epicurious.

Mango salads shot from above, on a beach blanket


Forbidden black rice not only looks striking, it's even better for you than brown rice!


4 from 5 votes
Print

Forbidden Mango Peanut Rice Salad

Lush mango and bright citrus top healthy and delcious "forbidden" black rice with cilantro and a few other crunchy vegetables. Topped with dry roasted peanuts and spicy peanut sauce, this is a great portable lunch feast great for a summer picnic or working lunch.

Course Lunch, Salad
Prep Time 15 minutes
Cook Time 25 minutes
Total Time 40 minutes
Servings 4

Ingredients

  • 2 oranges
  • 2 tbsp fresh orange juice, gathered from cut up oranges
  • 1/4 cup fresh lime juice
  • 2 tbsp vegetable oil
  • dried chile flakes to taste
  • 2 cups Forbidden black rice
  • 2 fresh mangos
  • 1 cup fresh cilantro leaves roughly chopped
  • 1–2 jalapenos, to taste seeded and sliced
  • 1 seedless cucumber sliced into 2" lengths, 1/4" wide
  • 2 tbsp chopped fresh chives
  • 2 red beets, roasted and chopped (optional)
  • 1/2 cup beet leaves, sliced (optional)
  • 1/2 cup salted, dry-roasted peanut
  • 1/3 cup Thai style peanut sauce

Instructions

  1. Bring rice and 2 3/4 cups water to a boil in a large saucepan. Season with salt to taste. Cover, reduce heat to low, and simmer for about 25 minutes, until liquid is absorbed and rice is tender. Remove from heat and let stand, covered, for 15 additional minutes. 

  2. Slice top and bottom from orange, cutting through the peel and pith to reveal the fruit. Working top to bottom, slice the peel and pith from the sides of the orange. Cube orange, discarding the centre pith and any seeds. Combine lime juice, orange juice, oil and dried chiles in a small bowl. Season with salt and pepper to taste. Whisk to blend. Reserve orange cubes. 

  3. Spread rice onto a rimmed baking sheet and drizzle the juice dressing over the rice, stirring to coat. Season with additional salt if required. Divide rice among four plastic lunch containers. 

  4. Top each container with cut up mangoes, cilantro leaves, jalapenos, cucumber and roasted beets and sliced beet leaves if using. Drizzle evenly with peanut sauce.

  5. Wrap peanuts in plastic wrap or wax paper. Pack separately and sprinkle onto salad immediately before eating, to ensure they remain crunchy.

Filed Under: Pleb Feasts, Recipe Tagged With: Black Rice, Cilantro, cucumber, Forbidden Rice, Mango, orange, peanut sauce, peanuts, pleb feast

Pancetta Parmigiano-Reggiano Quiche with Swiss Chard

September 18, 2017 By Caroline 2 Comments

I have to confess, I don’t understand the hype in Toronto when it comes to brunch. This means one has to get up, get ready, and travel to the brunch destination for the pleasure of waiting in line to pay quite a bit for dishes that are mostly made of inexpensive ingredients like eggs, toast and the like. I simply can’t be bothered when I can make amazing breakfasts at home, in my pyjamas, with a nice cup of coffee while I whip it up. Quiche: the quintessential brunch dish, can be quick and easy enough to make for a simple weekend breakfast at home. Then again, if you want to entertain, it’s special enough to dazzle your guests.

This version includes crisp Pancetta, freshly grated Parmigiano Reggiano cheese, and Swiss Chard to balance all that richness. Using a store-bought frozen pie crust speeds things up and since it’s just a single-crust pie, does the job rather nicely. The recipe makes a single 9″ quiche, but it easily doubles if you wanted to make enough for a crowd.

slice of quiche studded with pancetta and swiss chard

To start, you’ll want to prep your crust according the directions it came with. For mine, I let it defrost for about 15 minutes while heating up the oven. I pricked it all over with a fork before blind baking it for 13 minutes until it was a light golden. Then it can cool while you prepare all the other ingredients.

Nothing but freshly grated Parmigiano Reggiano cheese will do for this recipe, no substituting pre-grated, non-refrigerated stuff here! The real thing adds a deep, almost nutty flavour and amazing texture to the final quiche. I use the large holes on a box grater for the best result.

Parmigiano reggiano in front of a metal grater

Start the Pancetta in a large skillet, and fry until crisp. Then add the chopped Swiss Chard. You’l look at it and wonder how all this will ever fit into that pie crust, but don’t worry, it will reduce right down into a more management amount.

Swiss Chard fills a saute pan, steam rises

After 5–10 minutes, the Swiss Chard will wilt and the Pancetta will reemerge from the bottom of the pan. When it looks like the photo below, it’s ready! (Don’t overdo it, you want it well reduced but not completely dry).

Swiss chard shrinks as it cooks to reveal the pancetta

Meanwhile, whip up the eggs, milk, cream, nutmeg and Parmigiano Reggiano cheese in a bowl. I find between the cheese and the Pancetta, there is enough salt that no additional need be added. You can use some freshly ground pepper here, though.

Eggs, parmigiano reggiano, milk, cream and nutmeg in a bowl

Now you simply assemble everything into the crust. The chard and Pancetta go in first. Next, top it up with the egg filling. I save a bit of the cheese to sprinkle on top to enhance the top “crust”.

Swiss chard and pancetta line the bottom of the crust

Egg mixture with cheese fills the crust to the top

Bake at 375° for 25 minutes, and voilà… beautiful quiche. Your kitchen will smell amazing right about now.

Quiche shot from above on linens

I find cutting the quiche into quarters for serving works well. Add a small side salad and a glass of bubbly, and you are off to one spectacular breakfast. Look at that filling: fluffy, loaded with veg, cheese and salty pancetta. And there’s a pretty nice flake on that crust. Why get all ready to go out for brunch when you can make this so easily at home in your PJs?

Super close up of the baked quiche filling

Crisp Pancetta with Swiss Chard makes for a delicious quiche!
Quiche with rose bubbly and side salad
5 from 1 vote
Print

Pancetta Parmigiano-Reggiano Quiche with Swiss Chard

My favourite quiche with savoury cheese and bacon flavours.

Course Breakfast, Brunch
Cuisine French
Prep Time 15 minutes
Cook Time 40 minutes
Total Time 55 minutes
Servings 4

Ingredients

  • 1 9" frozen pie shell
  • 5 oz (140 g) Swiss chard, stems removed and chopped
  • 2.5 oz (75 g) Pancetta, cubed
  • 4 eggs
  • 1/3 cup milk (2%)
  • 1/3 cup half and half cream (10%)
  • 1/4 tsp ground nutmeg
  • freshly ground pepper to taste
  • 2 oz (55 g) Grated Parmigiano-Reggiano

Instructions

  1. Preheat oven to 400°. Remove pie shell from freezer and allow to rest at room temperature for 10–15 minutes. Prick pie shell all over with a fork, then bake for 12 minutes. Remove shell from oven and allow to cool.

  2. Reduce oven temperature to 375°. Cook Pancetta over medium high heat until crisp. Add chard and sauté until the leaves have wilted and reduced substantially, about 7–9 minutes. Insert into pie crust.

  3. In a medium bowl beat eggs; add milk, cream, nutmeg, pepper and most of the Parmigiano-Reggiano cheese (reserve a small handful to sprinkle on top of the quiche), stirring well to combine. Pour into prepared pie shell over top of the chard and Pancetta. Sprinkle with reserved cheese.

  4. Bake at 375° for 25 minutes or until just set in the centre. Insert a toothpick to check whether it is cooked through. Serve warm from the oven—tastes great with a side salad of peppery greens like Arugula in a light vinaigrette dressing.

Filed Under: Breakfast, Recipe Tagged With: breakfast, brunch, eggs, pancetta, Parmigiano-Reggiano, quiche, swiss chard

Roast Garlic Herb Marinated Chicken Thighs

September 13, 2017 By Caroline Leave a Comment

Refuse to let go of summer—you can keep your BBQ going well into the fall (and sometimes early winter)! This bright green herb sauce with roasted garlic makes a wonderful marinade for chicken thighs. Make the marinade and coat the chicken the day before, for an easy dinner the next day that can be pulled together in time it takes to heat the grill and cook the chicken. Throw a couple of peaches (or figs would be great too) during the final 5 minutes or so of grilling for nice contrast to the garlicky, herbacious chicken.


Bright green pesto in a white bowl on a bright pink background

To roast the garlic, take a full head, and slice off the tops to expose the cloves. The cloves are at different levels so I cut the tops from each row/level separately rather than a straight cut across the top, to maximize the garlic. Drizzle or spray with a touch of olive oil, wrap in foil, and roast at 375° for about one hour, until the cloves are soft when pierced with a knife. Allow to cool, and pop out the cloves with a butter knife into your food processor or mini-chopper.

Fresh from the oven, a head of roasted garlic in crinkly foil

Clean and prep your herbs, no need to chop them as you’ll be putting them into a food processor to blend with the roasted garlic. Parsley and mint work well to offset the garlic and give the sauce it’s amazing green colour.


Parsley packed into a 2-cup pyrex

Add the remaining marinade ingredients into the food processor and blend until the herbs are finely chopped and the texture is smooth.

Pesto getting made in a mini-chopper

Next, loosen the skin on the chicken thighs and rub the marinade under the skin, and then all over the outside the chicken, before placing into a bowl. Cover and chill in the fridge for at least one hour—if you can do this the night before, even better.

Chicken thighs marinating in pesto in a green bowl on bright pink backgorund

Finally, remove the chicken about 30–45 minutes before grilling to take the chill off the meat for more even cooking. Heat the grill to about 400°, and brush with olive oil (or spray carefully with non-stick spray). Note: with all the olive oil in the marinade, the flames can really jump up when you put the chicken on the grill, so allow excess marinade to drip off into the bowl before placing the meat on the grill. Start the chicken thighs skin side down, and grill until the skin is nice and crispy, then turn down the heat and flip the chick over to finish cooking at a lower heat.

Grilled pesto chicken with peaches piled onto a plate

Plate with your peaches or figs, and serve!


Grilled pesto chicken with peaches piled onto a plate
Print

Roast Garlic Herb Marinated Chicken Thighs

Tender grilled chicken with an herbacious-garlic kick and crispy skin. The marinade can be made in advance to make this a quick weeknight dinner you can get on the table in 30 minutes.

Course Main Course
Cuisine American
Prep Time 1 hour
Cook Time 30 minutes
Total Time 1 hour 30 minutes
Servings 4

Ingredients

Marinade

  • 1 head roasted garlic cut top off garlic head, roast at 375°, wrapped in foil, for 1 hour until tender
  • 2 cups packed parsley
  • 3/4 cup packed mint leaves
  • 3/4 cup olive oil
  • 1 tbsp fresh lemon juice
  • 1 tsp crushed red pepper flakes
  • 1/2 tsp salt

Chicken Thighs

  • 8 chicken thighs with bones and skin
  • salt
  • freshly ground pepper
  • 4 peaches, split into halves, pits removed
  • olive oil

Instructions

  1. Squeeze cooled garlic cloves out of the head into a small chopper or food processor. Add remaining ingredients. Blend until herbs are finely chopped and a sauce forms. 

  2. Loosen skin from chicken thighs, and spoon herb sauce under the skin. Rub more sauce all over the outside of the thigh, and transfer to a bowl. Repeat with remaining meat. Cover and transfer to a fridge for a minimum of one hour, or overnight.

  3. Remove chicken from fridge and allow to rest at room temperature for 30 minutes. Heat a BBQ to 400°. Spritz grill with olive oil or cooking spray, then carefully add meat, skin side down, to the hot grill (all that olive oil can create big flames, so shake off excess oil/sauce before placing on the grill). Grill for approximately 10 minutes until the skin is well crisped and dark in colour.

  4. Reduce heat to 300° and flip chicken pieces skin-side up, positioning them in indirect heat (turn a zone in the BBQ way down or off, placing chicken into that zone). Cook over lower heat for another 20 minutes or so, until the meat is cooked through. (Temperature should be 165°—I press down on the chicken with my tongs to get a sense of the firmness to see how cooked they are. Firmer meat means more cooked).

  5. During the last seven or so minutes, mist the peach halves with olive oil and place on the grill, starting skin side up. Get some nice grill lines, then filp and finish cooking the peaches until juices are flowing and the fruit has softened.

  6. Serve the chicken and peaches together on a platter. 

Filed Under: Main, Recipe Tagged With: chicken, chicken thighs, Garlic, Grill, herbs, marinade, marinate, parsley, Peach, pesto, sauce, summer

  • « Previous Page
  • Page 1
  • …
  • Page 3
  • Page 4
  • Page 5
  • Page 6
  • Page 7
  • Page 8
  • Next Page »

Primary Sidebar

Welcome to my kitchen journal, a place where I will share my favourite heritage recipes honed over the years, as well as document new evolutions and experiments along the way. Great feasts become vehicles for fond memories—the best meals are the ones someone made with love, for you. Follow me to explore traditions, document stories and experience the joy of the feast. Read More…

  • Facebook
  • Instagram
  • Pinterest
  • Twitter
  • YouTube

Don’t miss a story!

Get email updates

Copyright © 2025