• Skip to content
  • Skip to primary sidebar

Feast & Lore

Food stories featuring heritage recipes and new experiments.

  • Home
  • Recipes
  • About

Recipe

Lunch-Prep Acorn Squash Farro Salad

November 20, 2017 By Caroline 2 Comments

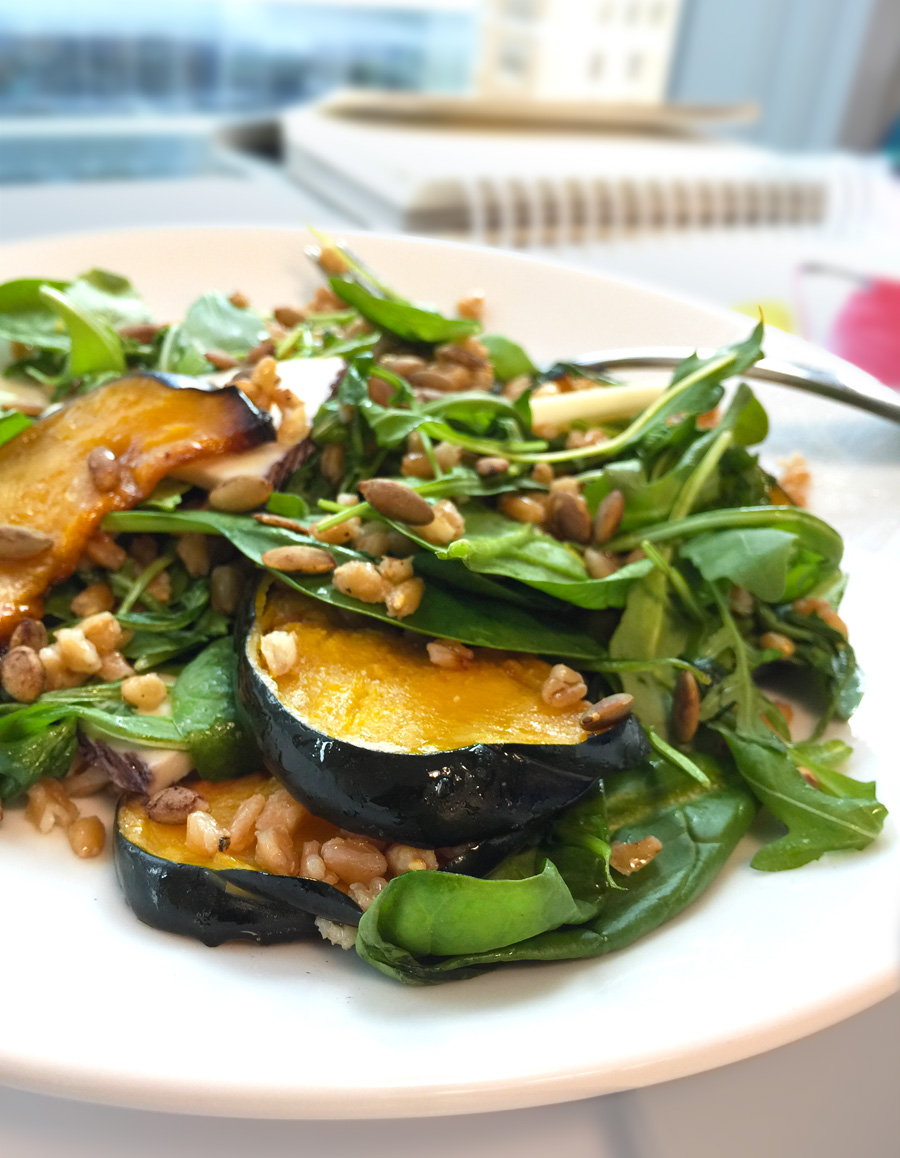
Most salads just don’t cut it for me when it comes to lunch. I still feel hungry and typically find myself rewarding my “healthy lunch” with cookies to fill the void in the afternoon, offsetting any healthy gains I thought I was making. Not to mention, leaky salad dressing making a mess of my containers (or worse, my backpack!) is not fun. Read on to learn how to meal prep this salad with all the flavour but none of the leaking. With hearty acorn squash, farro, pumpkin seeds and a few slices of aged goat cheese, this salad is satisfying and delicious. Oh, and pretty good for you, too!

Peppery arugula, sweet squash, faro and a cider dressing make a satisfying lunch you can take to work

The recipe does involve a few steps and isn’t the quickest to make, but the final product is so delicious and a great way to fuel your body for a healthy week. If you’re short on time, you could cut out the pumpkin seeds, but I absolutely LOVE them and find them totally worth the couple of extra steps. To begin, toss raw pumpkin seeds with lemon juice, salt and a bit of cayenne pepper. (I know, lemon juice seems weird when you want to roast the seeds and make them crunchy, right? But trust me it provides a lovely zing and makes them irresistible for snacking.)

Season raw pumpkin seeds and add lemon juice before roasting

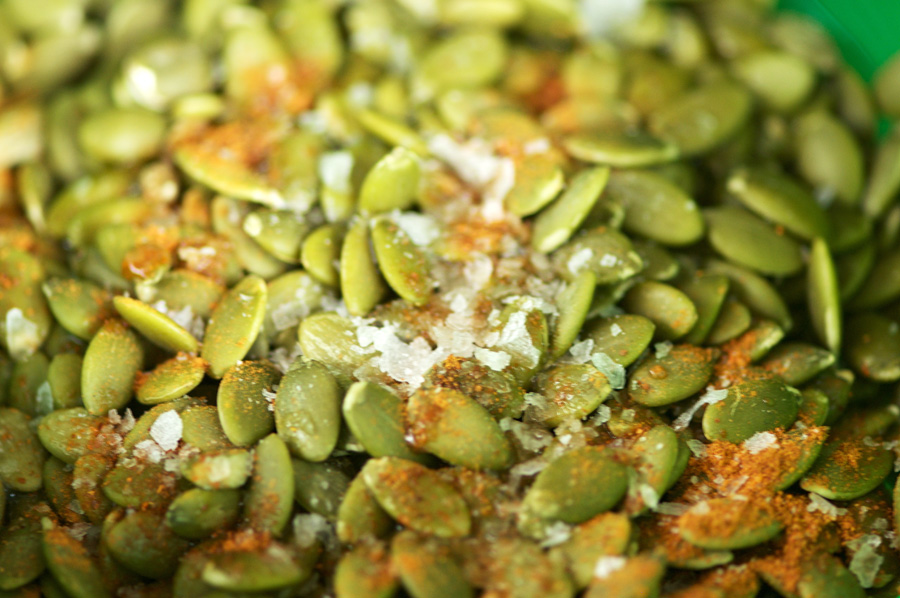
Roast in the oven and the raw green seeds transform into golden brown, crispy snacks. Good thing there’s extra so you can munch on these while you make the rest of the salad 🙂

Raw pumpkin seeds are transformed into crunchy goodness

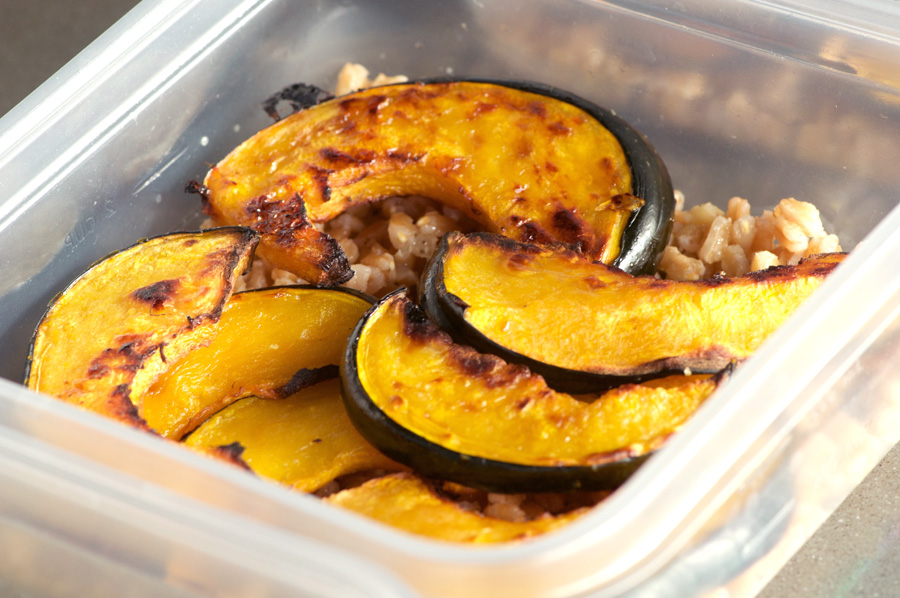
Next, prepare two baking sheets with parchment paper (or just use a light coating of olive oil on a baking sheet if you don’t have parchment—mainly I find the parchment helps speed up the cleanup afterwards). Place slices of acorn squash on top (with a light coating of olive oil, salt and pepper). Roast until golden and tender when pierced with a knife.

Roasted acorn squash slices fresh from the oven

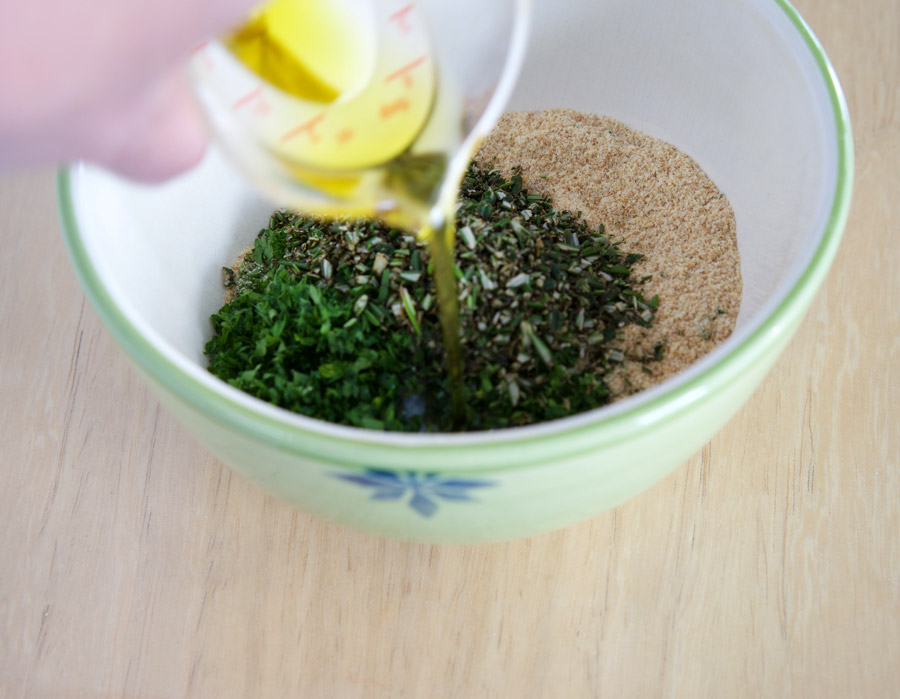
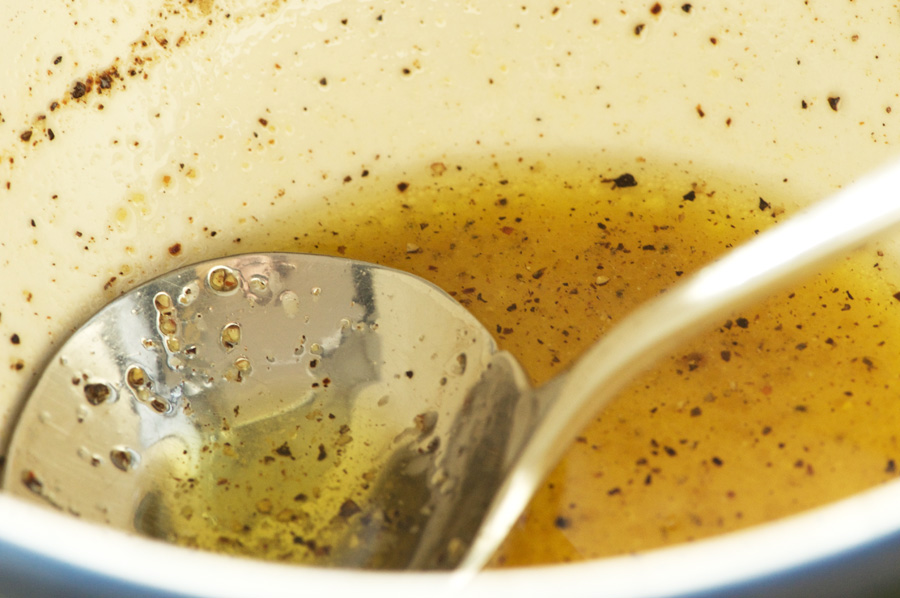
Then, whip up the dressing. Apple cider, cider vinegar, Dijon mustard, olive oil, and seasoning blend together to create a tart dressing for the farro to offset the sweetness of the squash.

Cider Dijon Dressing is tossed with cooked faro, nice and tart to offset the sweet squash

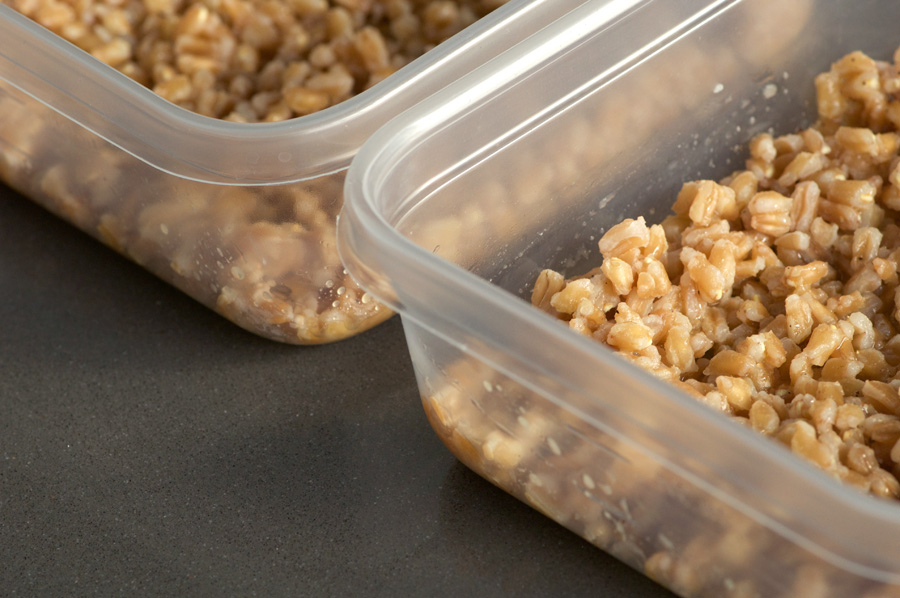
While the squash is in the oven, cook the farro. Farro is a really healthy grain that’s great to add to your regular diet. It’s higher in fibre than many other whole grains—twice the amount found in quinoa, and three times the fibre of rice. Cook according to the package directions. I cook mine like pasta, using more water than needed and draining once cooked, which usually takes about 30 minutes. You’ll want to let it cool a bit before dividing it among four lunch containers, spreading it out to cover the bottoms. Then, spoon the dressing overtop and stir it into the grains. This is the secret to avoid leaking—the farro absorbs much of the dressing and also keeps it from making the arugula layer soggy.

Divide faro between four lunch containers

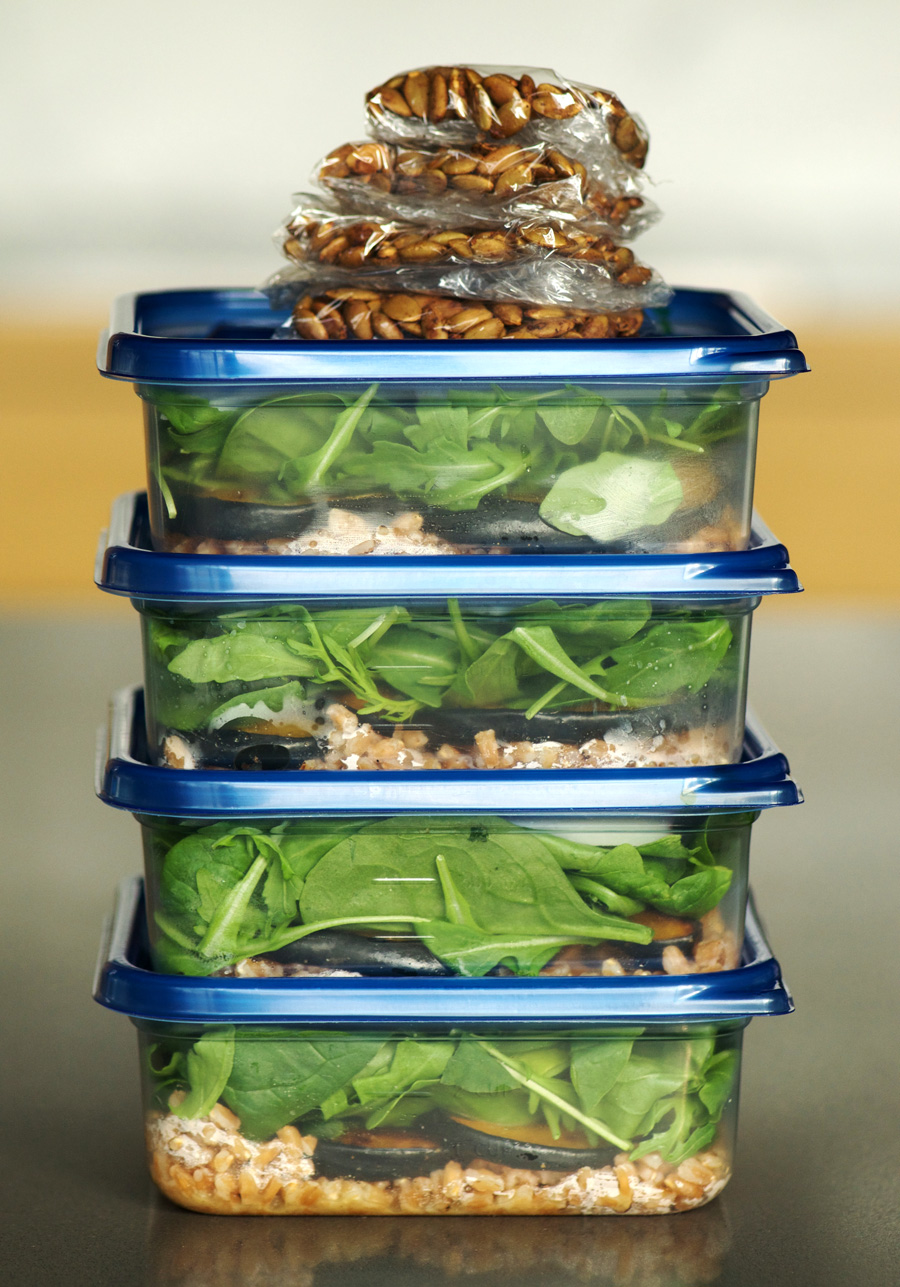
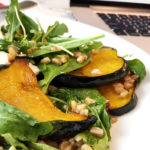
Next, layer the roasted squash. Finally, top with arugula and cheese slices.

Squash is layered onto faro, to be topped with arugula and goat cheese

To avoid the pumpkin seeds losing their crunch , I wrap them into four little plastic wrap bundles separately, and then add them onto the salad right before eating. If you are able to get a plate at your office, I like to remove the lid from the container, place the plate upside down onto the container and flip it, so that the lettuce is on the bottom of the plate and the grains are on top, and then stir it all together. You want to stir the layers just before eating to ensure the flavours of the dressing and farro interact with the arugula and squash. If you want to eat this right out of the container I suggest using one that’s a bit larger so you have room to stir everything up.

Don’t forget to sprinkle with the pumpkin seeds before eating like I do half the time! If you forget, no worries, they make a great snack on their own. Invest some time in yourself this week and stock your fridge with containers of Acorn Squash Farro Salad for lunches!

Lunch Prep Faro Squash Arugula Salad

Make-ahead salad with farro, squash and arugula wins lunch!
5 from 1 vote
Print

Lunch Prep Acorn Squash Farro Salad

A satisfying salad that won't leave you hungry, with instructions on how to prep this for lunches you can bring to work without any leaking or sogginess!

Course Lunch
Prep Time 15 minutes
Cook Time 1 hour
Total Time 1 hour 15 minutes
Servings 4

Ingredients

  • 1 cup raw pumpkin seeds
  • 1 tbsp fresh lemon juice
  • 1/4 tsp cayenne pepper
  • sea salt
  • 1 acorn squash, seeded and cut into 1/3" slices
  • 1 tbsp olive oil
  • 1 cup cooked farro, cooled
  • 6 oz arugula leaves, or arugula baby spinach mix
  • 6 oz aged goat cheese, sliced
  • 1/4 cup fresh apple cider
  • 2 tbsp cider vinegar
  • 1 tsp Dijon mustard
  • 1/2 tsp salt
  • freshly ground pepper
  • 1/4 cup olive oil

Instructions

  1. Preheat oven to 300°. Toss seeds with lemon juice, cayenne and sea salt to taste. Spread on a parchment lined baking sheet and bake for 12 minutes. Flip/stir the pumpkin seeds and bake another 10 minutes, until golden and crisp. Remove from oven and cool.

  2. Increase oven temperature to 400°. Line two baking sheets with parchment paper, and add acorn squash slices. Spray with a light coating of olive oil (if you don't have olive oil spray, toss with approx 1 tbsp olive oil) and season to taste with salt and pepper. Roast for 40 minutes, flipping halfway through, until golden at the edges and soft when pierced with a knife. Remove from oven and allow to cool.

  3. Cook Farro according to package directions, and allow to cool.

  4. Make dressing: combine apple cider, cider vinegar, Dijon, salt and pepper. Whisk in olive oil until blended. 

  5. Once the farro is cool enough, divide it among four lunch containers spreading the grains to fill the bottom. Spoon the dressing over the farro and stir to combine. Add acorn squash in a layer on top, dividing between the four containers. Finally top with arugula and goat cheese slices. Seal and store in the fridge up to four days.

  6. Wrap four bundles of roasted pumpkin seeds in plastic wrap to take with the packaged lunch containers. To serve, either stir up in the container and top with pumpkin seeds right before eating, or invert onto a plate, stir, toss pumpkin seeds on top and enjoy!

Acorn Farro Salad with Pumpkin Seeds

Note: recipe adapted from Roasted Acorn and Delicata Squash Salad on Epicurious.

Filed Under: Pleb Feasts, Recipe Tagged With: Acorn Squash, Arugula, Farro, lunch, Lunch Prep, Meal Prep, Pumpkin, Pumpkin Seeds, Salad

Meal-Prep Parmesan Turkey Meatballs

November 13, 2017 By Caroline 5 Comments

It’s a cold, dark November evening, you’ve come home after a long day at work, and your hunger is quickly turning you hangry. With some simple advance meal prep techniques, you could be coming home to spaghetti noodles, deep red tomato sauce and juicy, homemade meatballs less than 30 minutes from the time you walked in the door. Read on to find out how and get the full recipe.

Parmesan turkey meatballs ooze into bubbling tomato sauce

Meatballs offer a great intro to the world of advance meal prep. Spend about an hour in the kitchen one weekend afternoon, and you can make enough meatballs to keep your freezer stocked for six weeks or more. Making your own meatballs means you know exactly what went into them—allowing you to avoid unwanted sugar, salt, and fat that are most often found in store-bought varieties. These meatballs also provide an easy way add turkey into your regular meal rotation as an alternate to beef, chicken and pork.

Fresh ground turkey

This meatball recipe originated from Martha Stewart, here. In the Martha recipe, spaghetti squash replaces the pasta which can be a nice healthy option to add more vegetables, but roasting the squash does require closer to an hour. I also find it’s hard to avoid a liquid watery-ness on the plate with the squash noodles, so for my version, I’ve stuck with regular spaghetti pasta instead.

Breadcrumbs, garlic, parsley and Parmesan cheese are blended with the ground turkey to build texture and enhance the flavour. Egg and milk help the mixture hold together. While the Martha recipe advises to mix the liquid ingredients into the breadcrumb mix before adding to the turkey, I find it important to mix all the dry ingredients into the turkey before adding the eggs and milk, otherwise it can make the breadcrumbs soggy and the whole texture of the cooked meatballs goes from meaty and firm to mushy and blah. I like to season the mix with coarse salt and A LOT of freshly ground pepper, too.

Garlic, Parsley, Breadcrumbs and Parmesan flavour the meatballs

Once you’ve combined everything together into a consistent mixture, you’re ready to go into meal-prep assembly line mode! Figure out how many meatballs you want to cook up at a time. I go with seven meatballs per pack—which for us works out to enough for two dinners and leftovers for one lunch. Depending on the size of your family and how much you want for leftovers the next day, select the right number for you (or if you need a lot more than will fit onto a piece of plastic wrap, plan to grab two packs per meal and space them out accordingly). Next, spread out sheets of plastic wrap directly onto your counter. I usually put out 7–8 sheets, with each sheet approximately 16 – 18″ long. Now, start shaping your meatballs. Each one should be a ball about 1.5″ in width. Place each meatball directly onto a prepared sheet of plastic wrap, in a line, with a space of about 3/4″ between each ball.

Assembly line of turkey meatballs ready to be wrapped and frozen as meal prep

Once you’ve shaped all your meatballs, it’s time to wrap them up. Grab the long end of the plastic wrap and fold it over the meatballs, pressing down to stick it onto the other side the sheet so that the meatballs are covered. Starting at one end, gently hold a meatball with the plastic around it and push it towards the nearest meatball, allowing the excess plastic to bunch up between them so the actual meatballs don’t touch and are separated by plastic. Continue bunching and pressing the meatballs together until they are bunched closely together and form a log. Grab a second piece of plastic wrap and use it to wrap the bundle together, folding the ends in first and then rolling for a firm, secure plastic wrap sleeve.

Meatballs getting wrapped for the freezer as part of meal prep

Once all your logs/sleeves of meatballs are ready, you can pop them into the freezer. Pause to admire your handiwork—each bundle represents a evening where you can come home to a nice, easy meal that’s homemade and good for you, too 🙂

Meatballs are wrapped into logs ready for the freezer

To cook up a batch, grab a jar of your favourite spaghetti sauce and heat it to a gentle simmer. Grab a sleeve of meatballs from the freezer and throw into the microwave to defrost on very low power for about 30 seconds, just enough so that you can pull them apart. Unwrap them and drop the frozen meatballs straight into the bubbling sauce. Cover and simmer on medium-low for 25 – 30 minutes, until the meatballs are cooked through. (Stir the meatballs a few times while cooking and watch that the sauce bubbles don’t get too explosive, as tomato sauce likes to blow the lid!) Most recipes tell you to brown the meatballs before cooking in the sauce, but I honestly prefer the way they cook without that step. I find the meatballs are more tender and I love how the Parmesan starts to ooze into the tomato sauce as they simmer.

Cooking meatballs in bubbling tomato sauce

While the meatballs are cooking, boil up a large pot of salted water for the spaghetti noodles. At the 20 minute mark from when you dropped the meatballs into the sauce, add pasta to your boiling water and cook for 10 minutes or until al dente. Drain the noodles, plate, and top with meatballs and sauce. Top with a little (or a lot!) of additional grated Parmesan and a good dose of freshly ground pepper. Homemade comfort, yours in 30 minutes—enjoy!

Parmesan Turkey Meatballs piled high onto spaghetti noodles with tomato sauce

Parmesan Turkey Meatballs cut open on a bed of spaghetti noodles and tomato sauce

Meal Prep Parmesan Turkey Meatballs
Parmesan Turkey Meatballs piled high onto spaghetti noodles with tomato sauce
5 from 1 vote
Print

Meal-prep Parmesan Turkey Meatballs

Whip up a batch of these savoury, healthy meatballs on the weekend and enjoy comforting homemade dinners for weeks to come!

Course Main Course
Cuisine Italian
Prep Time 1 hour
Cook Time 30 minutes
Total Time 1 hour 30 minutes
Servings 45 meatballs

Ingredients

  • 950 g ground turkey (approx 2 lb)
  • 1 1/2 tsp coarse salt
  • lots freshly ground pepper
  • 1 cup breadcrumbs
  • 1 cup grated Parmesan cheese
  • 1/2 cup fresh parsley, chopped
  • 3 cloves fresh garlic, finely chopped
  • 2 eggs
  • 1/2 cup milk

Instructions

  1. Lay out plastic wrap sheets onto a table or counter, approximately 7 sheets, each about 18" long. 

  2. In a large bowl, add the ground turkey. Add salt, pepper, breadcrumbs, Parmesan, parsley and garlic; combine with a fork until loosely combined. Add milk and eggs and lightly incorporate with a fork. Using your hands, mix until it is fully combined and comes together into even consistency. 

  3. Shape into 1.5" balls, placing onto the prepared plastic sheet. Decide how many meatballs you want to cook up at one time and place that number of meatballs onto each sheet, spacing about 3/4" apart.

  4. Gathering plastic between each meatball, scrunch them together so there is no more empty space between them, shaping into a log. Wrap another sheet of plastic around each packet to form a sleeve to be placed into the freezer. Continue until all the meatballs are completed, and place everything into the freezer.

  5. When you are ready to cook some, remove a sleeve from the freezer and defrost slightly in the microwave if needed to be able to pull them apart (but they should still be frozen solid). Add a jar of spaghetti sauce to a pot and bring to a gentle simmer. Drop the frozen meatballs into the sauce and cook over medium low heat for 25 – 30 minutes, until cooked through. (Stirring a few times while they cook)

  6. Meanwhile, boil a large pot of salted water over high heat. When the meatballs have 10 minutes left to cook, add the spaghetti noodles and cook 10 minutes, until al dente. Drain pasta, plate and top with meatballs and sauce. Top with additional freshly ground pepper and Parmesan if desired. 

Filed Under: Main, Recipe Tagged With: freezer friendly, Italian, meal planning, meatballs, parmesan, pasta, spaghetti, Turkey

Barrel Aged Manhattan

November 5, 2017 By Caroline 6 Comments

Fragrances of bourbon, oak and vanilla waft up to your nose. The drink glows amber, with a delicate dewy sheen from the chill of ice from the cocktail shaker. A sip reveals rich oak and smokey flavours, faint sweetness and a soft burn, but it’s so smooth you can’t believe you’re drinking Bourbon. Small-batch barrel aging is the game changer for this cocktail, and once you’ve had one you’ll never go back to a regular Manhattan again. Get started now and you can warm up those cold January nights at home with a special glass of your very own creation.


Manhattan with cherries in cocktail glass

While it is possible to find small barrels in specialty stores, I find they are easy to buy online, and much cheaper, too. I purchased one from Mexico and it arrived in less than a week to my door in Toronto. A quick trip to my local LCBO and I had everything I needed to make up a new batch.

The makings of a great Manhattan

A new barrel takes a bit of prep, you want to shake out any excess chips that might be inside, then fill it up with water and position over a towel or baking sheet, to test for water-tightness. Sometimes a new barrel needs a bit of water to swell the wood to make it perfectly water-tight, though I’ve never had a new one leak. Once you’ve tested and are sure there are no leaks, you can empty the water (a good time to test the Spigot as well). Your barrel will likely come with directions on how to prepare it for use, so follow your manufacturers’ directions.

Another item you’ll need is a funnel, as the top hole is not very large and would be quite hard to pour into without spilling. Insert a funnel into the top hole, and pour in the Bourbon, Vermouth and bitters. Plug the top and that’s about it—now you just have to wait about 6–8 weeks, giving the barrel a 1/4 turn every week or so. I like to test the batch at around six weeks and depending on the flavour, I’ll either continue aging, or bottle the mix and start up a new batch. A new barrel gives off the most flavour, so as you continue using it, you’ll find you need to keep the mix in the barrel for longer to achieve the same depth of flavour, until it is too weak. Then it’s time to get a new barrel (I find they easily last a couple of years).

There is something special about barrel aging your own cocktail. It’s fun to take notes each time you fill a new barrel, making subtle changes each time, until you perfect the drink exactly to your liking. For me, the Manhattan isn’t complete until it’s topped with bourbon soaked cherries (a world apart from Maraschino!) Your own personally crafted and aged Manhattans are a wonderful treat to share with friends, too.

Top view of a barrel aged Manhattan drink

Elegant Barrel Aged Manhattan in gold rimmed cocktail glass with bourbon soaked cherries
3 from 1 vote
Print

Barrel Aged Manhattan

The smoothest, oaky-with-hints-of-vanilla-and-butterscotch Manhattan you can possibly imagine. There are great sources to buy your own barrels online, this recipe uses a 2 litre barrel.

Course Drinks
Cuisine American
Prep Time 10 minutes

Ingredients

  • 750 ml Bourbon (1 bottle) Four Roses brand
  • 375 ml Vermouth (1/2 bottle) Dolin brand
  • 12 ml Angostura bitters
  • 1 jar bourbon soaked cherries
  • 1 2 litre oak barrel

Instructions

  1. If using a new barrel, prepare it according to the manufacturer's direction. Generally you need to soak it in water for a few hours to ensure a good seal. Drain the water and the barrel is ready for action!

  2. Ensure barrel spout is closed. Place funnel into top hole of barrel. Add the Bourbon, Vermouth and bitters. Place the cork into the top of the barrel to seal. Allow 6–8 weeks for aging, giving the barrel a 1/4 turn each week. 

  3. Test a Manhattan: remove the cork from the top to allow the liquid to flow; get a cocktail shaker ready and fill straight from the barrel. Add ice, shake, and pour into cocktail glass. Test sample for depth of flavour and aroma. If desired, continue to age to bring out more oak flavour. If you are happy with the taste, pour into bottles. The barrel can now be used to make another batch—perhaps next time you'd like to adjust the bitters to suit your taste, or switch up the brands of Bourbon or Vermouth.

  4. Bourbon soaked cherries add the perfect finishing touch when you serve up a glass. Enjoy!

Filed Under: Drink, Recipe Tagged With: Barrel Aged, Barrel Aged Manhattan, Cocktail, Manhattan, Manhattan drink

Mustard-herb crusted rack of lamb

October 24, 2017 By Caroline 4 Comments

Rack of lamb can be intimidating—an expensive cut of meat that many enjoy at a restaurant but would never think to make at home. In fact, this is one elegant dish that does not require a lot of prep time, nor is it complex. So go out and buy a rack of lamb, grab a bottle of your favourite red wine, prepare some candles and get ready to enjoy an elegant, fancy dinner for two in less than an hour of active cooking time.

Elegant rack of lamb on a plate

The ingredients are quite simple: Dijon mustard, herbs, breadcrumbs, baby potatoes and olive oil. To keep this recipe quick and easy, I recommend having your butcher prepare the meat for you, trimming away to the chine bone and cleaning the rib bones. However if that isn’t possible, or you want to do this yourself, there is a great how-to video over at Martha Stewart here. We always have fun selecting which red to pair with lamb—we love a good Châteauneuf-du-Pape which tends to be fruity, luscious and a bit spicy.

Rack of lamb ingredients: herbs, mustard, lamb

The breadcrumb mixture is quick to put together, and it really compliments the lamb flavours to make this roast extra-special.

olive oil is mixed into chopped herbs and breadcrumbs

It’s important to get a good sear on the fat, to ensure it’s nice and crispy and not overly fatty once you roast it. Use tongs to turn the meat to sear it on all sides.

Rendering fat from the rack of lamb

I take the pan drippings and spoon them over the potatoes giving them great flavour. The potatoes roast together with the lamb so the roast even comes with its own built-in side dish!

spoon pan juices over baby potatoes


Next you add the lamb to the dish, coat it with mustard and then the breadcrumbs. Insert a thermometer if you have one (my oven comes with one that plugs into the oven, the timer beeps when the preset temperature is reached which is super handy). The ideal temperature to remove the rack from the oven is 130°F for medium rare—it will climb another 5 or so degrees while it rests.


Use mustard to help breadcrumbs adhere to the lamb

Golden and glorious, the rack emerges from the oven. Resist the temptation to cut into it right away and cover it with foil to rest for 10 minutes.

golden breadcrumbs enrobe the rack of lamb fresh from the oven

So elegant when plated, rack of lamb is a special treat that you don’t have to save for going out—you can make it at home and it’s easier than you would ever think!

Rack of lamb looks elegant on the plate

mustard crusted rack of lamb />
An elegant plate with rack of lamb with a breadcrumb herb crust
5 from 2 votes
Print

Mustard-herb crusted rack of lamb

An elegant dish that looks like a lot of work but is actually pleasantly simple to make for a special weekend dinner.

Course Main Course
Cuisine American
Prep Time 20 minutes
Cook Time 25 minutes
Total Time 45 minutes
Servings 2

Ingredients

For Herb Crust

  • 3/4 cup breadcrumbs
  • 1 tbsp fresh rosemary, finely chopped
  • 1/2 tbsp fresh parsley, finely chopped
  • 1/2 tsp kosher salt
  • 1/4 tsp freshly ground black pepper
  • 1 tbsp olive oil

For Lamb

  • 1 rack of lamb, frenched
  • 1 tbsp Dijon mustard
  • salt & pepper to taste
  • 1 tbsp olive oil
  • 2 cups baby potatoes

Instructions

  1. Remove the rack of lamb from the fridge about 1 hour before cooking, to allow the meat to come to room temperature. (This allows for more even roasting). Trim excess fat from the lamb so that an even, thin layer of fat is remaining. Season with salt and pepper to taste. 

  2. Preheat oven to 400°. Prepare a baking dish or roast pan just large enough to hold the rack of lamb. Add potatoes to the dish, pilling them to one of the long sides of the pan, and set aside. 

  3. In a small bowl combine all of the Herb Crust ingredients. Set aside.

  4. Heat olive oil over high heat in a large sauté pan. Add lamb rack, fatty side down, and brown until fat is rendered in the pan, and the fat on the lamb is golden and crisp. Use tongs to position the rack to evenly brown all sides of the meat. All together the browning should take about 5 minutes.

  5. Transfer lamb to a plate. Spoon pan drippings into prepared baking dish over the potatoes; stir to coat. Add salt to taste over the potatoes. Position the rack of lamb into the dish fatty side up, with the meaty part of the rack touching the bottom of the dish, and the bone tips arching over the potatoes. Spread Dijon mustard over the fatty side of the rack, and also the sides where the meat is exposed. Pat the reserved breadcrumb mixture onto the mustard to form a crust. Insert an oven thermometer if you have one. 

  6. Add the lamb to the oven and roast until the meat is medium rare (130°). This should take approximately 20–25 minutes. Remove roast from oven, place onto a cutting board and tent loosely with foil. Allow to rest for 10 minutes before cutting into chops and serving with the potatoes.

Filed Under: Main, Recipe Tagged With: dijon, herbs, lamb, mustard, rack, rack of lamb, roast

Test-Kitchen: Martha Stewart Apple-Cider Doughnut Bundt Cake

October 17, 2017 By Caroline 5 Comments

Martha Stewart came out with a new book last May, called A New Way to Bake. Touted as “the next-generation home-baking bible,” the book claims to offer healthy alternatives to your favourite baked goods with ingredients including whole-grain flours, quinoa, chia and coconut oil. The bundt cake on the cover caught my eye so I decided to give it a try.

Cross-section of the sliced cake shows a nice crumb

This recipe takes advantage of fresh apple cider, whole wheat flour, olive oil and unsweetened applesauce.

A slide of Martha's Apple Cider Donut Cake

I found the final result was a cake with a lovely texture, moist but not too dense. It sort of reminded me of a cake doughnut/coffee cake hybrid.

For me, the one fail was the natural cane sugar coating on the outside of the cake. It just wouldn’t stick to the cake, the texture of the sugar is too coarse so I could not achieve the lovely look of Martha’s cover cake. I finally gave up and simply sifted some icing sugar with cinnamon on top instead.

Cake on pretty glass stand with soft blue background

Overall this is a solid cake recipe that tastes great. You feel a bit less guilty eating it because of the whole wheat flour and other healthy substitutions. It still has quite a bit of sugar, so I’m not sure you could exactly call it healthy, but replacing some refined sugar with the applesauce and apple cider seem like healthier substitutes. I found it was nice to take to the office for a mid-afternoon snack the next day, too. Get the recipe here.


Filed Under: Dessert, Recipe Tagged With: apple, Apple Cider Bundt Cake, cake, cider, Doughnut, Healthy, Martha Stewart, Test, test kitchen, Whole wheat

  • « Previous Page
  • Page 1
  • Page 2
  • Page 3
  • Page 4
  • Page 5
  • Page 6
  • …
  • Page 8
  • Next Page »

Primary Sidebar

Welcome to my kitchen journal, a place where I will share my favourite heritage recipes honed over the years, as well as document new evolutions and experiments along the way. Great feasts become vehicles for fond memories—the best meals are the ones someone made with love, for you. Follow me to explore traditions, document stories and experience the joy of the feast. Read More…

  • Facebook
  • Instagram
  • Pinterest
  • Twitter
  • YouTube

Don’t miss a story!

Get email updates

Copyright © 2023